Edition 06/10 User Manual 11
BP-PR PLUS Series
2-1 Connecting Printer via Serial RS-232 Interface
2-1-1 Connecting Printer
The RS-232 interface is operated via an RS-232 cable.
1. Connect computer and printer with a suitable cable.
2. Secure cable connections with the screws found at the plugs.
3. Configure the RS-232 interface of the printer to match the settings of the
connected computer (see 4-1-4 Interfaces on page 21).
If problems occur, contact the computer manufacturer for interface assignments and note
the pin assignment of the SUB-D jack described in 2-1-2 RS-232 Interface Connection
Jack Pin Assignment on page 11.
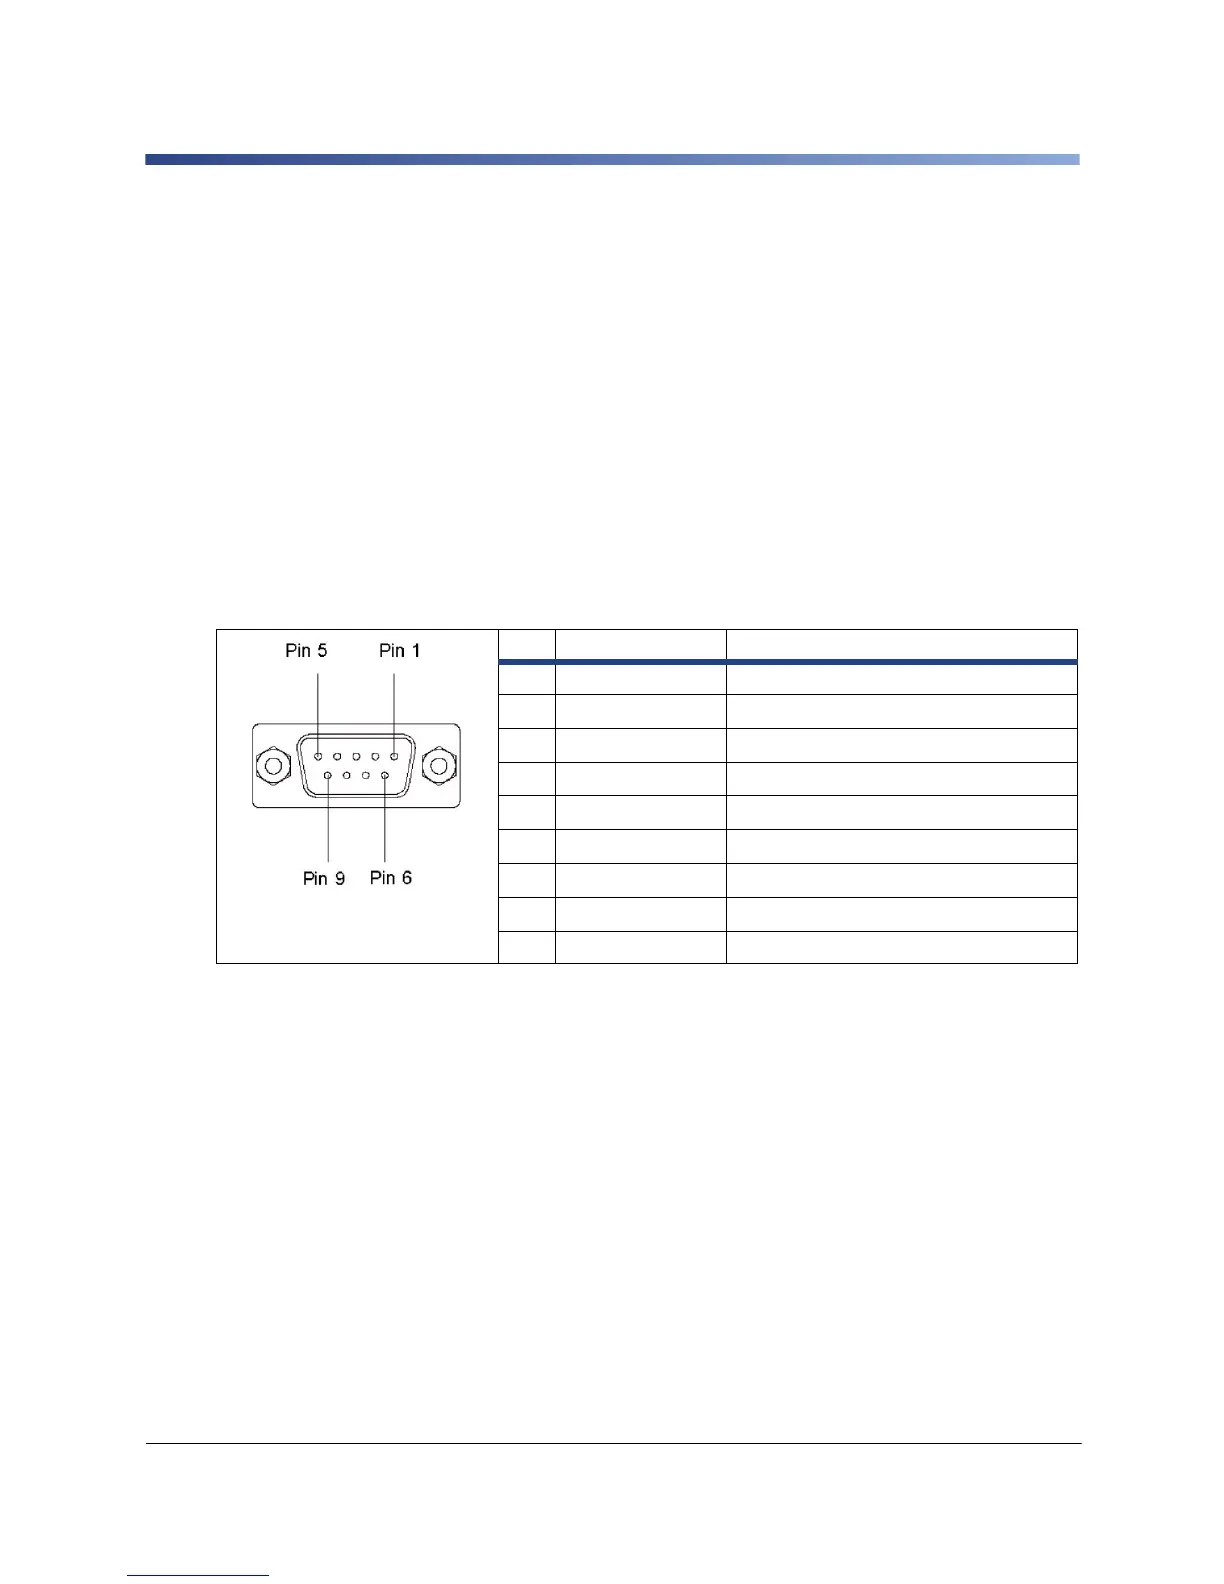
2-1-2 RS-232 Interface Connection Jack Pin Assignment
On the back of the printer there is a 9-pin SUB-D jack for the serial RS-232 interface.
Figure 5. Pin assignment of the
9-pin SUB-D jack
Pin Designation Function
1 CD Carrier Detect
2 TxD Transmit Data
3 RxD Receive Data
4 DTR Data Terminal Ready (not connected)
5 GND Ground
6 DSR Data Set Ready (not connected)
7 RTS Request To Send
8 CTS Clear To Send
9 RI Ring Indication (not connected)
 Loading...