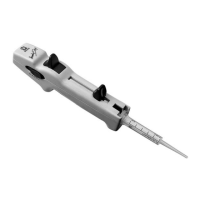
– Insert the cleaned or new suction
system:
– Slide the suction system on
the valve and insert it into the
support.
– Insert the plastic ridge into the
two grooves of the side rails .
– Press the adapter into the back
part of the instrument.
– Gereinigtes bzw. neues Saugsystem
einsetzen:
– Saugsystem auf das Ventil
schieben und in die Halterung
einsetzen.
– Kunststoffleiste in die beiden
Vertiefungen der Seitenschienen
einlegen.
– Adapter in das untere Geräteteil
eindrücken.
- 23 -
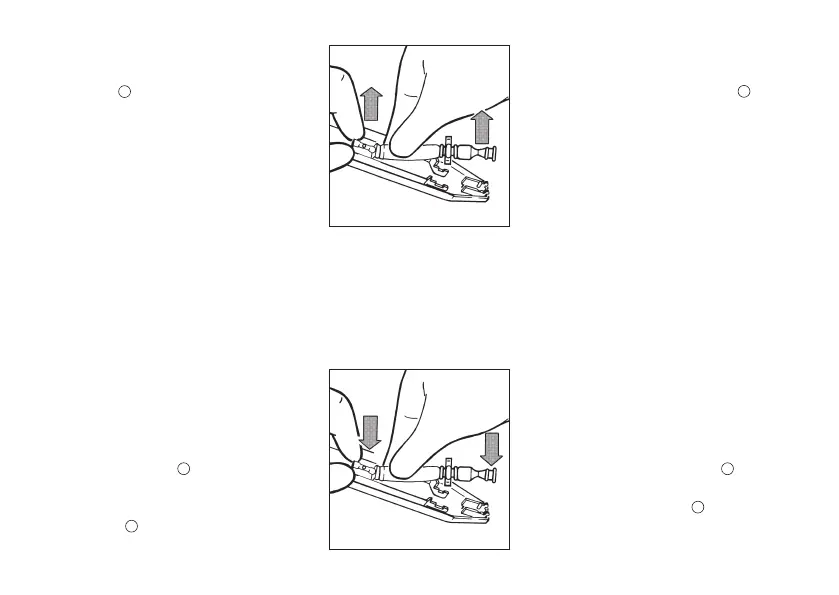
– Saugsystem mit Ventil aus der
Halterung herausnehmen.
– Saugbalg vom Ventil abziehen.
– Ist das Saugsystem verschmutzt:
Saugsystem in ein Reinigungs- oder
Desinfektionsbad geben und ggf.
autoklavieren (121 °C). Die Wirk-
samkeit des Autoklavieren ist vom
Anwender jeweils selbst zu prüfen.
– Bleibt das Saugsystem verschmutzt
oder ist es beschädigt: altes Saug-
system entsorgen und durch ein
neues ersetzen.
Gerät zusammenbauen
( „Einzelteile“, Seite 21)
– Remove the suction system with
the valve from the support.
– Pull off the suction bellows from
the valve .
– If the suction system is just dirty:
Put it into a cleansing or disinfecting
bath and, if necessary, autoclave it
(121 °C). It is the user's responsibili-
ty to ensure effective autoclaving.
– If the suction system remains dirty,
or if it is damaged: dispose and
replace it by a new one.
Reassembling the instrument
( “Components”, page 21)
8b
8c
8b
8c
8a
8a