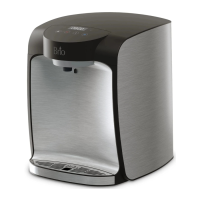
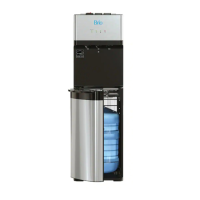
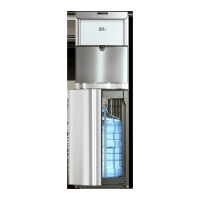
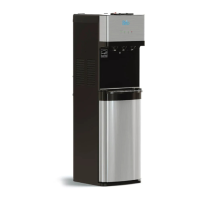
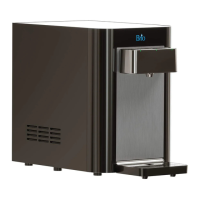
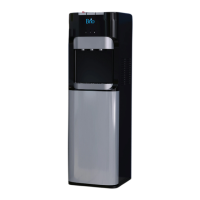
This document outlines the setup, operation, and maintenance of the Brio Modema Countertop Water Dispenser, Model No.: CLCTPOU820UVF2. It is designed for household and similar applications, including staff kitchen areas, offices, farmhouses, hotels, motels, bed-and-breakfasts, and catering environments. The dispenser is not intended for use by persons with reduced physical, sensory, or mental capabilities, or lack of experience and knowledge, unless supervised.
Before assembling, installing, or operating the dispenser, it is crucial to read the entire guide to reduce the risk of injury and property damage. The dispenser dispenses water at very high temperatures, so basic safety precautions must always be exercised. Proper assembly and installation are required prior to use. The unit is for indoor use only and should be kept in a dry place away from direct sunlight, installed on a hard and level surface. It should not be placed in an enclosed space or cabinet, and ventilation openings must always be kept clear. The dispenser must not be operated in the presence of explosive fumes, nor should explosive substances like aerosol cans with flammable propellants be stored in it. It must be used with a properly grounded outlet to avoid electrical hazards. To prevent electric shock, the cord, plug, or any part of the dispenser should not be immersed in water or other liquids. The water dispenser must be unplugged before cleaning. Children should never be allowed to dispense hot water without proper and direct supervision; unplugging the unit prevents unsupervised use. Service should only be performed by a certified technician to avoid damage. The appliance is not suitable for cleaning with a water jet or installation in an area where a water jet could be used. Mechanical devices or other means should not be used to accelerate the defrosting process, other than those recommended by the manufacturer.
The appliance operates best in temperatures from 39 °F – 100 °F (4 °C – 38°C) and humidity ≤90%. It should never be stored or exposed to an environment below 32 °F (0 °C). The appliance requires water with a TDS (Total Dissolved Solids) of ≤350 ppm; high water hardness can damage the hot water tank. It is not recommended for use at altitudes greater than 8,202 ft (2,500 m). The machine should never be turned upside down or leaned more than 15°. After turning the dispenser off, allow it to sit idle for 3 minutes before turning it on again. If the appliance permanently fails, immediately disconnect it from power, shut off the water supply, and contact customer service.
How to Use Quick-Connect Tubing
The dispenser includes quick-connect tubing for easy installation.
- Cutting Tubing: Use the included Tube Cutter (G) or a sharp knife to cut the end of the tubing. Ensure the ends are straight and flush against the fitting, inspecting for nicks or scratches. Recut if necessary.
- Connecting Tubing: Insert the tubing into the collet and push it until it engages the O-ring, then continue pushing until it hits the back of the quick-connect fitting. Stopping at the O-ring can cause leakage; the tubing must be inserted approximately 0.75 inches (2.2 cm) past the O-ring.
- Disconnecting Tubing: Push in the collet with fingertips and hold it while pulling the tubing out.
Installation
- Determine Installation Location: Place the dispenser upright on a sturdy, level indoor surface away from direct sunlight, ensuring it is fully seated on the counter and the drip tray does not extend off the edge. Locate it near a grounded GFCI wall outlet. Do NOT plug in the power cord until installation is complete. Position the back and sides of the dispenser at least 4 inches (10 cm) from walls for free air circulation.
- Connect to the Cold Water Supply:
- CAUTION: Do NOT connect to a hot water supply line, as this will severely damage the filters. The water supply MUST be from the COLD WATER LINE.
- Turn off and disconnect the current cold water supply line.
- Connect the Feedwater Adapter (C) to the cold water supply line.
- Connect the cold water supply line on top of the Feedwater Adapter (C). An extra adapter nut is included for 3/8 in. or 1/2 in. feed plumbing lines.
- Cut the non-elbow-connector end of the Shutoff Valve Tube (A) as instructed in the "Cutting Tubing" section.
- Insert the cut end of the Shutoff Valve Tube (A) straight into the Feedwater Adapter (C), ensuring the shutoff valve lever is perpendicular to the tube to prevent water from entering the dispenser.
- Gently tug on the Shutoff Valve Tube (A) to ensure a secure connection.
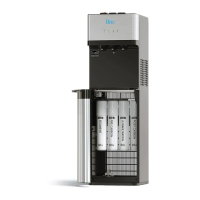
- Flush Filters: New filters must be flushed before first use.
- Remove filters from the dispenser by removing the Side Filter Panel, then rotating each filter counterclockwise.
- Connect the filter to the Filter Housing (D) by inserting and rotating clockwise until the BRIO logos on the filter and housing align.
- Ensure both the cold water supply and the shutoff valve on the Shutoff Valve Tube (A) are in the OFF position. Connect the elbow-connector end of the Shutoff Valve Tube (A) to the left side of the Filter Housing (D).
- Connect the Filter Flushing Tube (B) to the right side of the Filter Housing (D) and place its open end over a sink or receptacle.
- Turn on the cold water supply, then turn on the shutoff valve on the Shutoff Valve Tube (A).
- Flush the filter for a minimum of 5 minutes (1.5-3 gallons of water or about 10 minutes) or until the water is clear.
- Turn off the cold water supply, then the shutoff valve on the Shutoff Valve Tube (A). Disconnect the tubing from the Filter Housing (D) and repeat the process with the remaining filter.
- After flushing, reinstall filters into the dispenser by rotating clockwise.
- Complete Installation:
- Remove the blue silicone plug from the Water Inlet (10).
- Insert the elbow-connector end of the Shutoff Valve Tube (A) into the Water Inlet (10). Secure with Locking Clips (E) if desired.
- Connect the power cord to a grounded GFCI outlet.
- Turn on the valve on the Shutoff Valve Tube, allowing water to enter the dispenser.
- Press either the Hot, Ambient, or Cold button on the Touch Panel until water flows steadily and air is removed from the tanks.
- Turn on the green Cold Water Switch (7) and red Hot-Water Switch (8) on the back of the dispenser.
- NOTE: It takes approximately 15 minutes for cold water to reach optimal temperature and 90 minutes for hot water.
Using the Dispenser
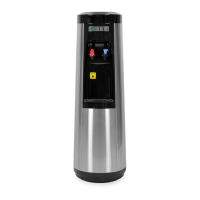
The touch panel features:
- Up arrow (1): Used to set time and temperature.
- Clock/Temperature display (2)
- Down arrow (3): Used to set time and temperature.
- PCB icon (4): Filter-life reminder function.
- Unlock button (5): Press to unlock the hot water button.
- Hot water button (6): Illuminates when selected.
- Ambient water button (7): Illuminates when selected.
- Cold water button (8): Illuminates when selected.
- Adjusting Time:
- Simultaneously press the Up and Down Arrows for 3 seconds; the digital screen will flash.
- To adjust hours, briefly press the Hot Water button. The hours will flash. Use the Up or Down Arrow to set the desired hour (range 01-12).
- To adjust minutes, briefly press the Cold Water button. The minutes will flash. Use the Up or Down Arrow to set the desired minutes (range 00-59).
- After setting the time, briefly touch the Unlock button. The screen will stop flashing and display the time.
- Adjusting Cold Water Temperature:
- Simultaneously press the Unlock and Cold Water buttons for 3 seconds; the digital screen will flash, displaying the current cold water temperature.
- Use the Up or Down Arrows to adjust the temperature by 2-degree increments (adjustable range 39 °F to 59 °F / 4°C to 15 °C).
- NOTE: Cold water temperature is measured inside the cold reservoir tank. Dispensed water temperature may vary due to ambient temperature, receptacle size/temperature, and internal travel.
- Once the desired temperature is selected, briefly press the Unlock button to set it and exit.
- Adjusting Hot Water Temperature:
- Simultaneously press the Unlock and Hot Water buttons for 3 seconds; the digital screen will flash, displaying the current hot water temperature.
- Use the Up or Down Arrows to adjust the temperature by 2-degree increments (adjustable range 174 °F to 194 °F / 79 °C to 90 °C).
- NOTE: Hot water temperature is measured inside the hot reservoir tank. Dispensed water temperature may vary due to ambient temperature, receptacle size/temperature, and internal travel.
- Once the desired temperature is selected, briefly press the Unlock button to set it and exit.
- Dispensing Water:
- Press and hold the blue Cold Water button for cold water.
- Press and hold the white Ambient Water button for room temperature water.
- Press the Unlock button, then press and hold the red Hot Water button for hot water.
Replacing the Filters
IMPORTANT: Only use new filters designed for this dispenser; other types will damage the dispenser and void the warranty.
The PCB/Filter-Life Reminder icon is a background function that flashes when it's time to replace filters.
- Shut off the water supply.
- Remove expired filters by twisting counterclockwise.
- Flush new filters as per instructions on page 8, "Flush Filters."
- Install new filters by twisting clockwise into place.
- Turn on the water supply.
- Simultaneously press the Unlock button and the Up Arrow for 3 seconds to turn off the flashing PCB icon and reset the filter service life. The PCB icon will darken.
Filter Replacement Schedule:
- Sediment Filter (NFMPP5M): Replace every 3-6 months or 950 gallons. Removes dirt, rust flakes, suspended solids, and other particulates.
- Carbon Block Filter (NFMCTO5MS2): Replace every 3-6 months or 950 gallons. Removes chlorine and other unpleasant tastes, odors, and colors.
Cleaning and Maintenance
- Keep the dispenser in a cool, dry place, away from direct sunlight.
- Ensure all sides of the dispenser are at least 4 inches (10 cm) from walls.
- Wipe surfaces with a clean, moist cloth. NEVER immerse the dispenser in water or clean with a solvent.
- Never place the dispenser on paper or foam, which can store moisture and cause creepage. Do not place flammable items near the dispenser.
- If the dispenser is not used for an extended period (e.g., vacation), disconnect the power cord, close the Feedwater Adapter (C), and turn off the Hot and Cold Water Switches on the back. Allow hot water to cool, then place a bucket or receptacle beneath the Water Drain (9) on the back. Remove the drain cover and drain water from the tanks. Reinstall the drain cover and discard the water.
- If the water supply is cut off, close the Feedwater Valve and unplug the dispenser. When water supply is restored, open your sink's faucet to discharge any sediment before reconnecting and using the dispenser.
Hot Water Sterilization Function
Before starting, remove the silicone plug from inside the filter door and install it onto the water dispense nozzle to prevent water flow.
- Simultaneously press the Hot, Ambient, and Cold buttons for 3 seconds.
- The display screen will flash "loop." NOTE: The cooler cannot dispense water in this mode.
- Once "loop" appears, press the Hot button, then release; press the Ambient button, then release; press the Cold button, then release. This initiates the sterilization process. The Unlock, Hot, Ambient, and Cold buttons will illuminate for 3 seconds, then go off, repeating this cycle throughout the process.
- The digital screen will display the current water temperature. When it reaches 140° F, the display will count down from one minute to zero seconds. When it reaches zero, sterilization ends, and the dispenser reverts to standby.
- Remove the silicone plug and re-attach it to the filter door. The dispenser is now ready to use.
- NOTE: If the digital screen displays "loop" for more than 15 seconds without operation, the dispenser will return to normal. To exit sanitation before it ends, press the Cold button for 3 seconds to return to standby.
Troubleshooting
This section provides solutions for common issues. If problems persist or are beyond the scope of this guide, contact customer service at 1-844-257-4103.
- Dispenser is not turning on: Check if it's plugged in and if there's a circuit break or power failure.
- Minimal water dispensed: Ensure sufficient water pressure (install a booster if necessary) and replace expired filters.
- Water temperature isn't right: Allow tanks to refill and water to heat/chill. Ensure the dispenser is plugged in and hot/cold water switches on the back are turned on.
- Water leakage: Inspect tubing for correct insertion. If tubing is burst, immediately shut off water supply and replace tubing. If there's a possible problem with the water leakage protector on the base plate, immediately shut off water supply, unplug the power cord, and contact customer service. You may be asked to release excess water by opening the Overflow Outlet (11) on the back.
- No water dispensed: This issue is typically addressed by the solutions for minimal water dispensed or water leakage.
- Noisy operation: Ensure the dispenser is placed on a flat, hard surface. Slight noise during heating is normal.