SEWING THE STITCHES
58
d
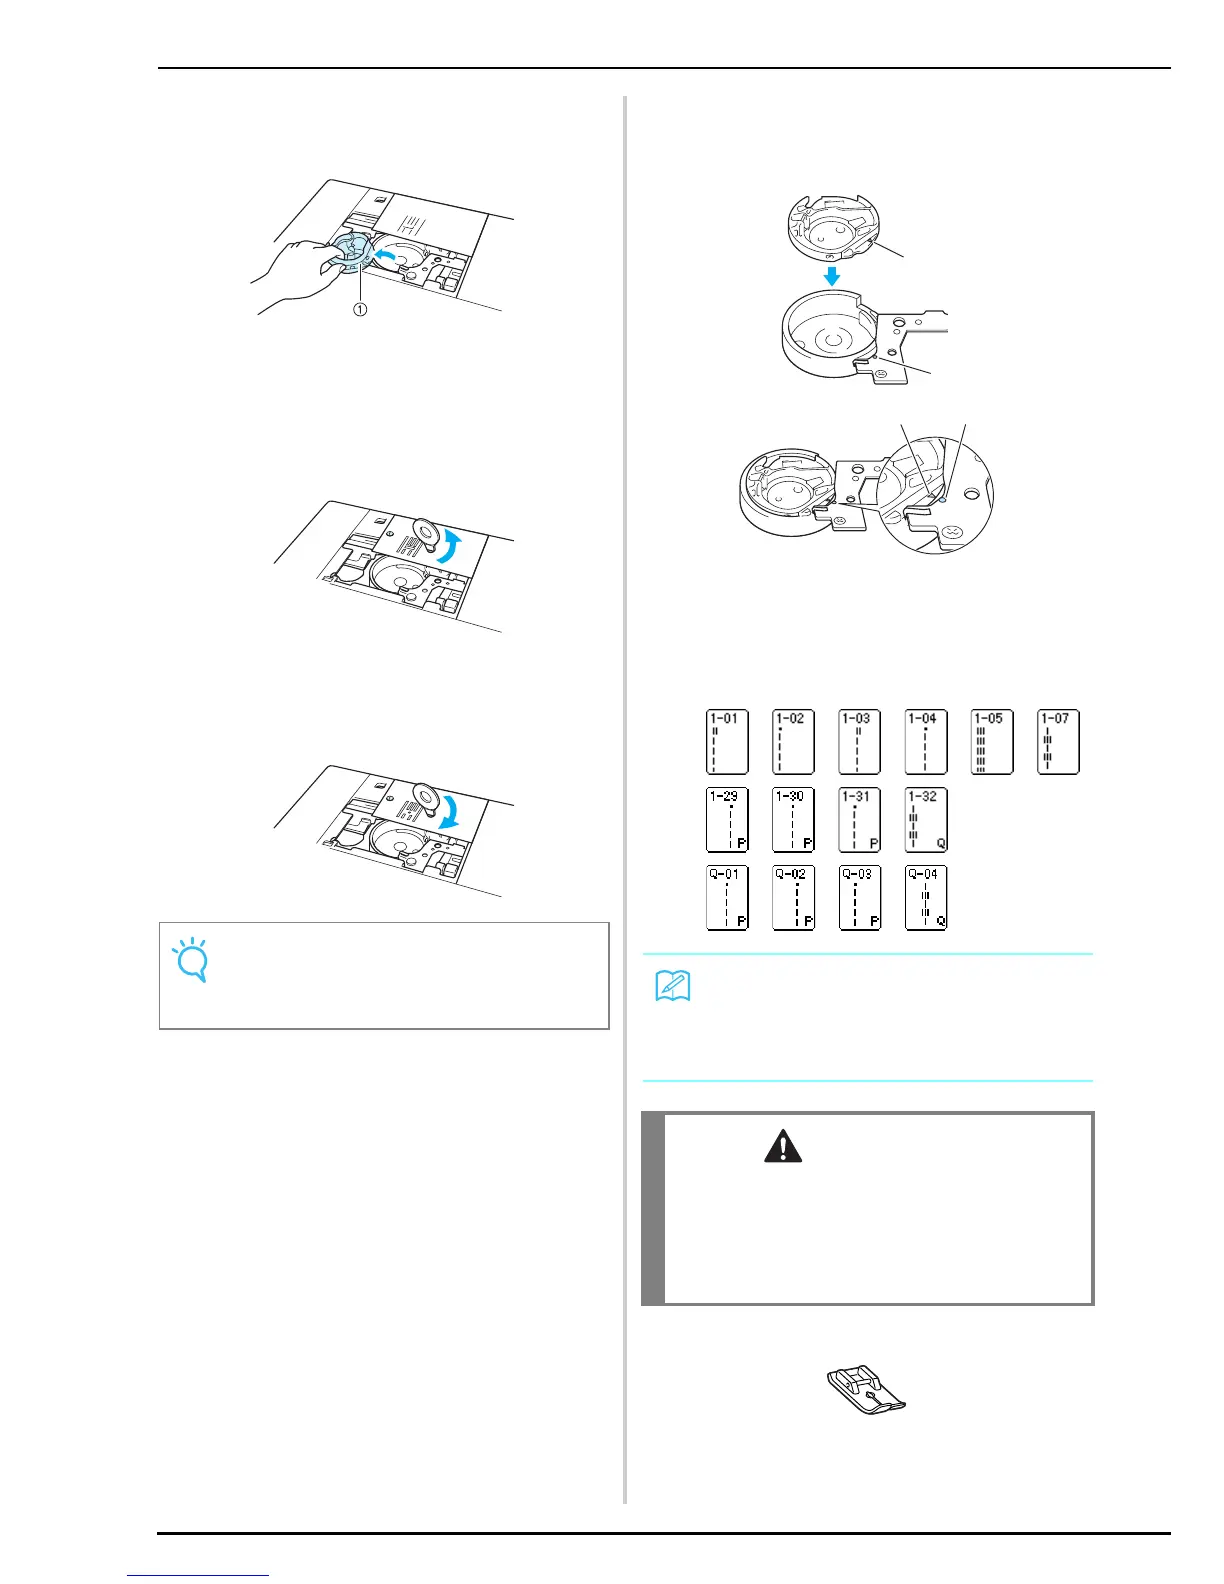
Grasp the bobbin case, and then pull it out.
a Bobbin case
e
Use the disc-shaped screwdriver included
with the machine to unscrew and remove the
regular needle plate.
f
Set the straight stitch needle plate in place
and use the screwdriver to tighten the plate.
g
Insert the bobbin case so that the ▲ mark
aligns with the ● mark as shown below, and
then attach the needle plate cover.
a ▲ mark
b
● mark
* Align the ▲ and ● marks.
h
After reinstalling the needle plate cover,
select one of the following straight stitches.
i
Attach the straight stitch foot.
Align the two screw holes on the needle plate with the
two holes on the machine. Use the disc-shaped
screwdriver to tighten the screws in the needle plate.
1
When using the straight stitch needle plate, all straight
stitches become middle needle position stitches. You
cannot change the needle position using the width
display.
• Selecting other stitches will cause an error message
to be displayed.
• Be sure to turn the handwheel slowly in your
direction before sewing and make sure that the
needle is not contacting the straight stitch foot and
straight stitch needle plate.
a
b
 Loading...