202
Basic Programmable Stitch Creator Operations
Step 5
Using the edited fill/stamp stitch
patterns in Layout & Editing
Start up Layout & Editing.
Select an embroidery pattern.
From the Region sew type selector, select
Prog. Fill Stitch.
Click
Sew
, then
Sewing Attribute Setting
.
c
“Layout & Editing Window” on page 47.
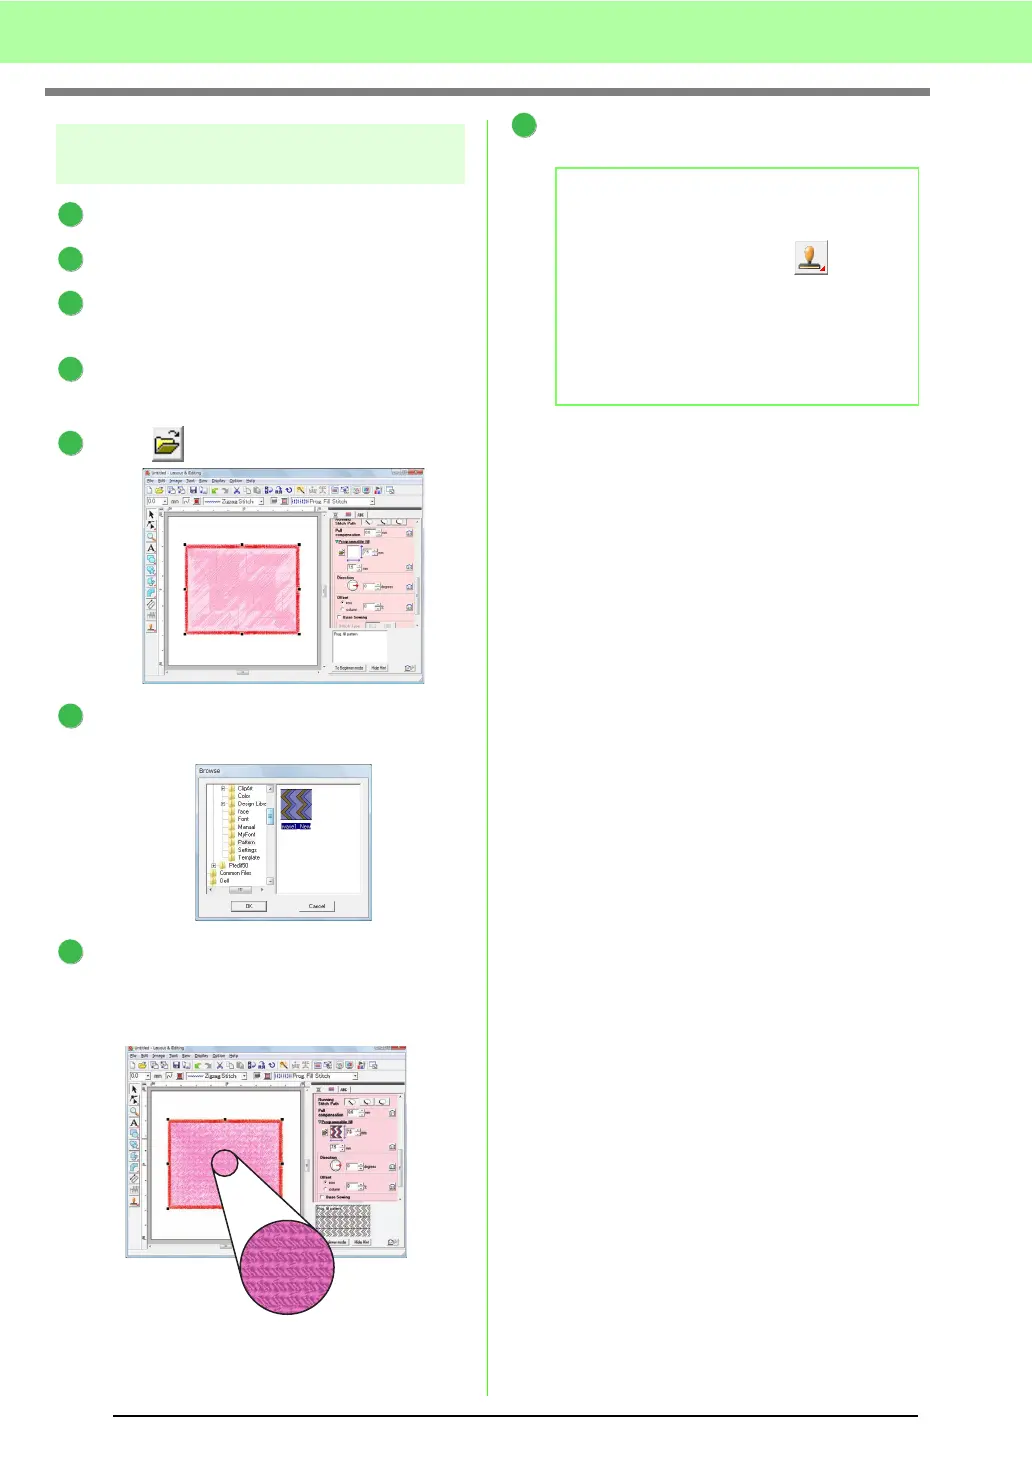
Click beside Programmable fill.
Select the drive and folder where the pattern
was saved in Step 4.
Click the edited fill/stamp stitch pattern, and
then click OK.
→ The pattern is applied to the inside
regions of the embroidery pattern.
If necessary, change any other sewing
attributes.
1
2
3
4
5
6
7
b Memo:
• A fill/stamp stitch pattern can also be
applied as a stamp by using .
c
“Applying and editing Stamps” on
page 114.
• For best results, refer to “Notes on
programmable fill stitches and stamps” on
page 109.
8
 Loading...


