7
RMM (RAID Mode Manager)
With RMM, you can create or expand a RAID array without erasing the data on the drives.
Changing from normal mode to RAID 1:
Hard drives that aren’t in a RAID array will show “Normal (RMM available)”. You must have at least two drives available
(not in a RAID array) to use RMM.
Adding a drive to an existing RAID array or adding a drive and changing the RAID mode:
You have RAID 1, RAID 10, RAID 5, RAID 51, RAID 50, or RAID 6 array. You must have at least one drive not currently in
the array shown “Normal (RMM available)”.
Notes:
• Each drive should have the same capacity.
• RMM can be used to expand only one hard drive per operation. To expand by two or more hard drives, RMM must be
performed several times.
1
2
3
Changing from normal mode to RAID 1:
Notes:
• After the RAID array is changed (except when creating a RAID 0 array), the TeraStation will perform a RAID
check that will take about 10 hours per TB. File transfers will be slower during this period. While the “RAID I17
ARRAYx Resyncing” message is displayed on the LCD panel, do not turn o the TeraStation. If you turn it o,
the RAID check will start over.
• If the TeraStation is restarted or shut down while changing the RAID mode, the message displayed on the LCD
panel changes from I46 and I47 to I18.
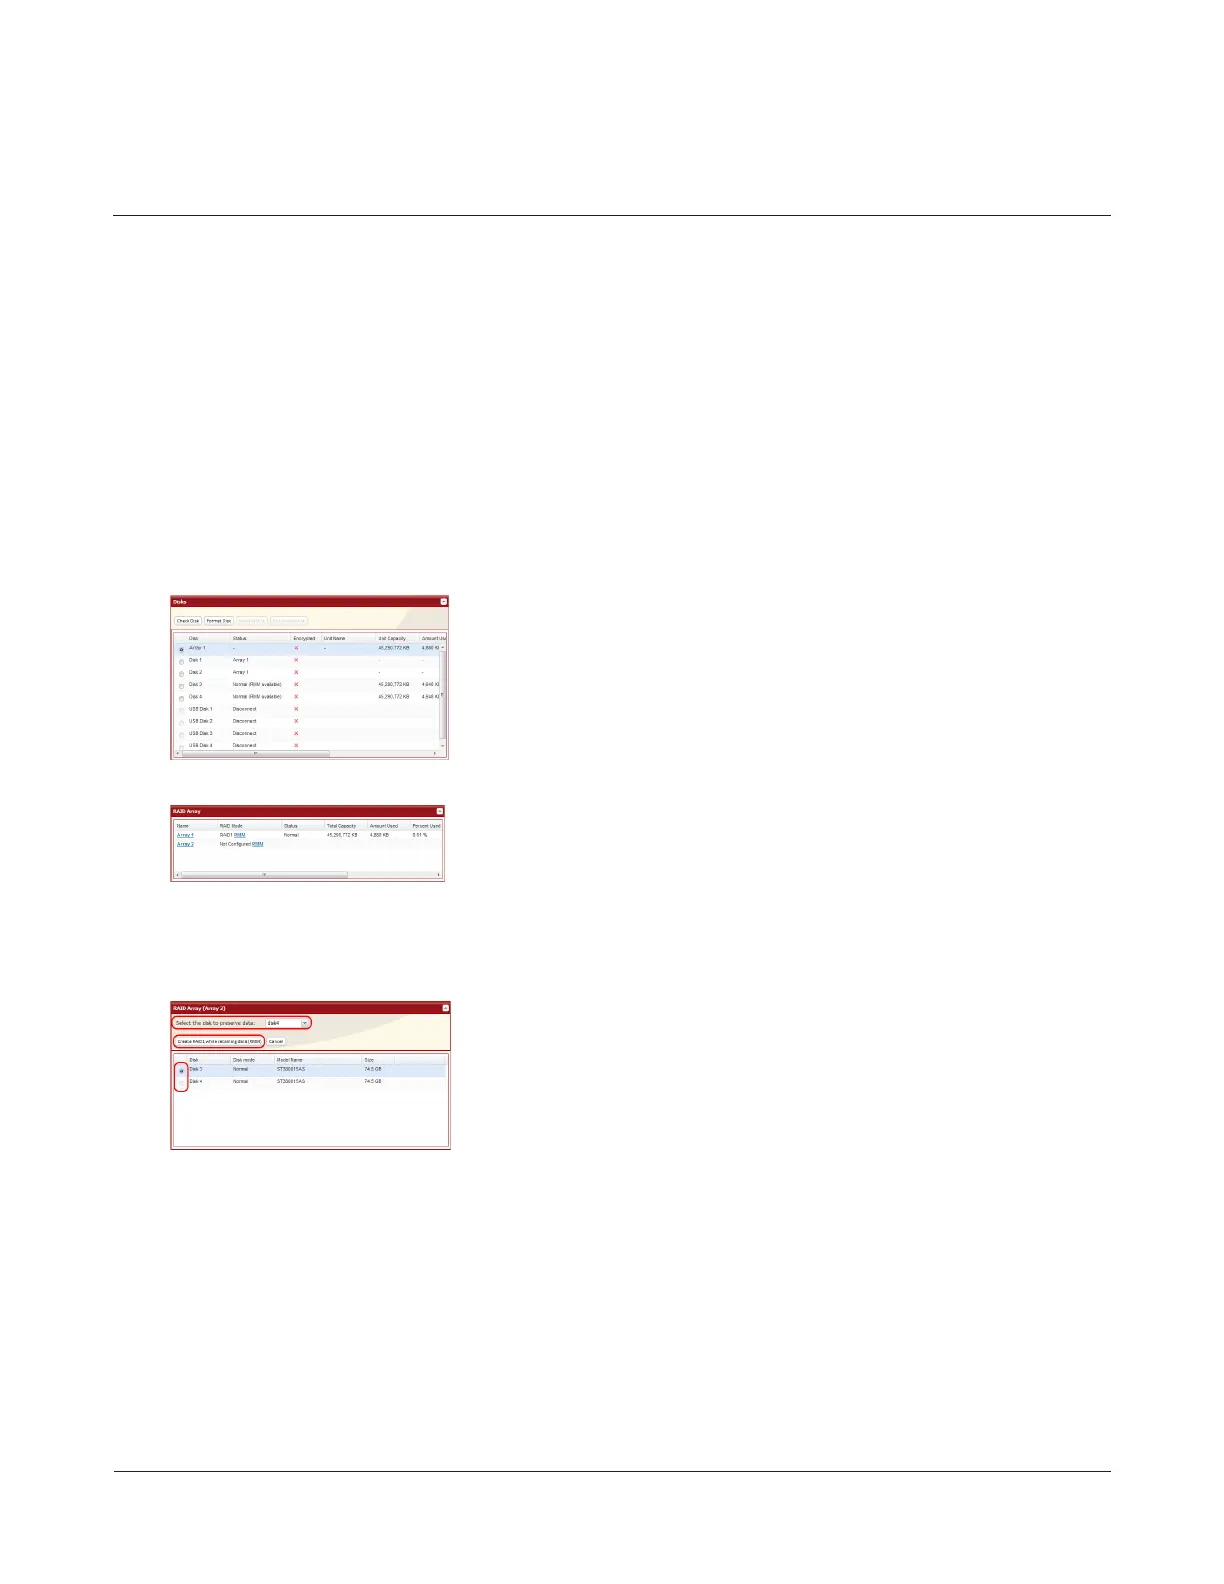
In Settings, navigate to System - Storage - RAID Array. Select RMM for RAID
Mode.
1 Select the drive whose data will not be erased from the pull-down
menu.
2 Select the drive to be added to the RAID array.
3 Click Create RAID 1 while retaining data (RMM).
If there are multiple hard drives not already included in a RAID array, or if
drives were formatted from Settings, Status under System - Storage appears
as “Normal (RMM available)”.