EasyManuals Logo

CAB A4 Service Manual

Default Icon
119 pages
To Next Page IconTo Next Page
To Previous Page IconTo Previous Page
Page #58 background imageLoading...
Page #58 background image
58 Serviceanleitung / Service Manual / / /
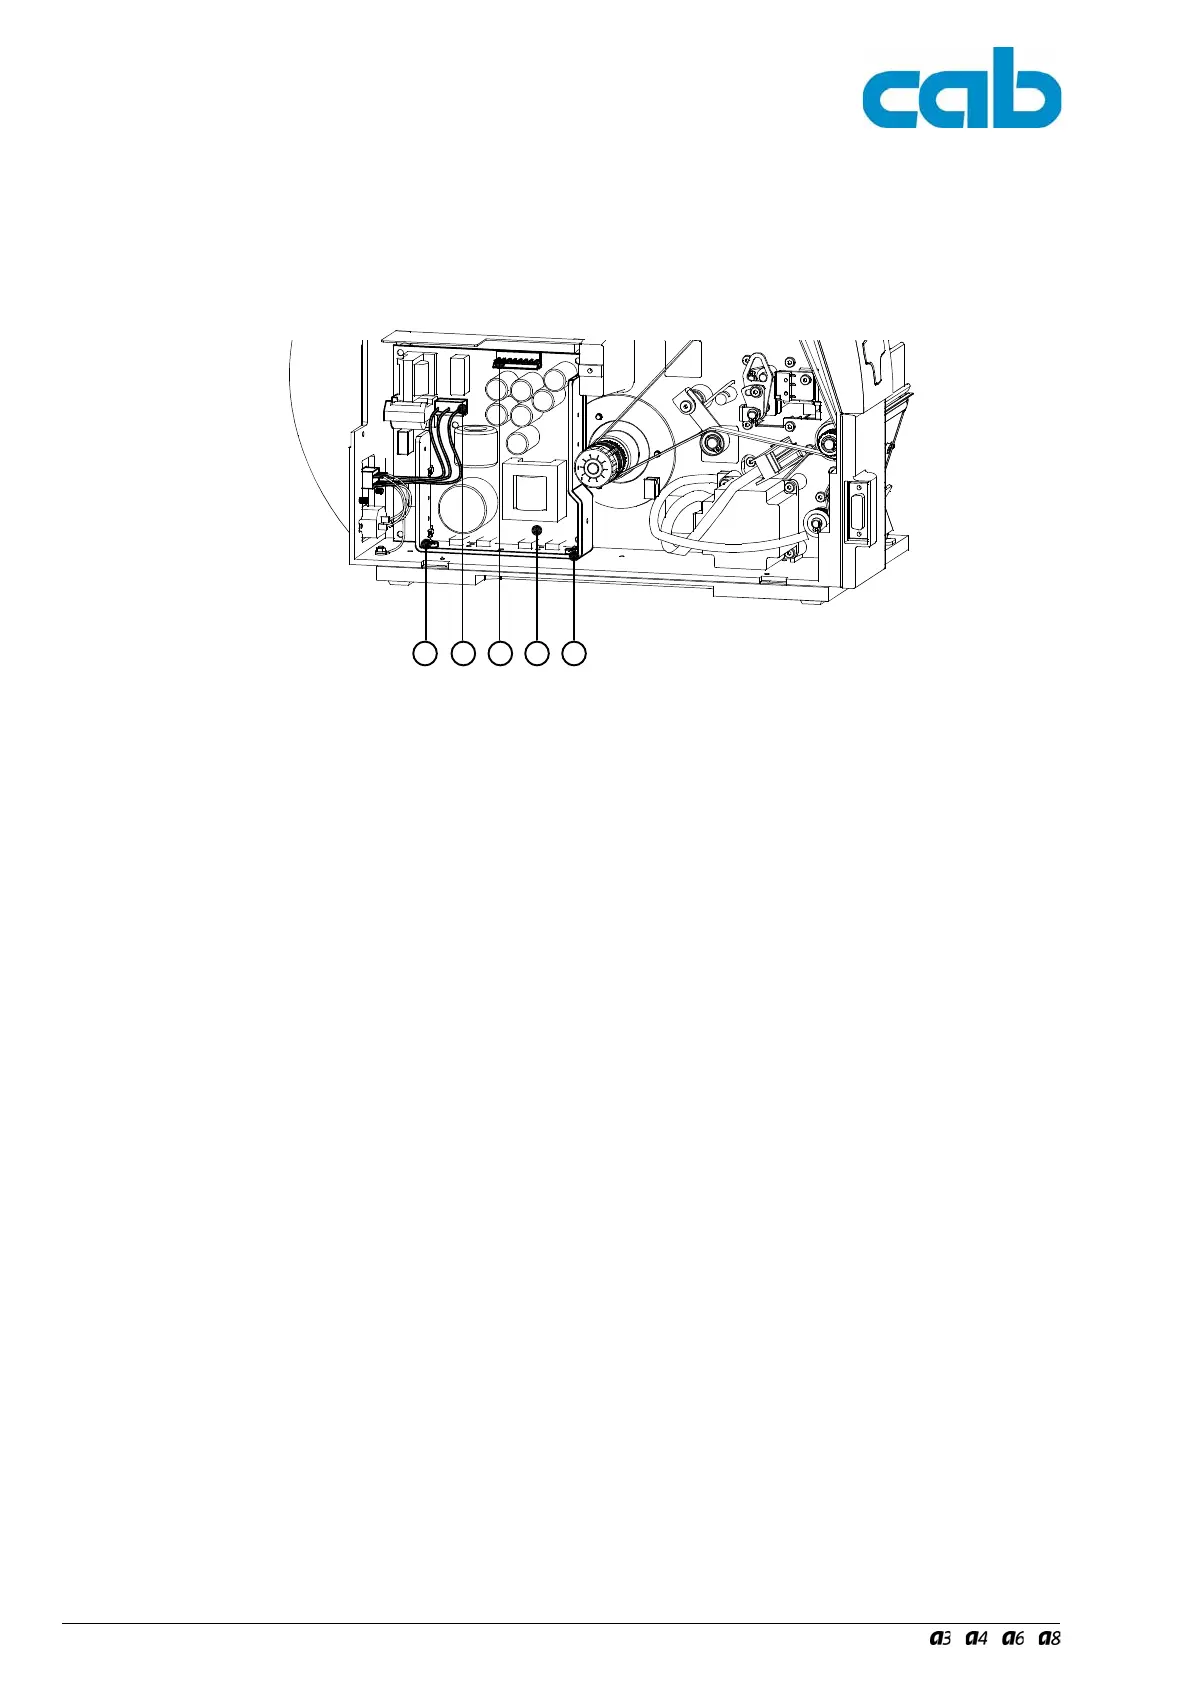
6. Pull the mains input plug (8) and the Power Cable
plug (9) out of the power supply PCB (10).
7. Remove the two screws M4x6 (7) from the cooling
plate and remove the power supply (10).
8. To fit the new power supply follow the above steps in
the reverse order.
6. Ziehen Sie den Stecker (8) des Netzeingangs und
den Stecker (9) der Leitung Netzteil von der Leiter-
platte (10).
7. Entfernen Sie zwei Schrauben M4x6 (7) aus dem
Kühlblech und entnehmen Sie das Netzteil (10).
8. Bauen Sie das neue Netzteil in umgekehrter Reihen-
folge wieder ein.
Bild 39 Wechseln des Netzteils II Fig. 39 Replacing the Power Supply II
7 98 10 7

Table of Contents

Other manuals for CAB A4

Questions and Answers:

Question and Answer IconNeed help?

Do you have a question about the CAB A4 and is the answer not in the manual?

CAB A4 Specifications

General IconGeneral
Printer TypeThermal transfer / direct thermal
InterfacesUSB, Ethernet, RS232
Label Thickness Range0.05 mm - 0.25 mm
Memory8 MB Flash
Power Supply100-240 VAC, 50/60 Hz
Operating Temperature+5°C to +40°C
Print Resolution203 dpi
Humidity Range10-85% non-condensing

Related product manuals