10 10
4 Replacing Assembly Units
31 4
2
6
6 8
7
4
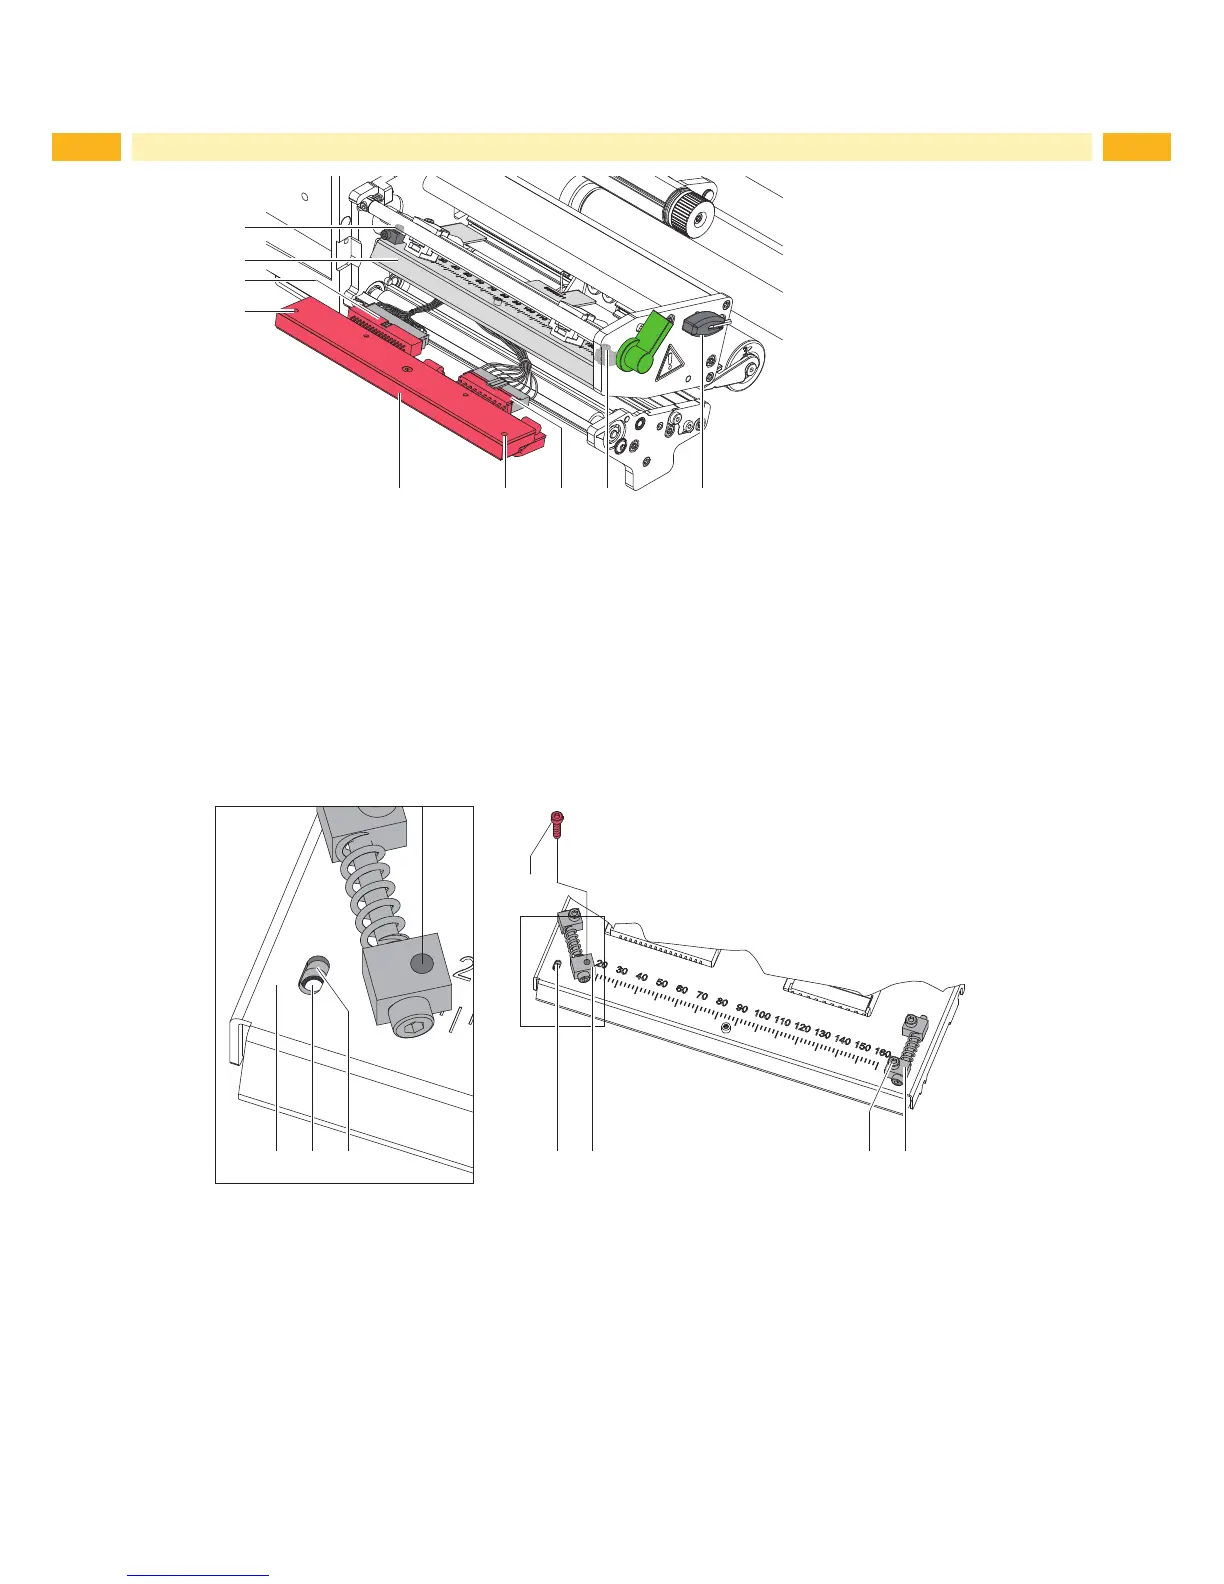
Figure 5 Dismounting printhead Hermes+ 6
Dismounting printhead
1. Open the printhead assembly.
2. Remove the labels and transfer ribbon.
3. Press the prithead bracket (7) on the print roller and loosen screw (6) with the hexagon wrench (8).
4. Open the printhead bracket (7) with turning on top.
5. If necessary, takeout the printhead (1) from the printhead bracket (7).
6. Unplug both connections (2,3) on the printhead.
7 9 9 10
6
1064
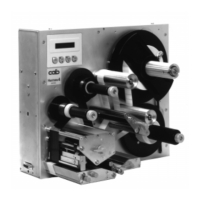
Figure 6 Mounting printhead Hermes+ 6
Mounting printhead
1. Plug in the connectors (2,3) on the printhead.
2. Turn the adjustment element (10) sidewards to got free the hole under the element.
3. Put in the printhead into the printhead carriage and press the printhead assembly down and hold it.
4. Position the printhead in such away that the threaded holes of the printhead (4) are centered into the slots (9) of
the printhead carriage.
5. Swing back the adjustment elements(10) to the home position.
6. Insert and tighten the screws (6).
7. Reloaded labels and transfer ribbon.