15
4 Replacing Assembly Units
4.5 Replacing the Label Sensor
i
Notice!
Soiling of the label sensor can also cause malfunctions. Before replacing the label sensor, check whether it
is soiled and clean it if necessary. 3.1 on page 7.
2 31
5 63 74
5 63
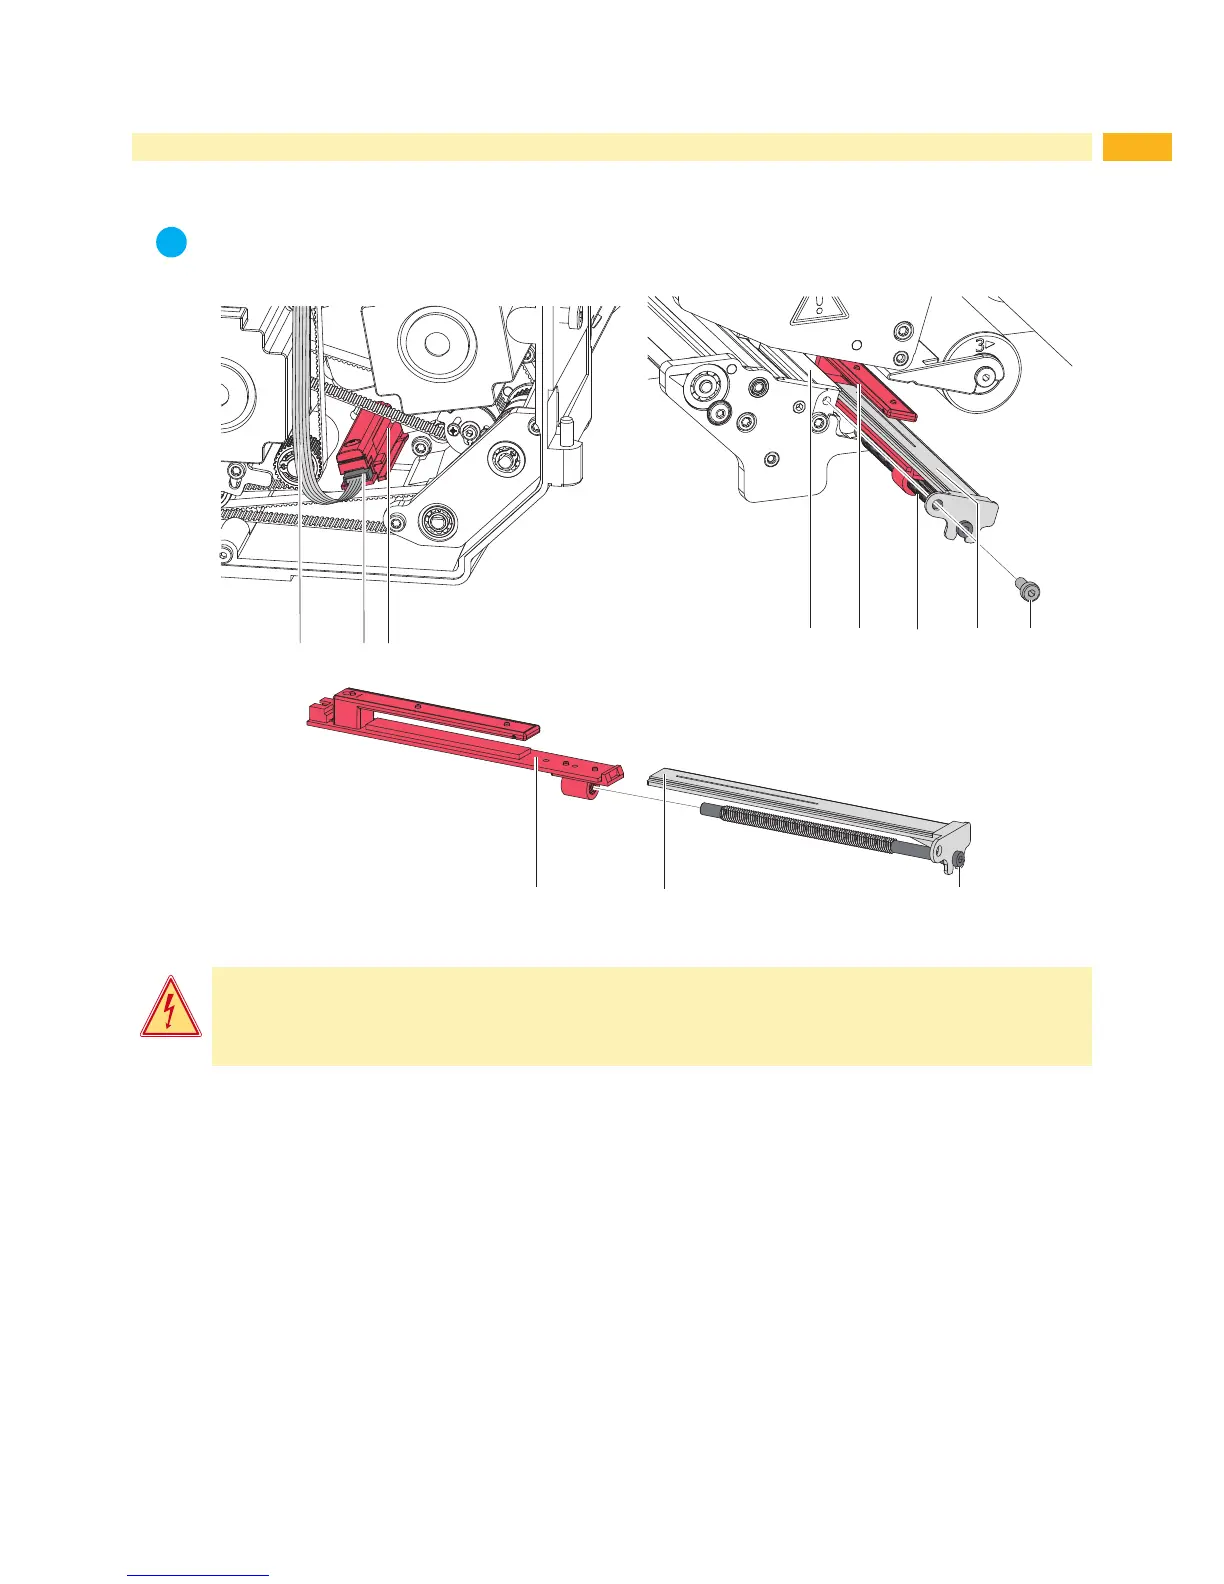
Figure 12 Replacing the label sensor
Danger!
Risk of death via electric shock!
Before opening the housing cover, disconnect the device from the mains supply and wait at least one
minute until the power supply unit has discharged.
1. Unplug the printer from the electrical outlet and remove the rear cover.
2. Remove the material from the printer.
3. Totally loosen the knurled screw (2).
4. Disconnect the cable (4) from the connector (5).
5. Push the label sensor (3) in arrow direction and pull it out
6. Insert the new label sensor and move it against the arrow direction in the former position.
7. Connect the cable (4) to the connector (5).
8. Mount cover and restore all connections.
9. Adjust label sensor mechanically Operator's Manual.
10. Insert the knurled screw (2) through the slot (1) in to the label sensor and tighten it.
11. Adjust label sensor electrically Conguration Manual.