17
4 Replacing Assembly Units
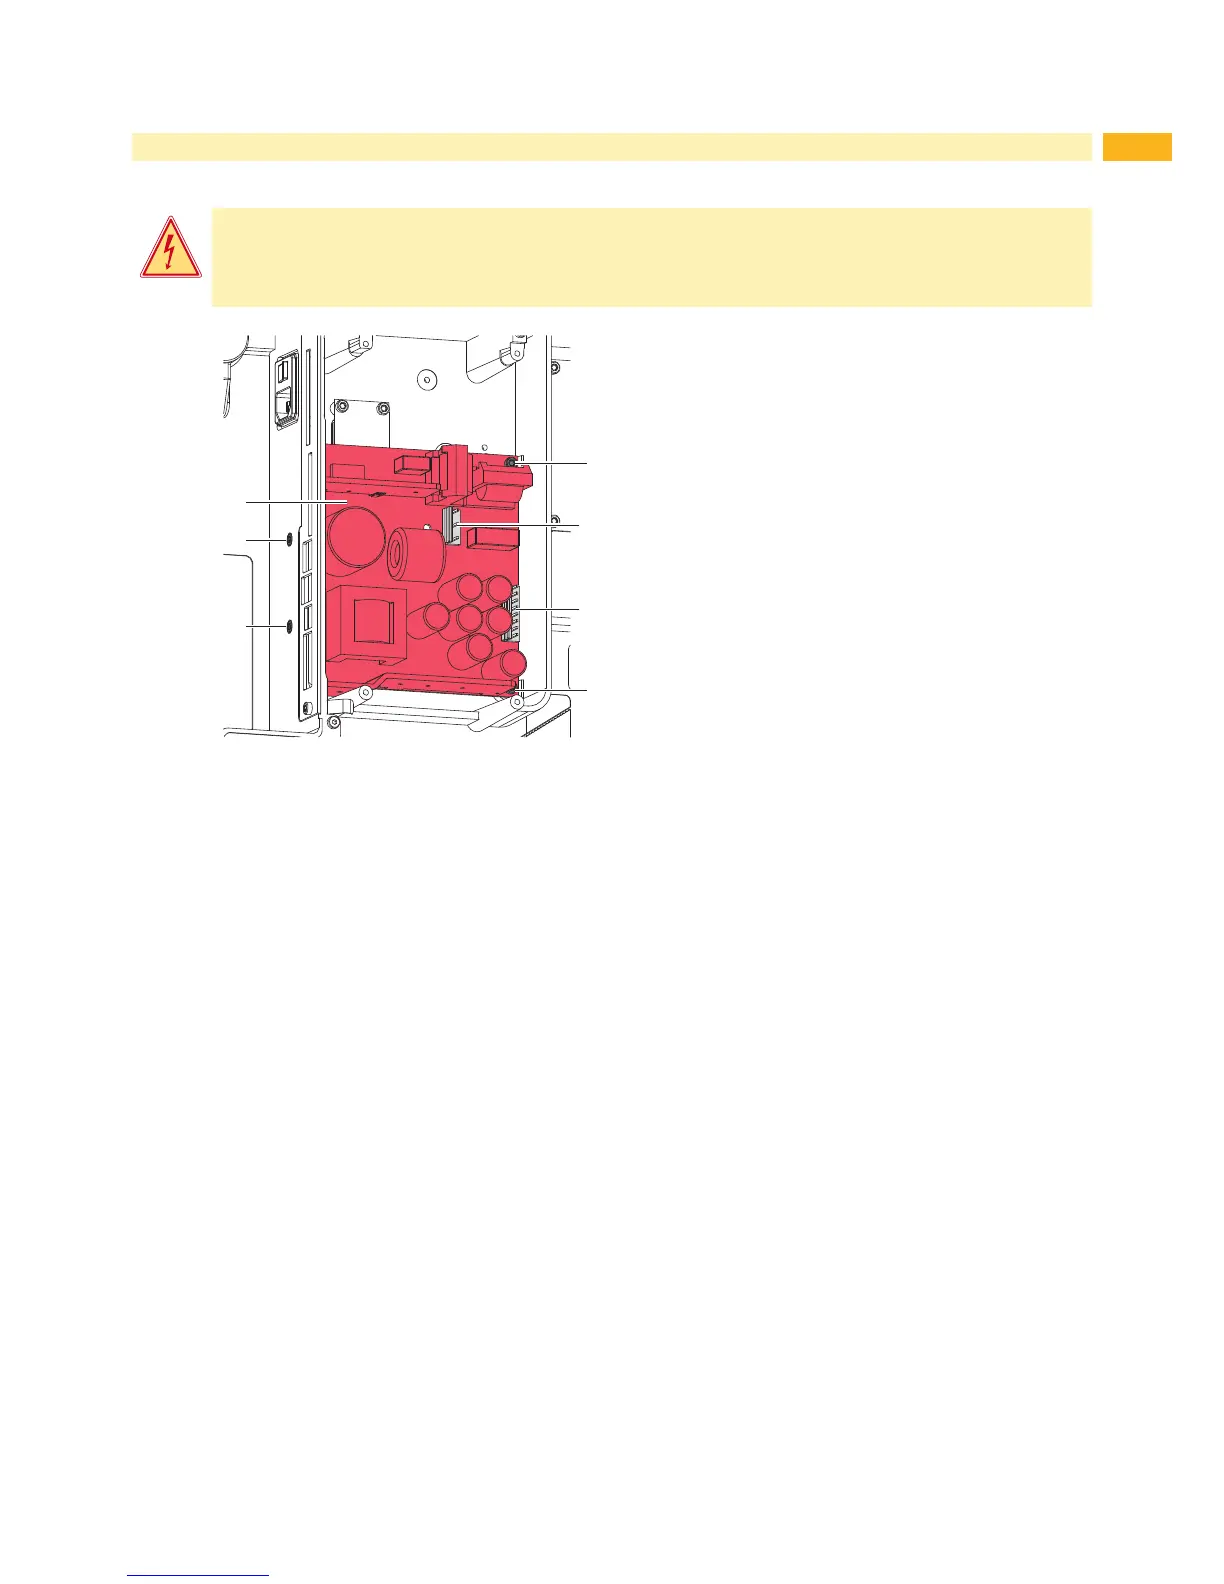
4.7 Replacing the Power Supply Unit
Danger!
Risk of death via electric shock!
Before opening the housing cover, disconnect the device from the mains supply and wait at least one
minute until the power supply unit has discharged.
3
3
2
2
CN1
CN2
1
1. Unplug the printer from the electrical outlet.
2. Remove the rear cover.
3. Dismount the PCB CPU 4.6 on page 16.
4. Unplug the cables from the connectors CN1 and
CN2.
5. Loosen 2 screws M4x10 (3) and 2 screws M4x6 (2).
6. Remove the power supply unit (1).
7. Insert the new power supply unit an x it with the
screws (2,3).
8. Connect the cable coming from the power input
module to CN1, the cable Power unit - CPU to CN2.
9. Re-mount the PCB CPU 4.6 on page 16.
10. Mount the rear cover.
Figure 15 Replace the power supply unit