13
4 Replacing Assembly Units
Removing the brake at the ribbon unwinder
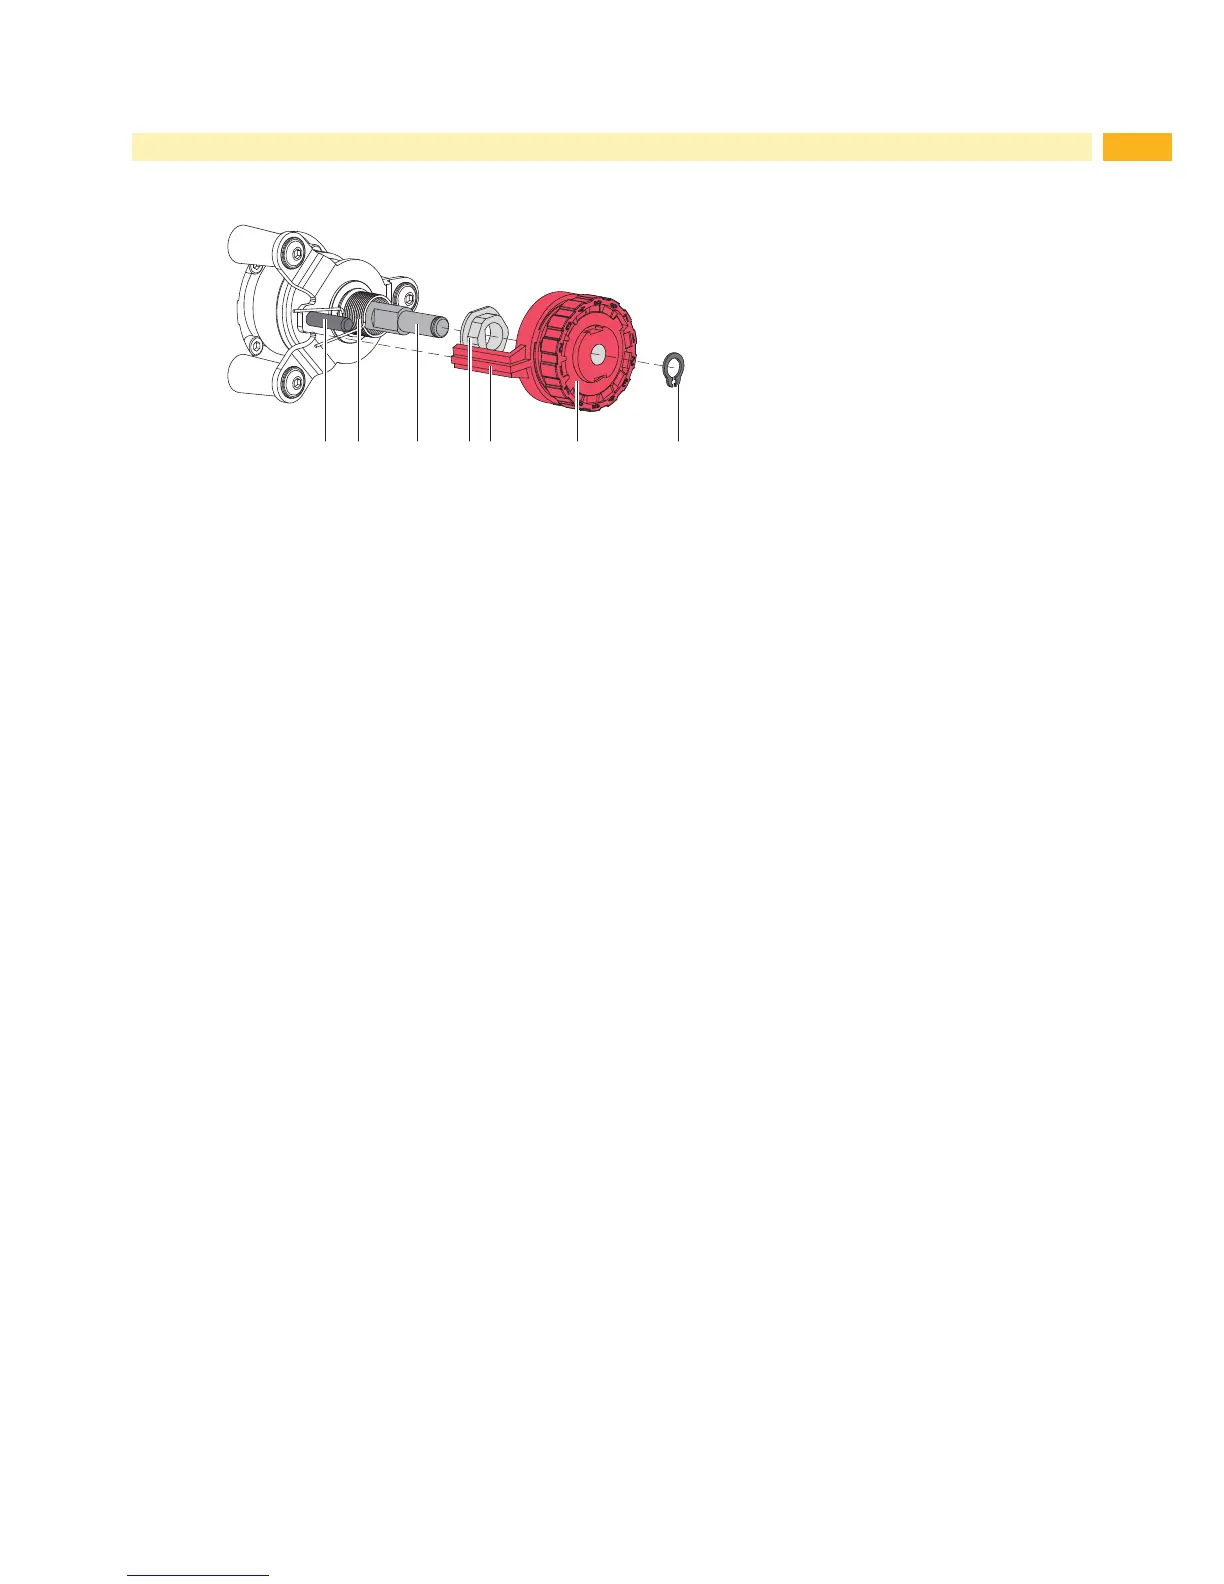
2 3 4 5 6 71
1 Pin
2 Spring
3 Winder axle
4 Tappet
5 Lever
6 Brake
7 Snap ring
Figure 10 Brake at the ribbon unwinder
1. Unplug the printer from the electrical outlet.
2. Remove the rear cover of the printer
3. Remove the snap ring (7).
4. Pull the clutch (6) from the winder axle (3).Ensure that the tappet (4) remains on the winder axle. Reattach the
tappet to the winder axle if it has been pulled off. The axle prole is shaped in such a way that the tappet only ts
in one way.
5. Check the position of the spring (2). Ensure that pin (1) grasps between the spring arms.
6. Slide the new clutch (6) onto the winder axle (3) in such a way that it ts on the hexagonal prole of the tappet (4).
7. Push the clutch further until it stops in such a way that lever (5) grasps between the spring arms..
8. Secure the snap ring (7).
9. Adjust the clutch 5.1 on page 18.