8200-0753-0M Rev A 225D Weight Digital Indicator
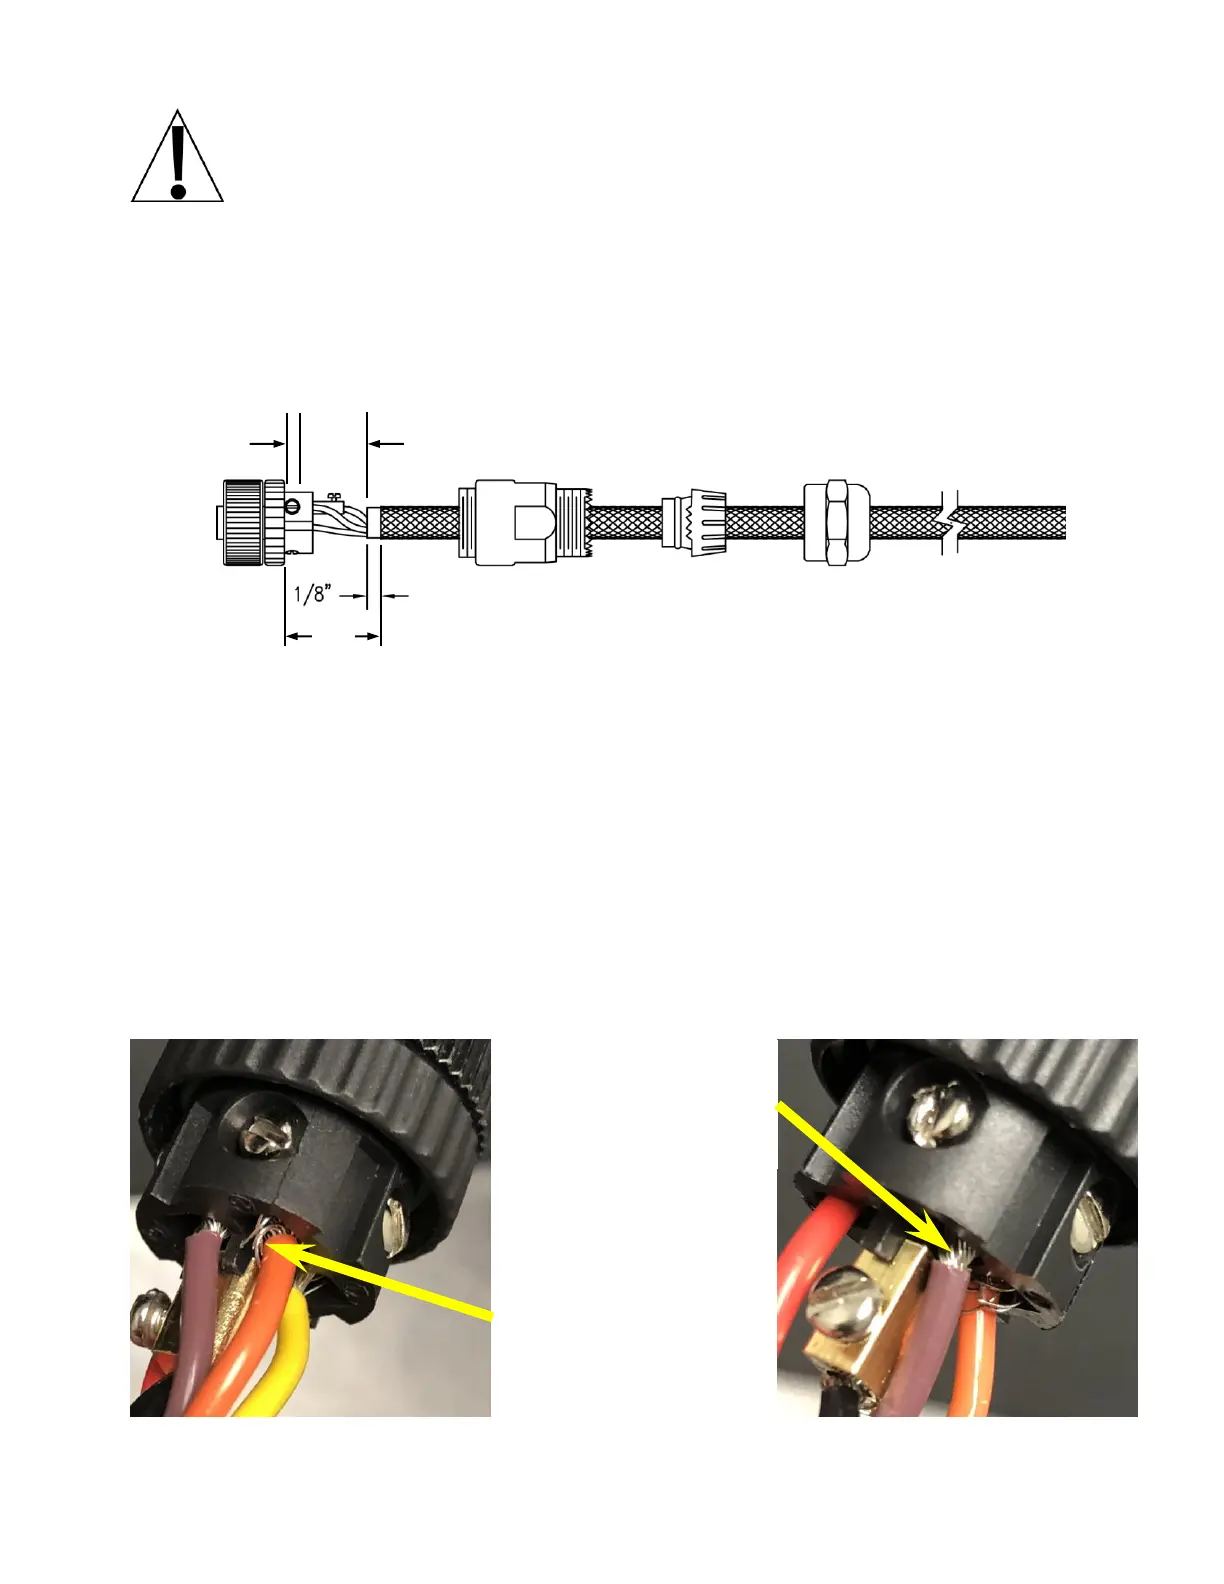
IMPORTANT: Clean all connectors and plugs with electrical contact cleaner.
Take care that the wires to pins 1-4 do not contact the center pin (#5). Apply
dielectric grease inside the connector and plugs before sealing. Refer to the
connector diagram on the previous page and the images below.
1. Dis-assemble the connector, and then insert the homerun cable through the connector
components.
2. With the cable routed through the connector components, remove approximately 1 inch of
the cable’s outer braided jacket, exposing the inner insulating jacket.
3. Next, remove approximately 3/4 inch of the inner insulating jacket, exposing the internal
wires.
4. Now, remove 1/8 inch of insulation from the end of each of the five wires.
5. Make sure the inner insulating jacket extends past the outer braided jacket approximately
1/8 inch.
6. To terminate a wire, use a small flat blade screwdriver to loosen the screw, and then insert
the wire into the opening. Tighten the screw to secure the wire in place.
7. Repeat the procedure until all five wires are in place.
8. After all terminations have been made, reassemble the connector components by sliding
them together on the cable and then hand-tighten.
Insulation stripped
too far back. May
short to center
conductor.
Frayed wire. May
short to center
conductor and can
cause sporadic
connectivity during
temperature changes.