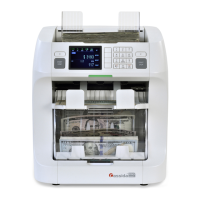
CassidaPRO Zeus: Service Manual
2018 Cassida Corporation. All rights reserved.
Rev: 09/05/2018
cassidapro.com/partner/
CURRENCY AND FUNCTION CHECKS
MIX MODE (BASIC CURRENCY RECOGNITION)
• Run a stack of same-denomination bills, split evenly into the 4 possible orientations
(ex. face to the right, face to the left, back to the right, back to the left). Do this
for each denomination, from $1 to $100. The amount of bills used depends on
availability, but Cassida recommends testing with a large quantity of bills (100 per
denomination).
FUNCTION MODE TESTS
NOTE: Use 2 bills of each denomination (14 bills total) to perform the following mode
tests.
1) Sort
2) Count
3) Face
4) Orientation
5) VALUSORT
TM
PRINT FUNCTION
• After performing any of the currency tests, the Menu hotkey will become Print.
Connect a thermal printer to the serial port in the back of the unit. Press the Print
hotkey, and the summary will be printed. Check to make sure the currency (i.e.
USD), date, and time are correct.
DETAILED SENSOR INFORMATION
SCANNING QUALITY TEST
NOTE: This test checks feeding quality, image quality, RGB histograms, and position, MG,
IR, UV sensors. Enter the Service Menu -> [1] Diagnosis ->[5] Scanning Quality
• Count 10 to 30 notes. The display will show double sensor output first. Graphical
information is assigned to numeric keys. Press each number repeatedly to scroll
through the values and tolerances of each sensor individually
[1] Double sensor output
[2] Magnetic sensor output
[3] Position sensor output
[4] Scanned image
[5] CIS shading waveforms
The [0] and [8] keys are commonly used to enlarge the screen (Key [0]) or to reduce the
screen (Key [8]). The [ADD] and [STRAP] keys are used to scroll the display left or right.
• In every display, the assigned numeric key itself acts like a next/previous key. For
example: Display the Magnetic sensor output by pressing Key [3], then the key
[3] is used to show ‘display for all Magnetic sensors’ -> ‘display for Left Magnetic
sensor’ -> ‘display for Center Magnetic sensor’ -> etc.
1) Check Double Sensor
• Select this display by pressing in Service Menu -> [1] Diagnosis -> [5]
2.3.

 Loading...