CassidaPRO Zeus: Service Manual
2018 Cassida Corporation. All rights reserved.
Rev: 09/05/2018
cassidapro.com/partner/
BATTERY REPLACEMENT - CR2302 BUTTON CELL
1. With the unit facing front, remove the left side cover (Reference Section 4.1.). On the
Mecha Board, locate the battery behind the serial port and RJ11 port (marked J25 on
PCB).
2. Gently bend the clip to reach the battery, then slide battery out
3. Insert new battery into slot, ensuring clip is returned to position
3.1.
PROCEDURES 3.
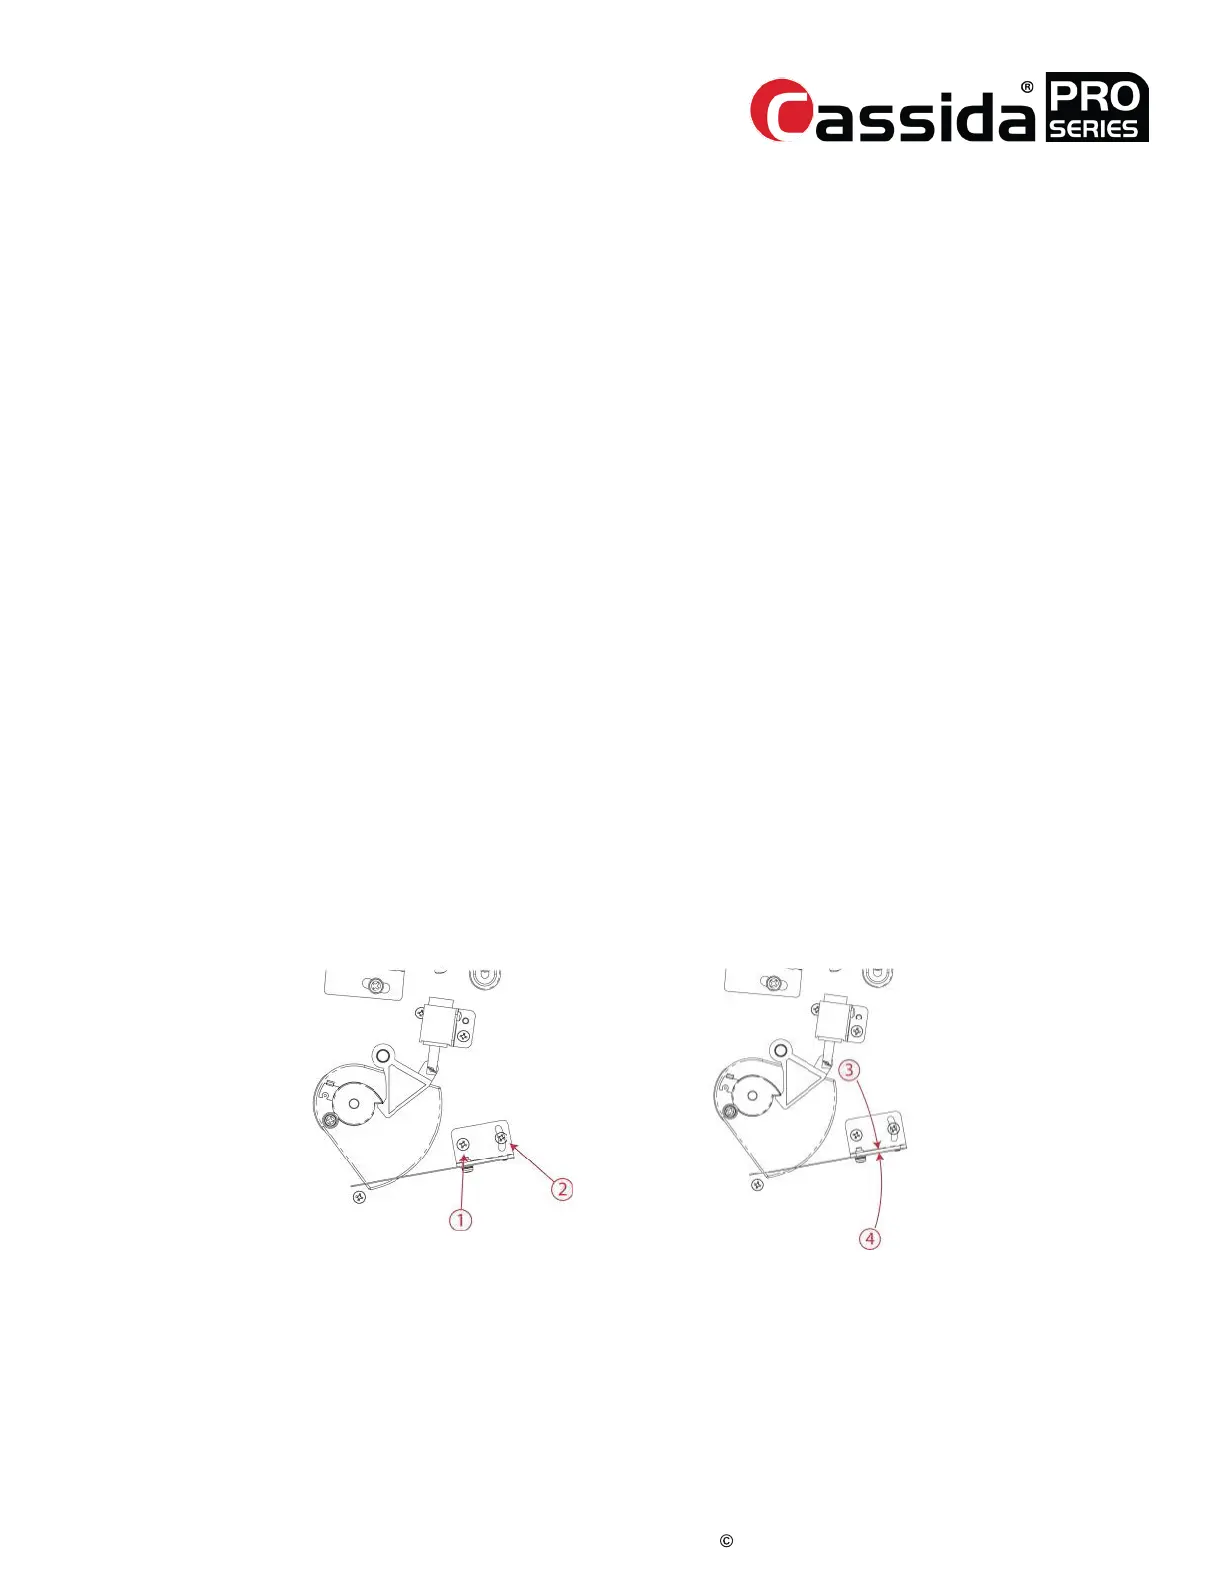
DUST COVER TENSION ADJUSTMENT
HOW TO ADJUST THE TENSION OF THE DUST COVER
1. With the unit facing front, remove the right side cover. Turn the power on
and enter the Service Menu -> [1] Diagnosis -> [7] Sensor Detail.
2. Engage the dust cover release solenoid by pressing [9] key.
3. Ensure screws 1 and 2 are snug, but not overly tight. Loosen screw 2
slightly, if necessary.
4. Open dust cover and close it by pressing [9].
5. If the dust cover closes too hard, fast, and/or it bounces and stays open,
adjust the tension by tapping the spring (3) downward. If the dust cover
closes too slowly or does not close completely, adjust the tension by
adjusting the spring (4) upward.
6. Repeat step 3 and 4 until the dust cover operates properly. Optimum
adjustment is when the dust cover makes a clear contact and a soft noise
against bottom of the reject pocket.
7. Tighten screws while holding tensioner in position and verify proper dust
cover operation.
3.2.
 Loading...
