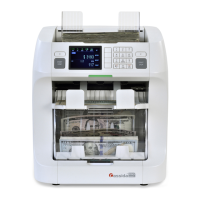
CassidaPRO Zeus: Service Manual
2018 Cassida Corporation. All rights reserved.
Rev: 09/05/2018
cassidapro.com/partner/
shading sheet just below the reflectors in the upper door ensuring that the edges of
the sheet are aligned in the center of the door. Close the door firmly until a ‘click’ is
heard from the latch engaging. Proceed to run the CIS (R) calibration by selecting
[YES]. For a passing calibration, the RGB values of the sensor will be displayed
and the background will be BLACK. For a failed calibration, the RGB graphs will
be uneven with low spots or spikes, and the background will be PURPLE with
<N.G.> displayed in the center. This is usually due to improper placement of the
calibration sheet.
[6] CIS Calibration (Transmitted)
• Ensure no material is blocking the CIS sensor and the IR/UV illumination bar. Do
not use a shading sheet for this calibration. Select [YES] to calibrate. The IR curve
should be ‘U’ shaped with a relatively flat bottom. No spikes or 0 values should be
present. The UV waveform (LIGHT BLUE) should be relatively flat around the same
range as the bottom of the IR ‘U’ shape with no spikes or 0 values.
[7] Currency
• The default software comes with only one currency available: USD. Users or VARs
may request additional currency scanning at a nominal fee. Use this menu to select
the unit’s default currency on an unlocked unit with custom software
BACKUP AND RESTORE
This menu provides options to the technician to backup current unit settings, rebuild
software, and to reset all settings back to the factory default settings.
[4] Backup and Restore ->
[1] Backup
• Technicians are encouraged to use this operation before performing any major
changes to a unit. By running the backup, all user settings, test menu settings,
and calibrations will be saved to an external storage medium. Insert a FAT32
formatted external storage device into the USB port on the backside of the unit.
Select [YES] to save current unit settings to the storage media. A new directory
will be created in the base folder of the storage media with a name following the
format ‘ _YYMMDDhhmmss’ where Y is year, M is month, and D is day, h is hour,
m is minute, and s is second. This format is used to ensure that no settings file is
overwritten, but does not contain any information about what unit the backup file
was created for. If the technician plans on saving the backup file for multiple units,
it is suggested that a new directory is created with the serial number of the unit as
the directory name.
[2] Restore
• To restore saved settings, insert the FAT32 formatted storage device into the USB
port on the backside of the unit. In order for the Zeus to detect saved settings file,
the desired directory must be placed in the base folder of the external storage
media. The unit will detect all settings files stored in the root directory, ensure
that the correct settings are selected using the [UP]/[DOWN] arrow keys before
loading. Press the [SET] key to load the selected file.
ADJUSTMENTS 6.4.
6.5.
 Loading...
