CassidaPRO Zeus: Service Manual
2018 Cassida Corporation. All rights reserved.
Rev: 09/05/2018
cassidapro.com/partner/
PBA REPLACEMENT 4.15.
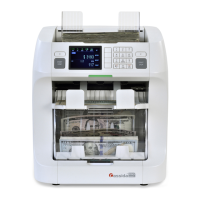
PBA_FRONT — HOPPER SENSOR CALIBRATION
When PBA-FRONT is replaced, Hopper sensor should be calibrated
1. Prepare a small sheet like a name card and attach black tape on it.
2. Go into Test Menu -> [1. Diagnosis] -> [7. Sensor Detail]
3. Place the sheet on the hopper
4. Adjust the variable resistor confirming the hopper diff is 3,000 to 4,000
ranges.
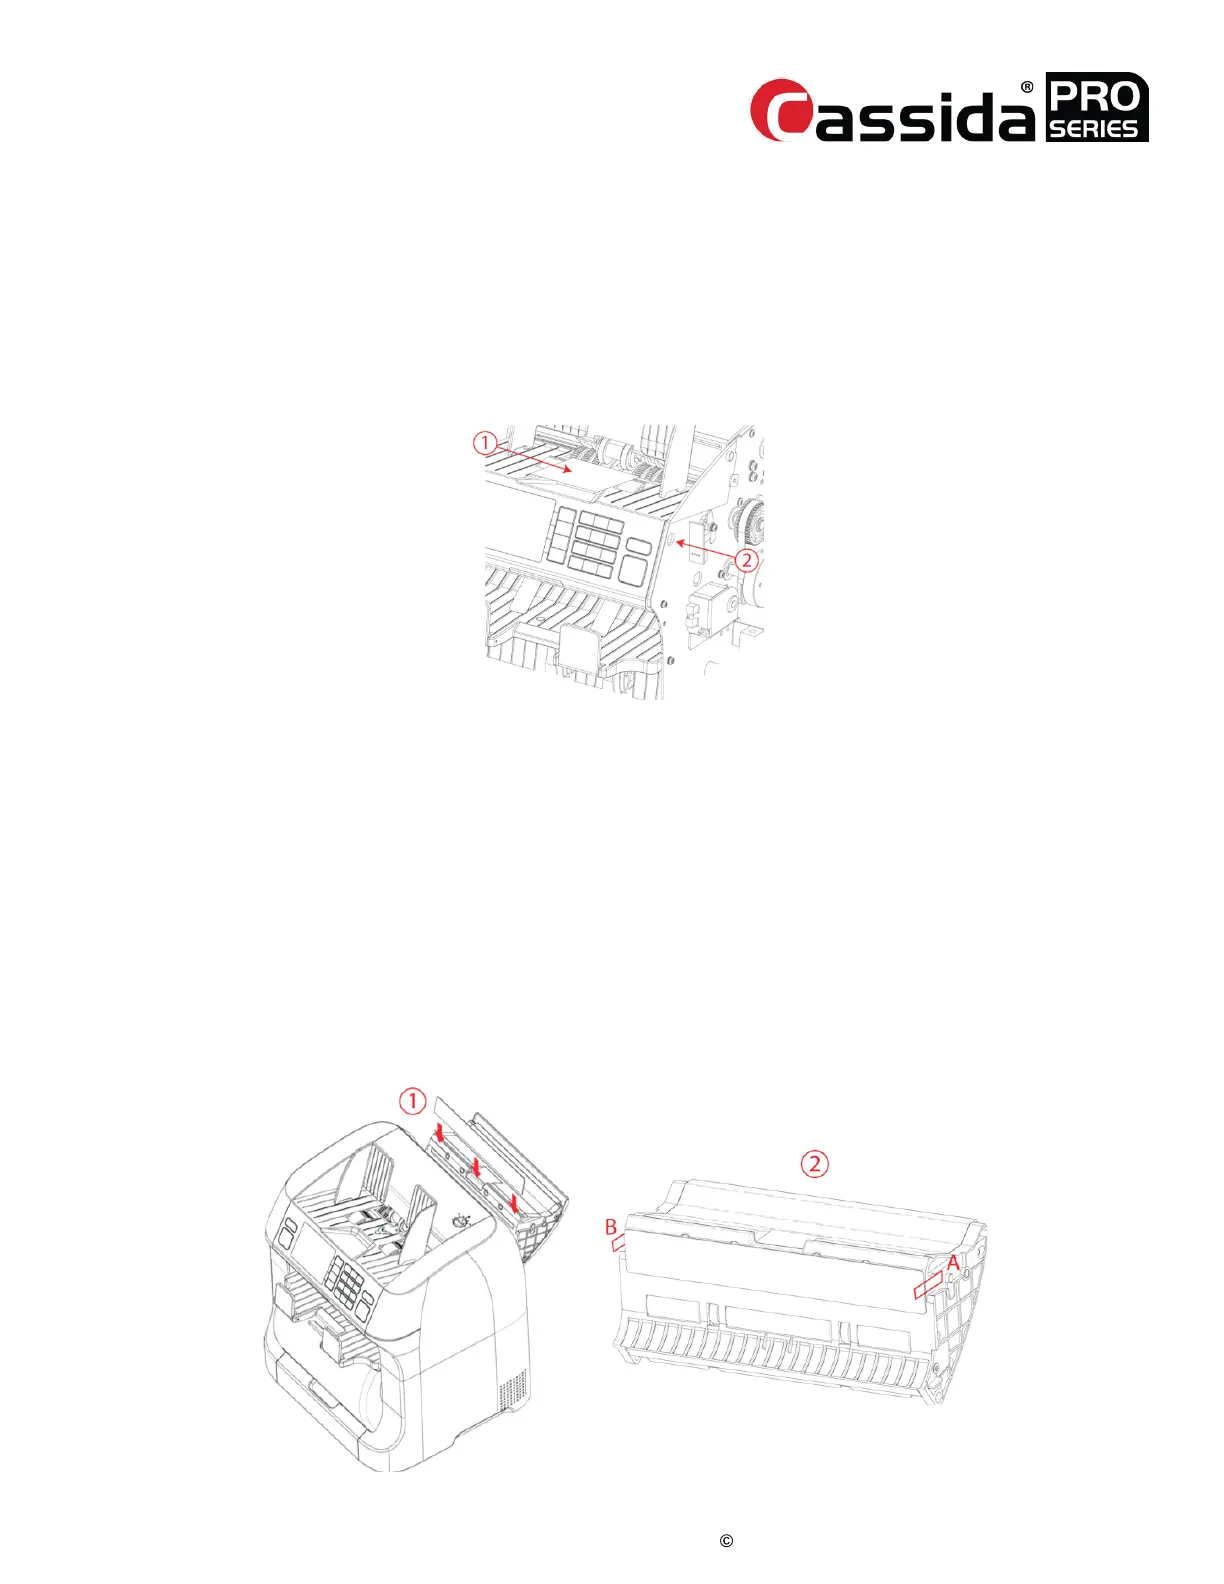
PBA_MAIN — CIS CALIBRATION
When the PBM_MAIN is replaced, the CIS sensor should be calibrated. (CIS should be
calibrated too when it is replaced with the new one.)
1. Go into Test Menu -> [3. Adjustment] -> [5. CIS Calibration (R)
2. Open the Upper door and attach the shading sheet referring to the below
figure.
3. Align the shading sheet to A and B sides. This sheet can be attached due to
magnetic.
4. Close the Upper door tightly and press [YES] to start calibration.
5. Open the Upper door and remove the shading sheet.
6. Close the Upper door tightly and go into [6. CIS calibration (T)] and press
[YES].
 Loading...
