Installation 2-7
3902 Service Delivery Switch Hardware Installation and Start-up Manual
009-3205-001 Standard Revision D
Copyright
©
2013-2015 Ciena
®
Corporation July 2015
Procedure 2-1
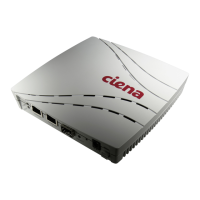
Mounting the 3902
Use the following procedure to mount the 3902.
Step Action
1 Remove the 3902 from the packaging and inspect the unit for damage.
Note: If damage is apparent, contact Ciena Customer Support to obtain an
RMA number, and ship the damaged unit back to Ciena for repair.
2 Do one of the following:
• If this is a desktop installation, place the unit on the installation surface.
The mounting portion of the installation is now complete.
• If this is a wall mount installation, proceed to step 3.
3 Using customer supplied mounting screws, drill holes and install the two
screws in the mounting surface so that they are 6.9 cm (2.7 inches) center to
center. The screws should be installed so that they protrude from the
mounting surface. The distance from the mounting surface to the top of the
screw head should be 0.6 cm (0.25 inches).
4 Orient the 3902 so that the faceplate is facing downward and then use the
keyhole slots on the bottom of the unit to hang the unit on the mounting
hardware.
You have mounted the 3902.