Installation 2-9
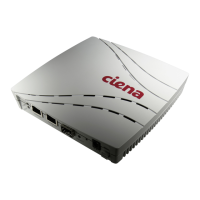
3902 Service Delivery Switch Hardware Installation and Start-up Manual
009-3205-001 Standard Revision D
Copyright
©
2013-2015 Ciena
®
Corporation July 2015
Procedure 2-3
Installing an SFP
The SFP is installed in the 1G port on the faceplate of the 3902.
Step Action
1 Hold the optic module by the sides and position it so that the label is facing
up and the 20-pin connector card (near the rear of the optic) is facing the
empty slot.
Note: If installed upside down, the SFP will only insert halfway into the slot.
Remove the SFP, turn it over, and reinstall. Do not forcibly insert an SFP.
2 Gently insert the pluggable module into the available slot until it seats
completely. Take care not to crush the side clips, if present.
Note: Certain types of SFP transceivers have small springs/clips on each
side, near the front (connector) end. These springs may catch on the SFP
cage during insertion, and prevent the full insertion of the optic. Take extra
care when installing these types of optics. If any resistance is encountered do
not force the optic into the slot. Bent springs may be carefully reformed with
needle nose pliers.
3 Gently pull on the SFP to make sure that it has seated properly.
You have now installed the SFP.
CAUTION
Optic operation should be verified by observing the
status LEDs. Do not look into the laser to verify
operation.
CAUTION
This is a class 1 laser product. Only optics that have
been qualified by Ciena should be used in this product.
The list of supported optics is included in Packet
Networking Transceivers Reference (009-2011-602).
These optics have been demonstrated to meet Class 1
eye safety levels by a Nationally recognized
Authority(s) such as the Food and Drug
Administration’s 21CFR1040 Laser Energy Source, UL
60950 Information Technology Equipment and
European norms EN60825-1 and EN60825-2. Failure
to use laser transceivers which meet these standards
could result in eye damage to users or service
personnel working around the equipment.