2-8 Installation
3902 Service Delivery Switch Hardware Installation and Start-up Manual
009-3205-001 Standard Revision D
Copyright
©
2013-2015 Ciena
®
Corporation July 2015
Procedure 2-2
Installing Power to the 3902
Use the following procedure to connect power to the 3902.
Step Action
1 Remove the power supply from the packaging and inspect the unit for
damage.
Note: If damage is apparent, contact Ciena Customer Support to obtain an
RMA number, and ship the damaged unit back to Ciena for repair.
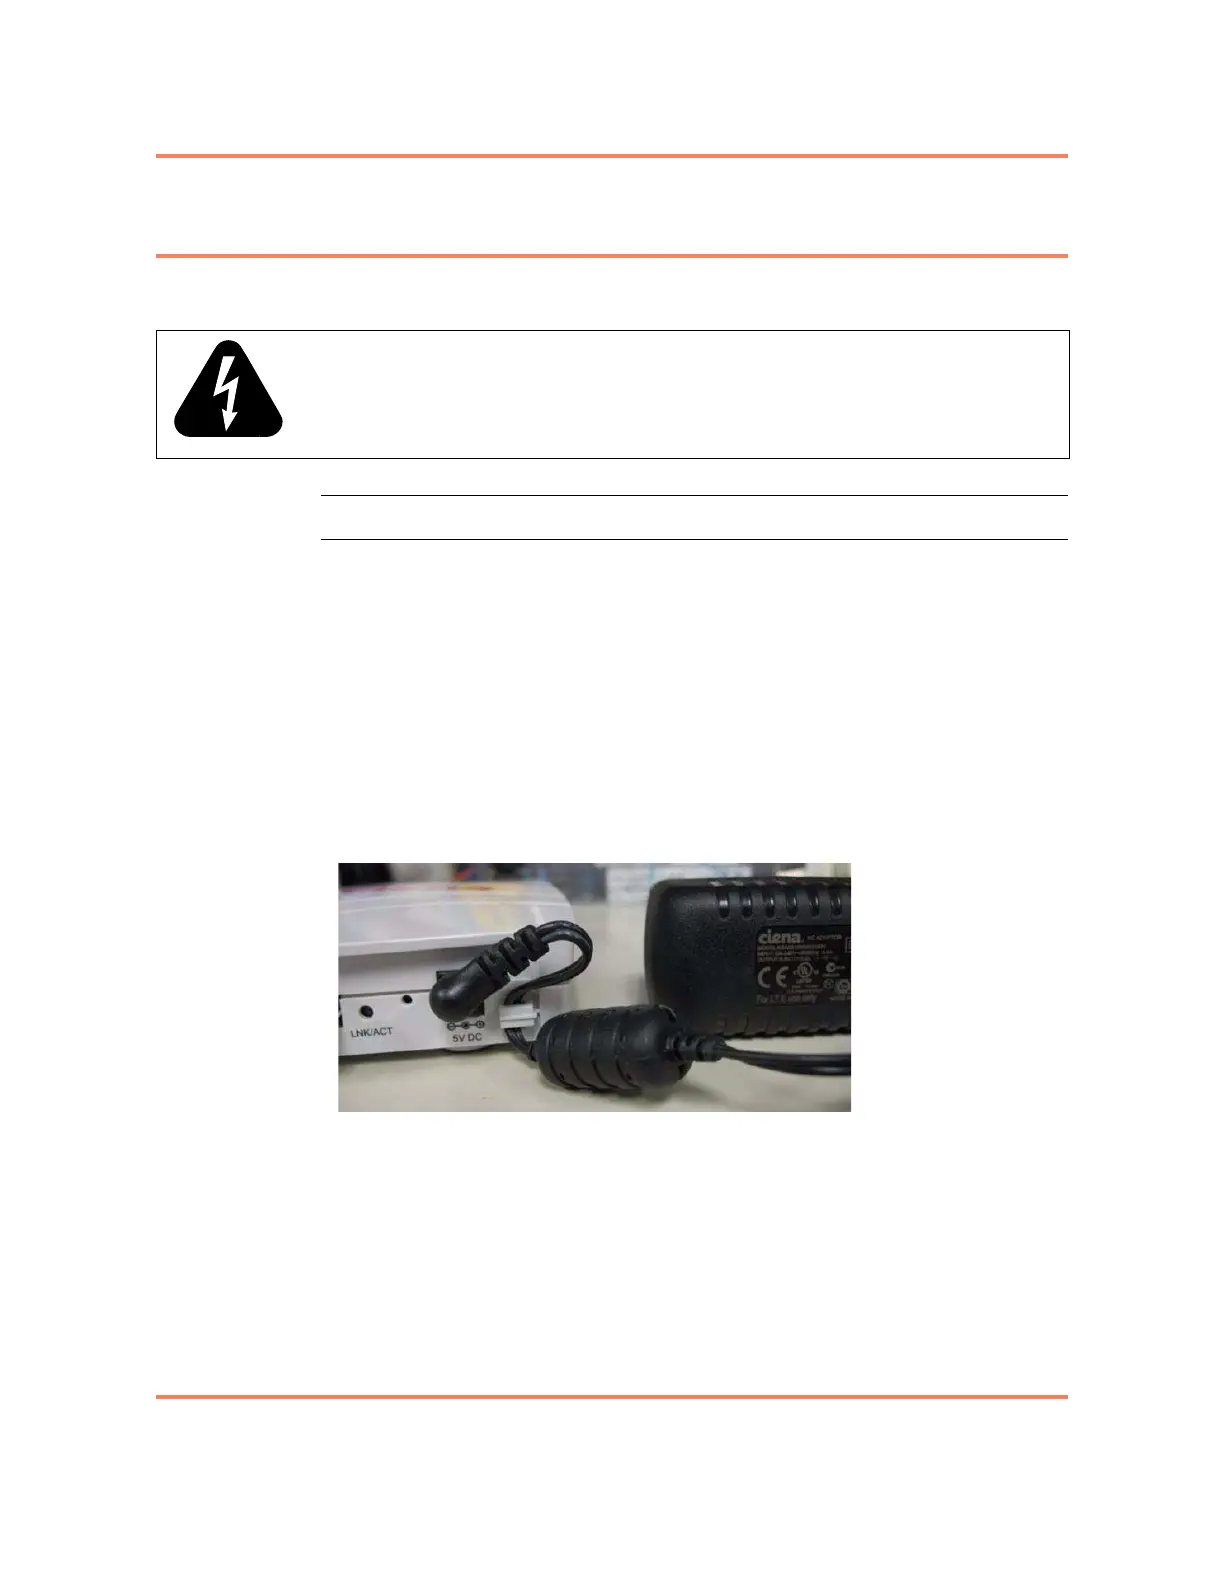
2 Take the modular jack end of the power cable and snap the cable into the
retention clip to the right of the power jack. Approximately 1.9 cm (0.75
inches) of cable should extend from the clip.
3 Plug the modular jack into the plug on the right side of the faceplate of the
3902 labeled 5V DC. See Figure 2-4.
Figure 2-4
Installing the Power Cord
4 Dress the power cable as appropriate for your site.
Note: In wall mount installations it may be useful to secure the power cable
and or the power supply to the mounting surface.
5 Plug the power supply into a power source.
You have installed power to the 3902. The 3902 will now turn on.
WARNING: The AC socket outlet shall be installed near the equipment and
shall be easily accessible.