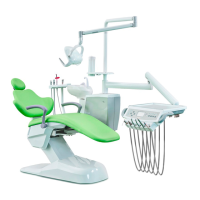
X1 Series Dental Unit -Operating Manual
Add: Building 6-1,Nansha Industrial Village Jiangli North Rd,Danzao Town, Nanhai District,Foshan ,Guangdong,China
www.cingol.com
3.4.Installation and setting
3.4.1 Installation conditions
To make sure dental unit work well the conditions of air, water, electricity for the
device should be:
Air supply&air pressure: 0.5 MPa--0.8MPa
Water supply&Water pressure: 0.2MPa--0.4MPa
Power supply: AC 230±10% /AC 110±10% 50Hz/60Hz
( the rated voltage according to different country refers to the order)
3.4.2 Preparation for installation
Decide the suitable location of installation place according to the elements like
general situation, day lighting,convenience for use. Where should be clean, dry,
well ventilated,cool,and the floor must be solid,firm and flat.what’s more,the
installation room should be wide enough for the arm stretch. After decide the
location, you can connect the wires and tubes from outside ends as below:
3.4.3 Arrangement of connecting water in/out, electricity,
compressor air supply
Get the things below ready before installation
A) End of power wire should stretch over 80mm from ground.
B) Adopt the pipe of water or air with width 22 mm
C) Outlet pipe of water should have internal diameter 40mm, stretch over
50mm from ground
3.5 Steps of installation
A)Patient chair installation
Fit the chair base at the planned place. If the installation floor is not flat
enough,user can fix the five pieces of enclosed leveling screws(M12*15) into
the five screw holes (M12),adjust the height of five screws to make sure the
dental unit stand firmly onto the ground.and then fix four pieces of expansive
screws into the ground, to make sure the device works stably and quietly.
B)Mount the patient chair cushion
Stretch the backrest to the end first,fix two flat head screws into screw holes of
the seat through the screw slots of the base frame,adjust the seat board to best
location to make sure the bottom surface touch firmly with the metal frame.
Finally fix the rest two screw firmly.
C)Outlet unit installation
Seal this device’s outlet tubes with the inlet tubes from outside tightly, thus to
avoid the water and air input or output leak outside. The outlet unit may set in
the frame base or out side of the base, it depends on your choice. Open the
cover you can find fix the outlet tubes.
D)Tubes connection
You must get rid of the water and air inside this dental unit,as well as the waste,
note to get the tubes connected tightly with outside tubes.
E)Dental lamp installation
Pass the power wire through the supporting arm inside,and connect it with the
wire from pillar bases of the dental unit,put the clasp end into the pillar and then
fix the supporting pillar onto the dental unit,(mind not to damage the power wire
when connecting wire) Pass the power wire from the pillar into the cover ring of
dental to fit together with the wire of dental lamp.insert the connective pivot into