4-3
Cisco ASA 5550 Getting Started Guide
78-17644-01
Chapter 4 Connecting Cables to Network Interfaces
Connecting Interface Cables
Step 3 Connect to the Console port.
a. Before connecting a computer or terminal to any ports, check to determine the
baud rate of the serial port. The baud rate must match the default baud rate
(9600 baud) of the Console port of the adaptive security appliance.
Set up the terminal as follows: 9600 baud (default), 8 data bits, no parity, 1 stop
bits, and Flow Control (FC) = Hardware.
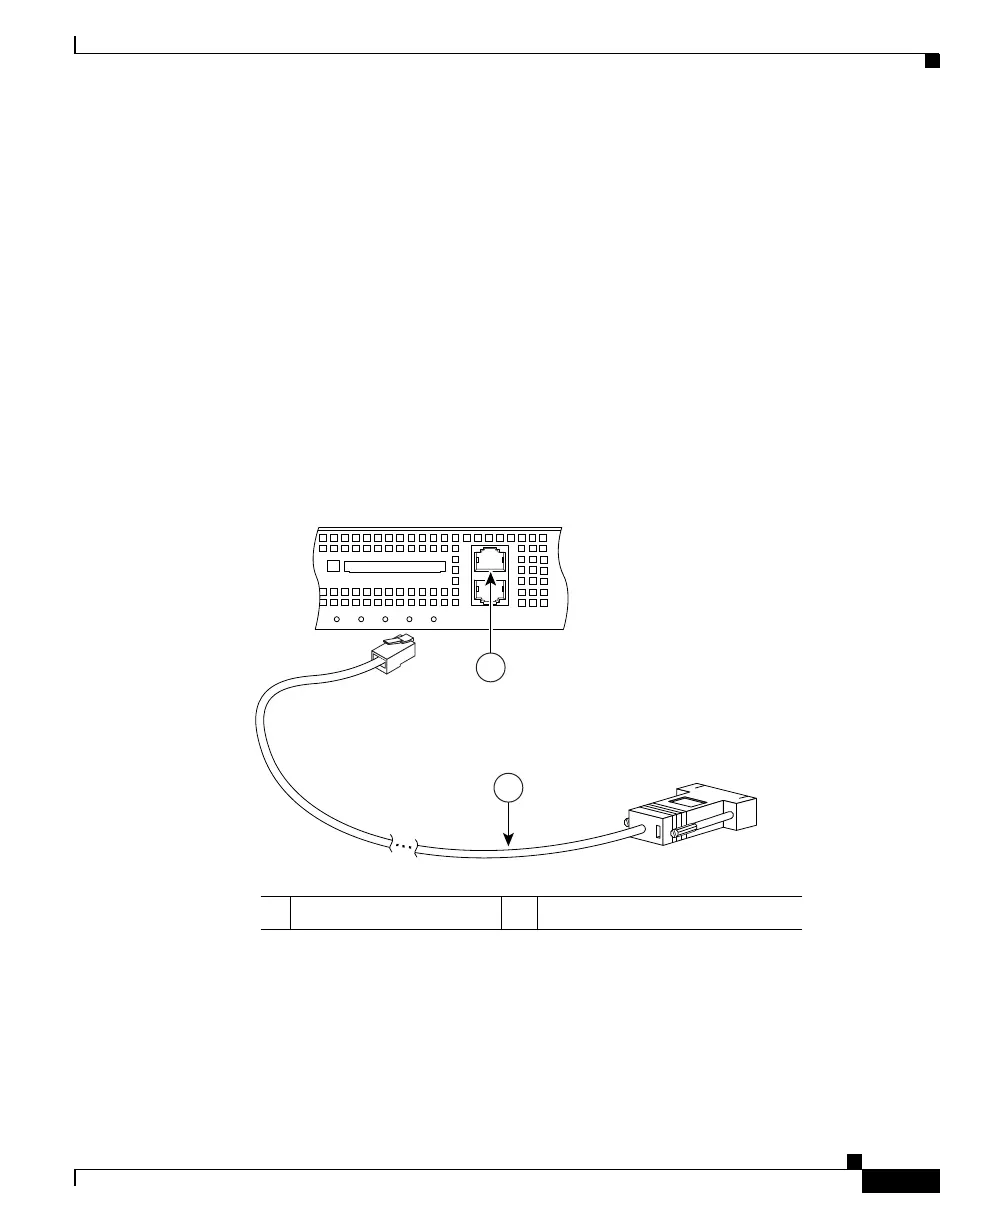
b. Locate the serial console cable, which has an RJ-45 connector on one end and
a DB-9 connector on the other end for the serial port on your computer.
c. Connect the RJ-45 connector to the Console port of the adaptive security
appliance as shown in Figure 4-2.
d. Connect the DB-9 connector to the console port on your computer.
Figure 4-2 Connecting the Console Cable
Step 4
Connect to the Auxiliary port (labeled AUX).
a. Locate the serial console cable, which has an RJ-45 connector on one end and
a DB-9 connector on the other end for the serial port on your computer.
b. Connect the RJ-45 connector of the cable to the Auxiliary port (labeled AUX)
on the adaptive security appliance, as shown in Figure 4-3.
1 RJ-45 Console port 2 RJ-45 to DB-9 console cable
126982
FLASH
CONSOLE
AUX
POWER
STATUS
FLASH
VPN
ACTIVE
2
1
 Loading...


