In an HA environment, when both the management centers are behind a NAT, you can
register the threat defense without a host IP or name in the primary management center.
However, for registering the threat defense in a secondary management center, you must
provide the IP address or hostname for the threat defense.
Note
• Display Name—Enter the name for the threat defense as you want it to display in the management center.
• Registration Key—Enter the same registration key that you specified in the threat defense initial
configuration.
• Domain—Assign the device to a leaf domain if you have a multidomain environment.
• Group—Assign it to a device group if you are using groups.
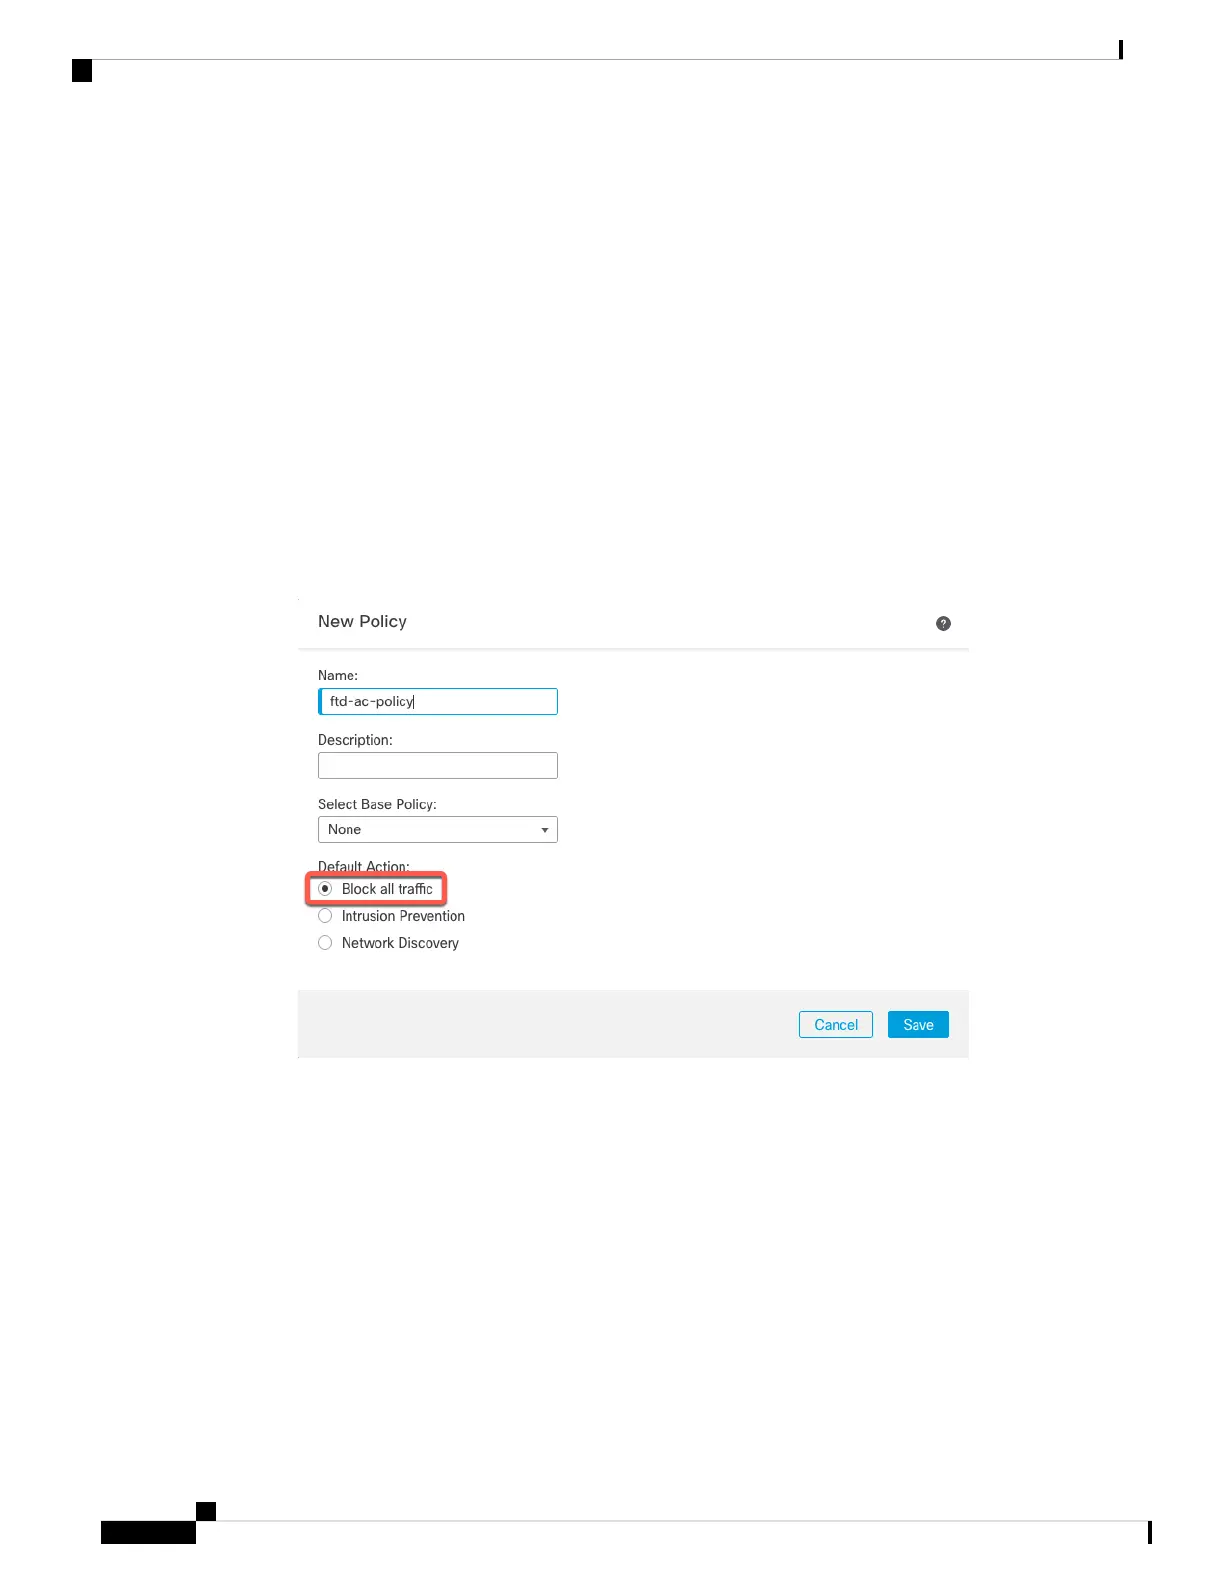
• Access Control Policy—Choose an initial policy. Unless you already have a customized policy you
know you need to use, choose Create new policy, and choose Block all traffic. You can change this
later to allow traffic; see Allow Traffic from Inside to Outside, on page 39.
Figure 52: New Policy
• Smart Licensing—Assign the Smart Licenses you need for the features you want to deploy. Note: You
can apply the Secure Client remote access VPN license after you add the device, from the System >
Licenses > Smart Licenses page.
• Unique NAT ID—Specify the NAT ID that you specified in the threat defense initial configuration.
• Transfer Packets—Allow the device to transfer packets to the management center. When events like
IPS or Snort are triggered with this option enabled, the device sends event metadata information and
packet data to the management center for inspection. If you disable it, only event information will be
sent to the management center, but packet data is not sent.
Step 3 Click Register, and confirm a successful registration.
Cisco Firepower 2100 Getting Started Guide
78
Threat Defense Deployment with a Remote Management Center
Add a Device to the Management Center Manually