37-35
Cisco Security Appliance Command Line Configuration Guide
OL-10088-01
Chapter 37 Configuring WebVPN
WebVPN End User Setup
Customizing the WebVPN Login Page
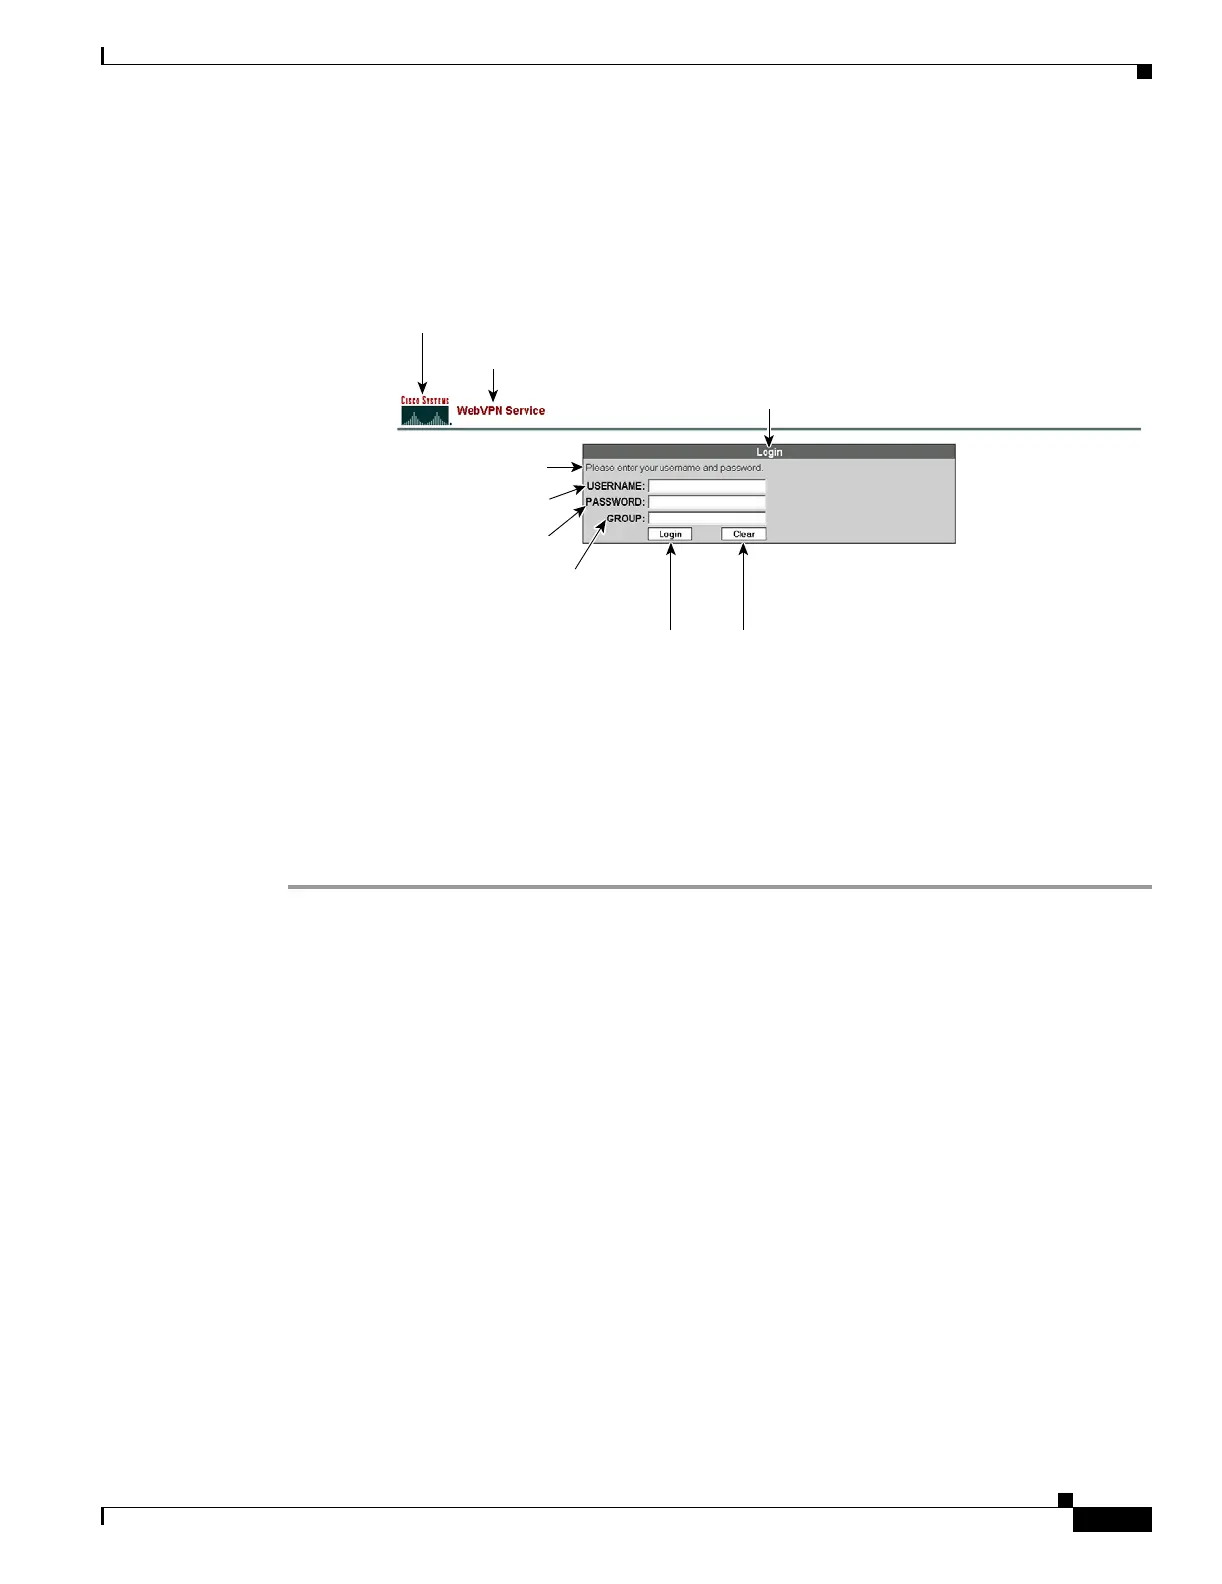
Figure 37-10 shows the WebVPN Login page and associated CLI commands that you can use to
customize the page.
Figure 37-10 WebVPN Login Page and Associated CLI Commands
The following procedure guides you through customizing every element of the WebVPN Login page
using CLI commands and includes examples of the commands:
Step 1 Enter WebVPN customization mode using the customization command from webvpn mode:
hostname(config)# webvpn
hostname(config-webvpn)# customization cisco
hostname(config-webvpn-custom)#
Step 2 Change the CSS style of the WebVPN Login page using the page style command:
[no] page style value
hostname(config-webvpn-custom)# page style font-size:large
Step 3 Change the title using the title command:
[no] title {text | style} value
hostname(config-webvpn-custom)# title text Cisco WebVPN Service
Step 4 Change the logo with a logo residing in flash memory using the logo command:
[no] logo {none | file {path value}}
To disallow a logo and prevent inheriting a logo, use the none option to set a null value.
hostname(config-webvpn-custom)#logo file disk0:cisco_logo.gif
Step 5 Change the title of the Login box using the login-title command:
[no] login-title {text | style} value
logo {none | file {
path value
}}
title {text | style}
value
username-prompt {text | style}
value
password-prompt {text | style}
value
group-prompt {text | style}
value
login-button {text | style}
value
clear-button {text | style}
value
login-title {text | style}
value
page style
value
148904
login-message {text | style}
value

 Loading...


