Step 12 Enter the Control Industrial Protocol (CIP) VLAN settings (optional):
• CIP VLAN: Enter the VLAN on which CIP will be enabled. The CIP VLAN can be the same as the management
VLAN, or you can isolate CIP traffic on another VLAN that is already configured on the switch. The default CIP
VLAN is VLAN 1. Only one VLAN on a switch can have CIP enabled.
• IP Address: Enter the IP address for the CIP VLAN. If the CIP VLAN is different from the management VLAN,
you must specify an IP address for the CIP VLAN. Make sure that the IP address that you assign to the switch is
not being used by another device in your network.
• Subnet Mask: Select a mask from the drop-down list.
For more information about the CIP VLAN settings, click Help on the tool-bar.
Step 13 Optional Settings:
You can enter the optional information now, or enter it later by using Device Manager. For more information about
the Express Setup fields, see the on-line help for the Express Setup window.
Click Submit to save your changes and to complete the initial setup.
For more information about the optional settings, click Help on the tool-bar.
After you click Submit, these events occur:
• The switch is configured and exits Express Setup mode.
• The browser displays a warning message and tries to connect with the earlier switch IP address.
• Typically, connectivity between the computer and the switch is lost because the configured switch IP address is
in a different subnet from the IP address on the computer.
Step 14 Turn off DC power at the source, disconnect all cables to the switch, and install the switch in your network. See
Management Options, on page 13 for information about configuring and managing the switch.
Step 15 If you changed the static IP address on your computer in Step 1, change it to the previously configured static IP address.
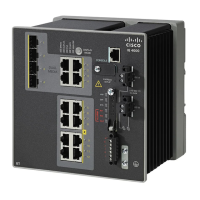
The screen capture below shows an IE 4000 series switch, but the functionality is identical for the IE 4010.
Note
Cisco IE 4010 Switch Hardware Installation Guide
68
Configuring the Switch with the CLI Setup Program
Express Setup Procedure
 Loading...