● If only AUX IN is used, press the AUX IN/OUT SELECT button
(#28) until the IN light (#27). Listen to the headset audio input
as you adjust the INPUT control (#26) below the light to the
desired level.
● If only AUX OUT is used, press the AUX IN/OUT SELECT
button (#28) until the OUT light (#29) comes on. Check the
audio level on the auxiliary equipment, and adjust the
OUTPUT control (#30) to the desired level.
● If the auxiliary equipment requires two-way communication, have someone listening at the auxiliary
unit. Press the AUX IN/OUT SELECT button (#28) until both the IN and OUT lights (#s 27 and 29) go
on. While speaking into your headset microphone, adjust the OUT control (#30) above the light to the
desired listening level at the auxiliary unit. Listen to the audio input in your headset as you adjust the
INPUT control (#26) below the light to the desired level.
Auxiliary Controls and Indicator Lights:
● The SELECT button on the right (#28) is used to select AUX IN (audio from auxiliary equipment
connected to the base station), AUX OUT (audio to the auxiliary equipment from the ISO channel of the
beltpack, all-in-one headset or local headset.
● The IN and OUT lights come on green to indicate the selection.
● The INPUT and OUTPUT controls adjust auxiliary inbound and outbound audio levels.
● The SELECT button on the left (#25) is used to select IC1 or IC2 or both as the destination for AUX
IN audio. The IC1 and/or IC2 INPUT ASSIGN lights come on green to indicate the selection as the
destination for AUX IN audio.
NOTE: If you are not connecting other equipment, go on to System Operation, section 3, page 14.
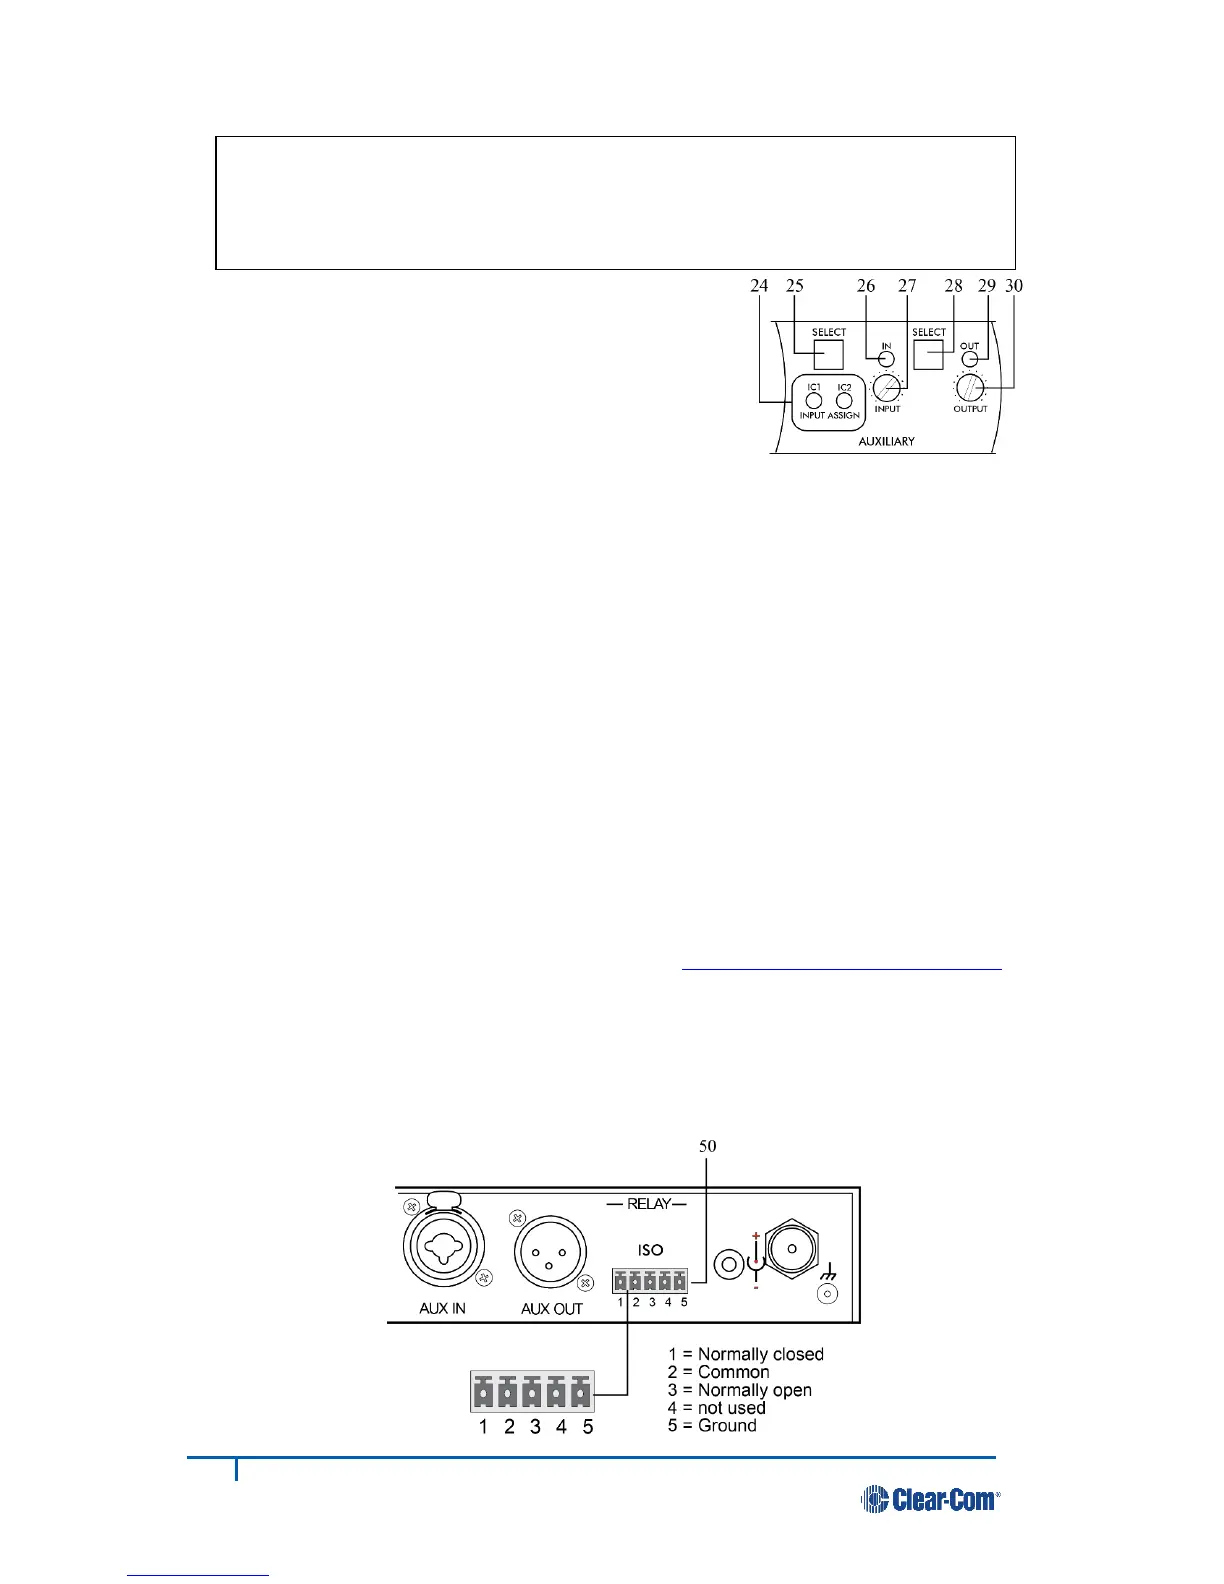
2.6 ISO Relay
During ISO communication, a relay closure is provided. This can be used for tasks such as keying a long
range radio or triggering an alert light. It can be activated from a beltpack, all-in-one headset or a local
headset.
The AUXILIARY SELECT button (#25) is used to select IC1 or IC2 or both as the
destination for AUX IN audio. The IC1 and/or IC2 INPUT ASSIGN lights (#24) come on
green to indicate the selection as the destination for AUX IN audio. If neither is selected,
AUX IN audio will not be routed to the beltpack or all-in-one headset. The AUX IN light must
be lit for the INPUT ASSIGN SELECT function to operate.
 Loading...