3 System Operation
This chapter describes how to operate the Base Station, Beltpack or All-In-One Headset.
3.1 Base Station Operation
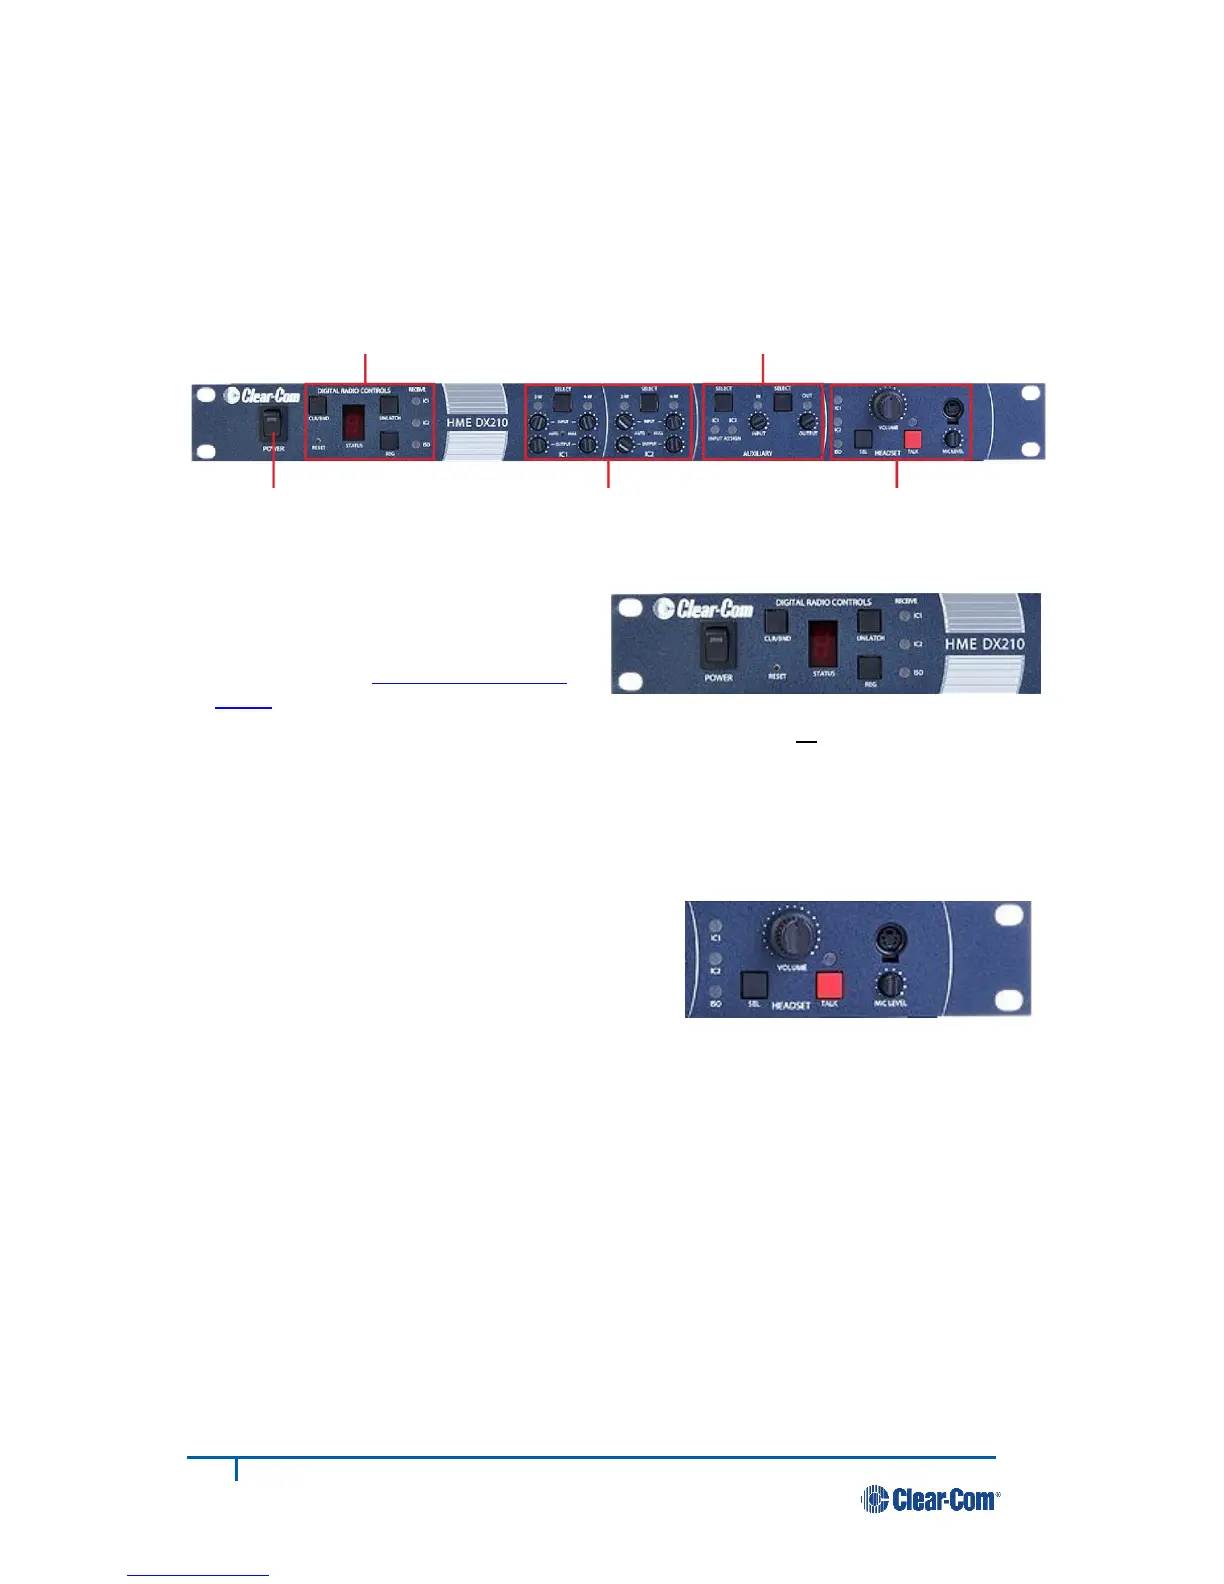
3.1.1 Digital Radio Controls and Indicator Lights
● The CLR/BND button, RESET button,
STATUS indicator and REG button are used
when registering beltpacks and all-in-one
headsets. Refer to Registration procedure,
page 9.
● The UNLATCH button is used by the base station operator to unlatch all beltpacks and all-in-one
headset transmitters.
● The RECEIVE IC1, IC2 (Intercoms) and ISO (Isolate) lights indicate whether reception from a
Beltpack or all-in-one headset is on IC1, IC2 or ISO.
3.1.2 Local Headset Connector, Controls and Indicator Lights
● The SEL (select) button is used to select
communication from the local headset to IC1, IC2,
IC1 & IC2 or ISO.
● The IC1, IC2, IC1 & IC2 or ISO indicator light will be lit
for the selection you made.
● IC1 and IC2 communication will be heard by wireless users on the respective channel, as well as
users wired into 2-W and 4-W connections.
● ISO is heard in both wireless channels, and AUX OUT if activated.
NOTE: When the ISO button is pressed, ISO RELAY (#50) is activated.
● The TALK button is used for communication from the local headset to the selected channel.
For open communication, press and release the TALK button quickly to “latch on”. To “latch off,”
press and release the button again quickly.
For momentary communication, press and hold the TALK button for more than one second. In this
mode, the selected channel will remain open only as long as you are pressing the TALK button. The
TALK light indicates that the TALK mode is active via the local headset.
● Use the VOLUME control to adjust the output to the local headset earpiece.
● Use the MIC LEVEL control to adjust the audio level from the local headset microphone.
 Loading...