Data creazione 10/09/03 DS03I009GB--00 Pagina 17 di 59
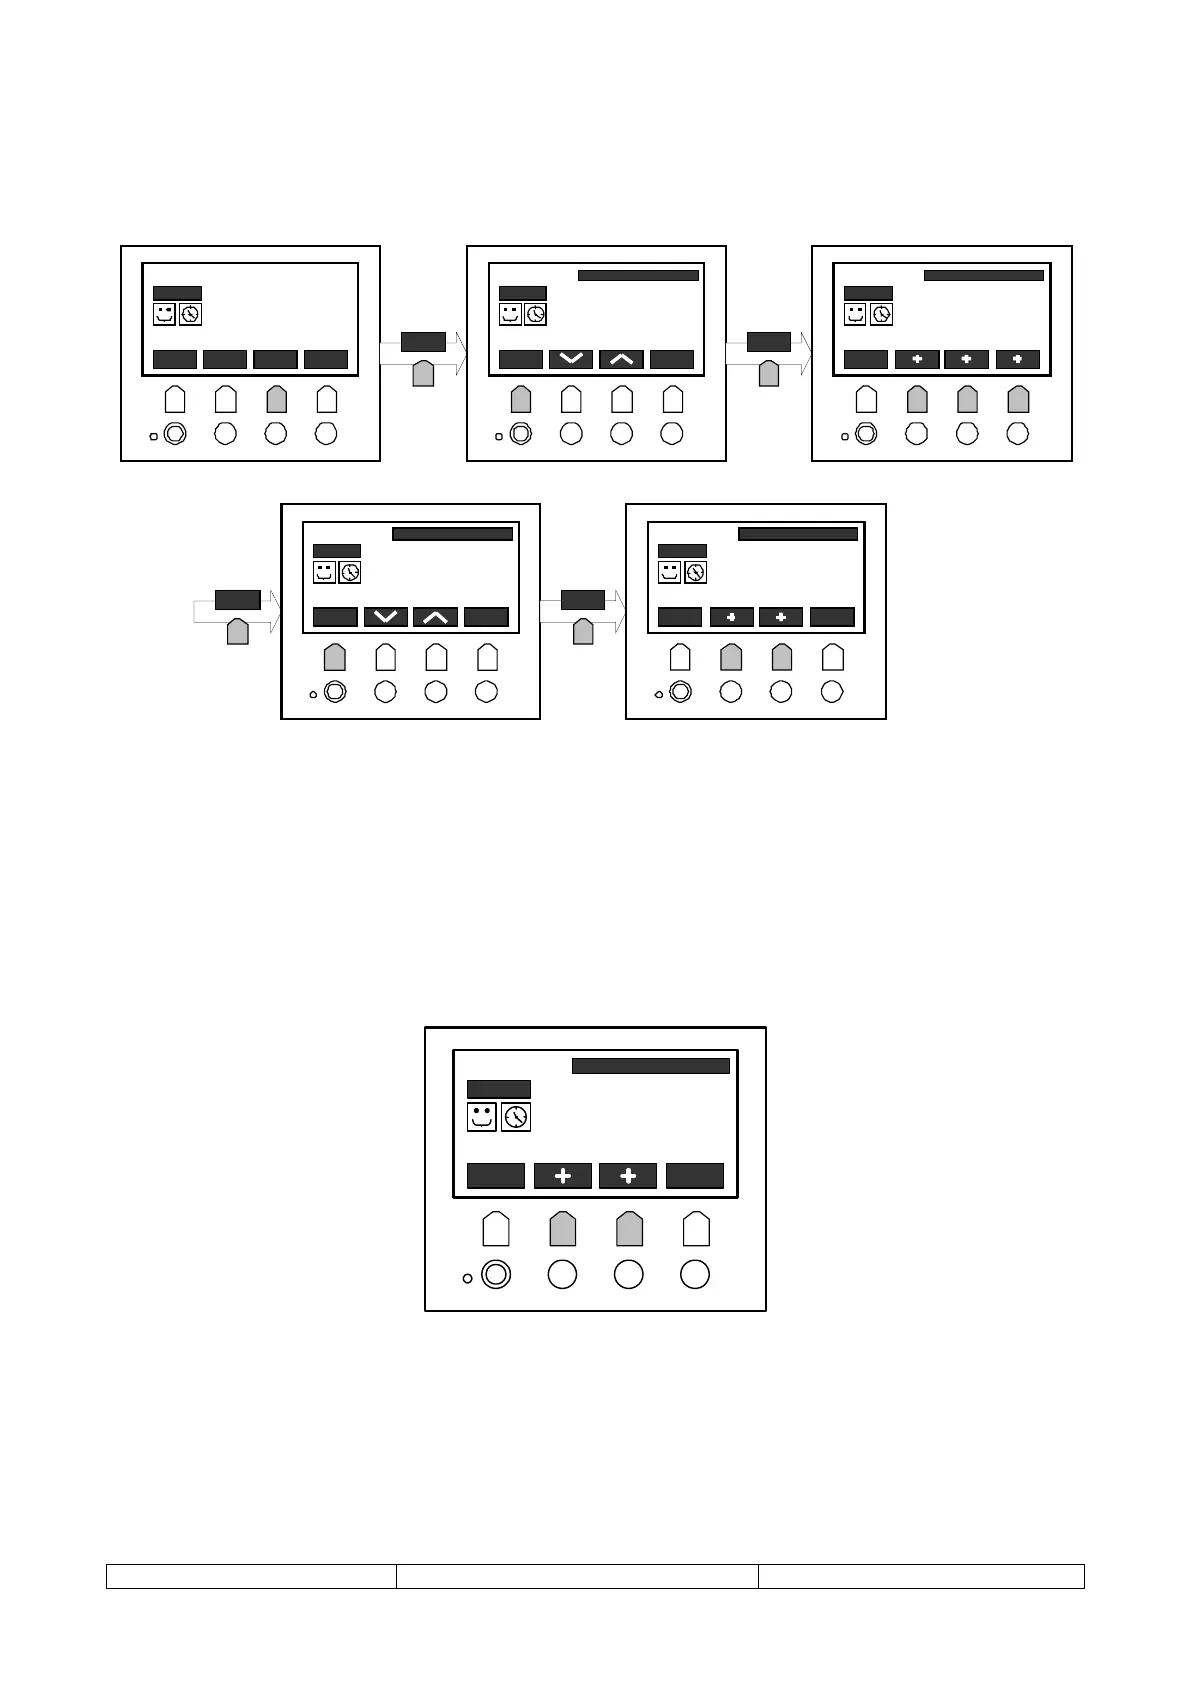
LOCAL INTERFACE ADDRESS
By definition, it has been established that the LOCAL KEYPAD is recognised by the local network layout as
the module with address = 26. To initialise the local interface, use the screens as highlighted below:
F1 F4 F3 F2
?
ESC
I
HOME
ALARM MODE SETUP STATE
ON
C O O L
STEP:
03 / 12
15 / 02 / 03 08:03:51
7.
0
°C
SET
9.
3
°C
OUT
12.
2
°C
IN
SETUP
F3
F1 F4F3F2
?
ESC
I
HOME
ENTER
ON
C O O L
STEP:
03 / 12
S E T U P
PARAMETERS
SCHEDULING
CLOCK SETUP
ID Tast-Cen
>PASSWORD
ENTER
F1
F1 F4F3 F2
?
ESC
I
HOME
ENTER
ON
C O O L
STEP:
03 / 12
P A S W O R D
0 0 0
ENTER
F3
F1 F4 F3 F2
?
ESC
I
HOME
ENTER
ON
C O O L
STEP:
03 / 12
S E T U P
PARAMETERS
SCHEDULING
CLOCK SETUP
>ID Tast-Cen
PASSWORD
ENTER
F1
F1 F4F3F2
?
ESC
I
HOME
ENTER
ON
C O O L
STEP:
03 / 12
A D D R E S S E S
Tast. 26
C
ent. 25
Figure 2
NOTE
Figure 2 shows how the address of the local keypad requires a password (known by the Clivet service
centres).
REMOTE INTERFACE ADDRESS
By definition, it has been established that the REMOTE KEYPAD is recognised by the local network layout
as the module with address = 27.
Follow the instructions indicated in Figure 2, and then at the end set the address as shown in Figure 3
F1 F4F3F2
?
ESC
I
HOME
ENTER
ON
C O O L
STEP:
03 / 12
A D D R E S S E S
Tast. 27
C
ent. 25
Figure 3
NOTE
Figure 2 shows how the address of the local keypad requires a password (known by the Clivet service
centres).