EXTRAORDINARY MAINTENANCE WORK
REPLACING THE SQUEEGEE BODY RUBBER BLADES
The careful cleaning of the whole vacuum unit ensures better drying and cleaning of the oor as well as a longer vacuum motor life.
To carry out the cleaning of the squeegee body, proceed as follows:
1. Take the machine to the designated maintenance place.
NOTE: the place designated for this operation must comply with current environmental protection regulations.
2. Make sure the machine is in a safe condition (read “MACHINE SAFETY”).
CAUTION: users are advised to always wear protective gloves, to avoid the risk of serious injury to hands.
3. Stand at the back of the machine.
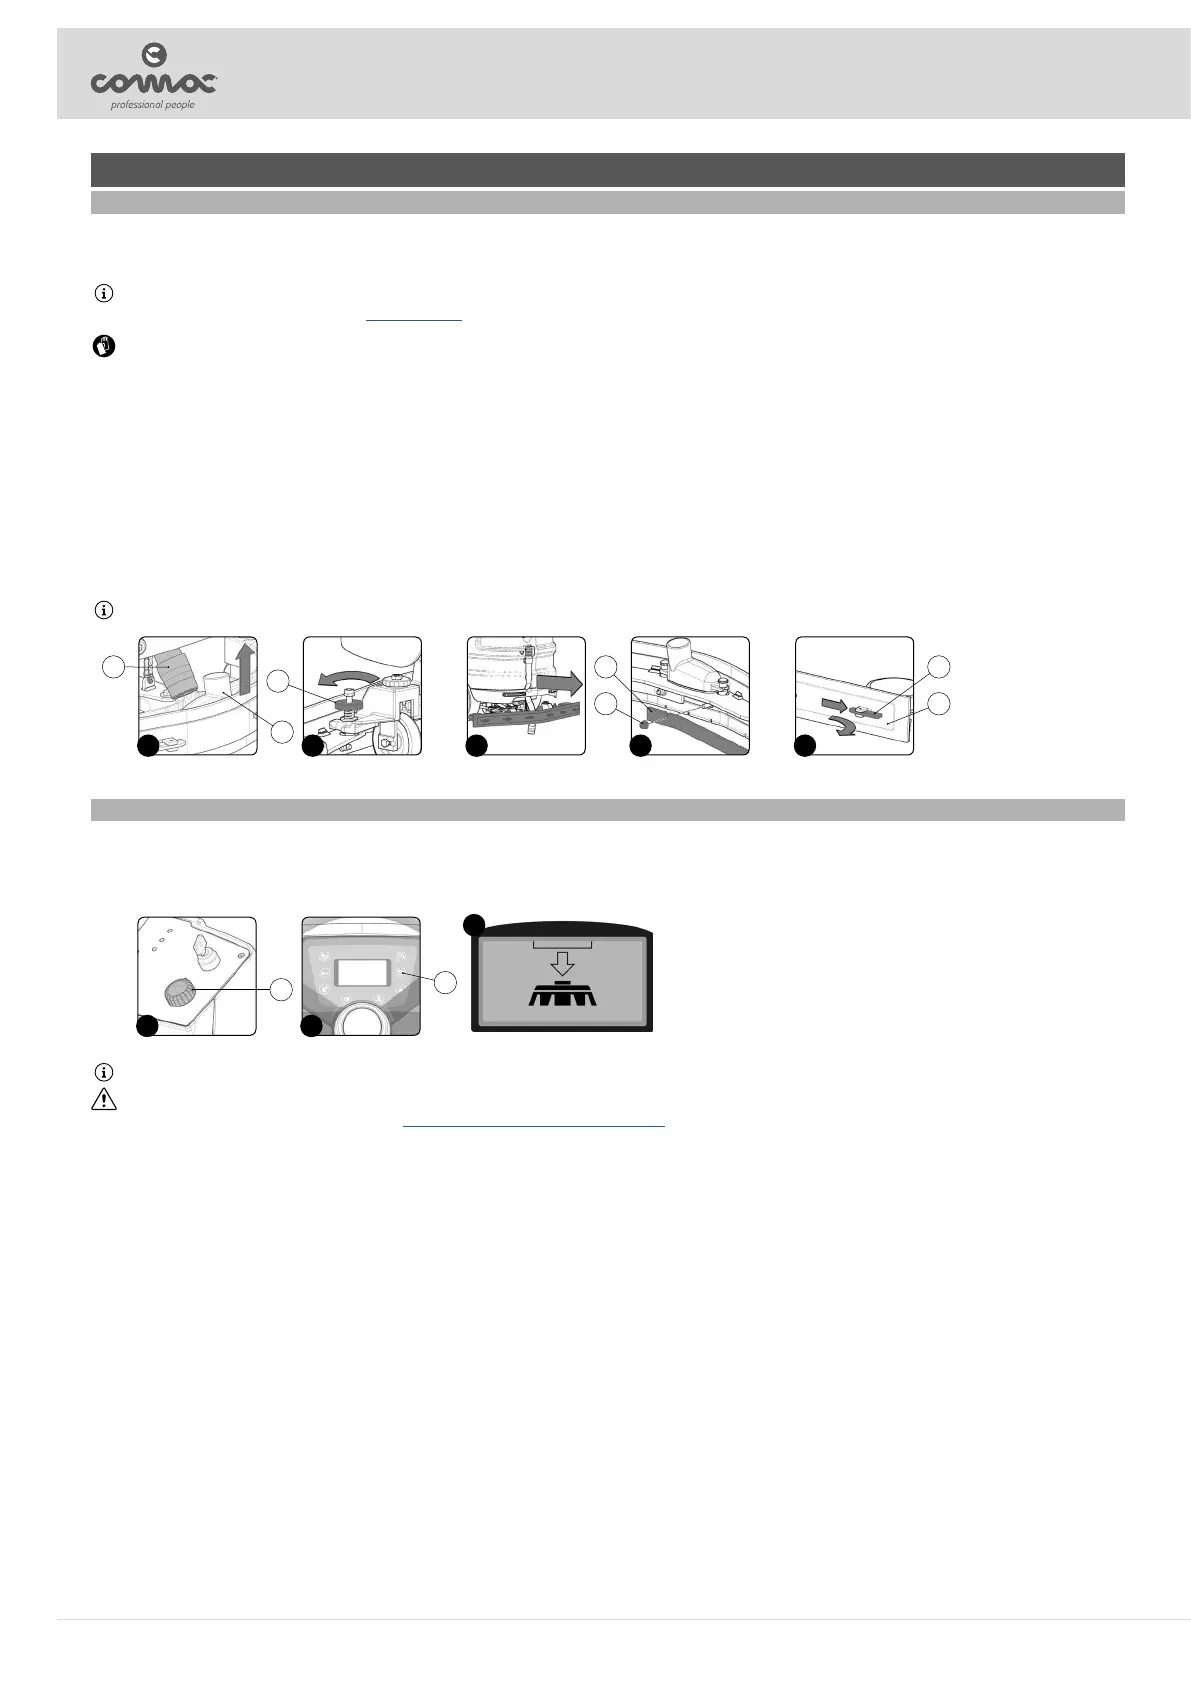
4. Remove the vacuum hose (1) from the sleeve in the vacuum nozzle (2) (Fig. 1).
5. Unscrew the knobs (3) in the squeegee body pre-assembly (Fig. 2).
6. Remove the squeegee body from the slits in the squeegee connector (Fig. 3).
Proceed as follows for replacing the front rubber blade of the squeegee body:
7. Using the appropriate equipment (not present in the packaging of the machine), remove the nuts (4) that x the rubber blades (5), then remove the rubber blades (Fig. 4).
8. Remove the worn front rubber blade and replace it with the new one.
9. Repeat the operations in reverse order to reassemble all the parts.
Proceed as follows for replacing the rear rubber blade of the squeegee body:
10. Using the appropriate equipment (not present in the packaging of the machine), turn the rubber blade retainer (6) that x the rubber blades (7), then remove the rubber blades (Fig. 5).
11. Remove the worn rear rubber blade and replace it with the new one.
12. Repeat the operations in reverse order to reassemble all the parts.
N.B.: Before returning to work, adjust the squeegee body, read paragraph “SQUEEGEE BODY ADJUSTMENT”.
1
2
1
2 3
3
4
5
4
5
6
7
REPLACING THE BRUSH HEAD BODY BRUSHES
To replace the brush head brushes, proceed as follows:
1. Take the machine to the designated maintenance place.
2. Select the “TRANSFER” function using the knob (1) (Fig. 1).
3. When the button (2) on the control panel (Fig. 2) is pressed for the rst time, the conrmation request symbol (Fig. 3) will appear in the control display.
4. Pressing the button (2) again will activate the brush release function.
N.B.: Once the release sequence has been activated, it is not possible to activate other functions or move the machine.
CAUTION: During this operation, check there are no people or objects near the brush.
5. Replace the worn brush with the new one, read paragraph “ASSEMBLING THE BRUSH HEAD BODY BRUSHES”.
2
3
2
1
1
26