ADJUSTMENT INTERVENTIONS
ADJUSTING THE SQUEEGEE BODY'S RUBBER BLADES
The careful adjustment of the squeegee body rubber blades guarantees better cleaning of the oor.
To adjust the squeegee body blades, proceed as follows:
1. Sit on the driver’s seat.
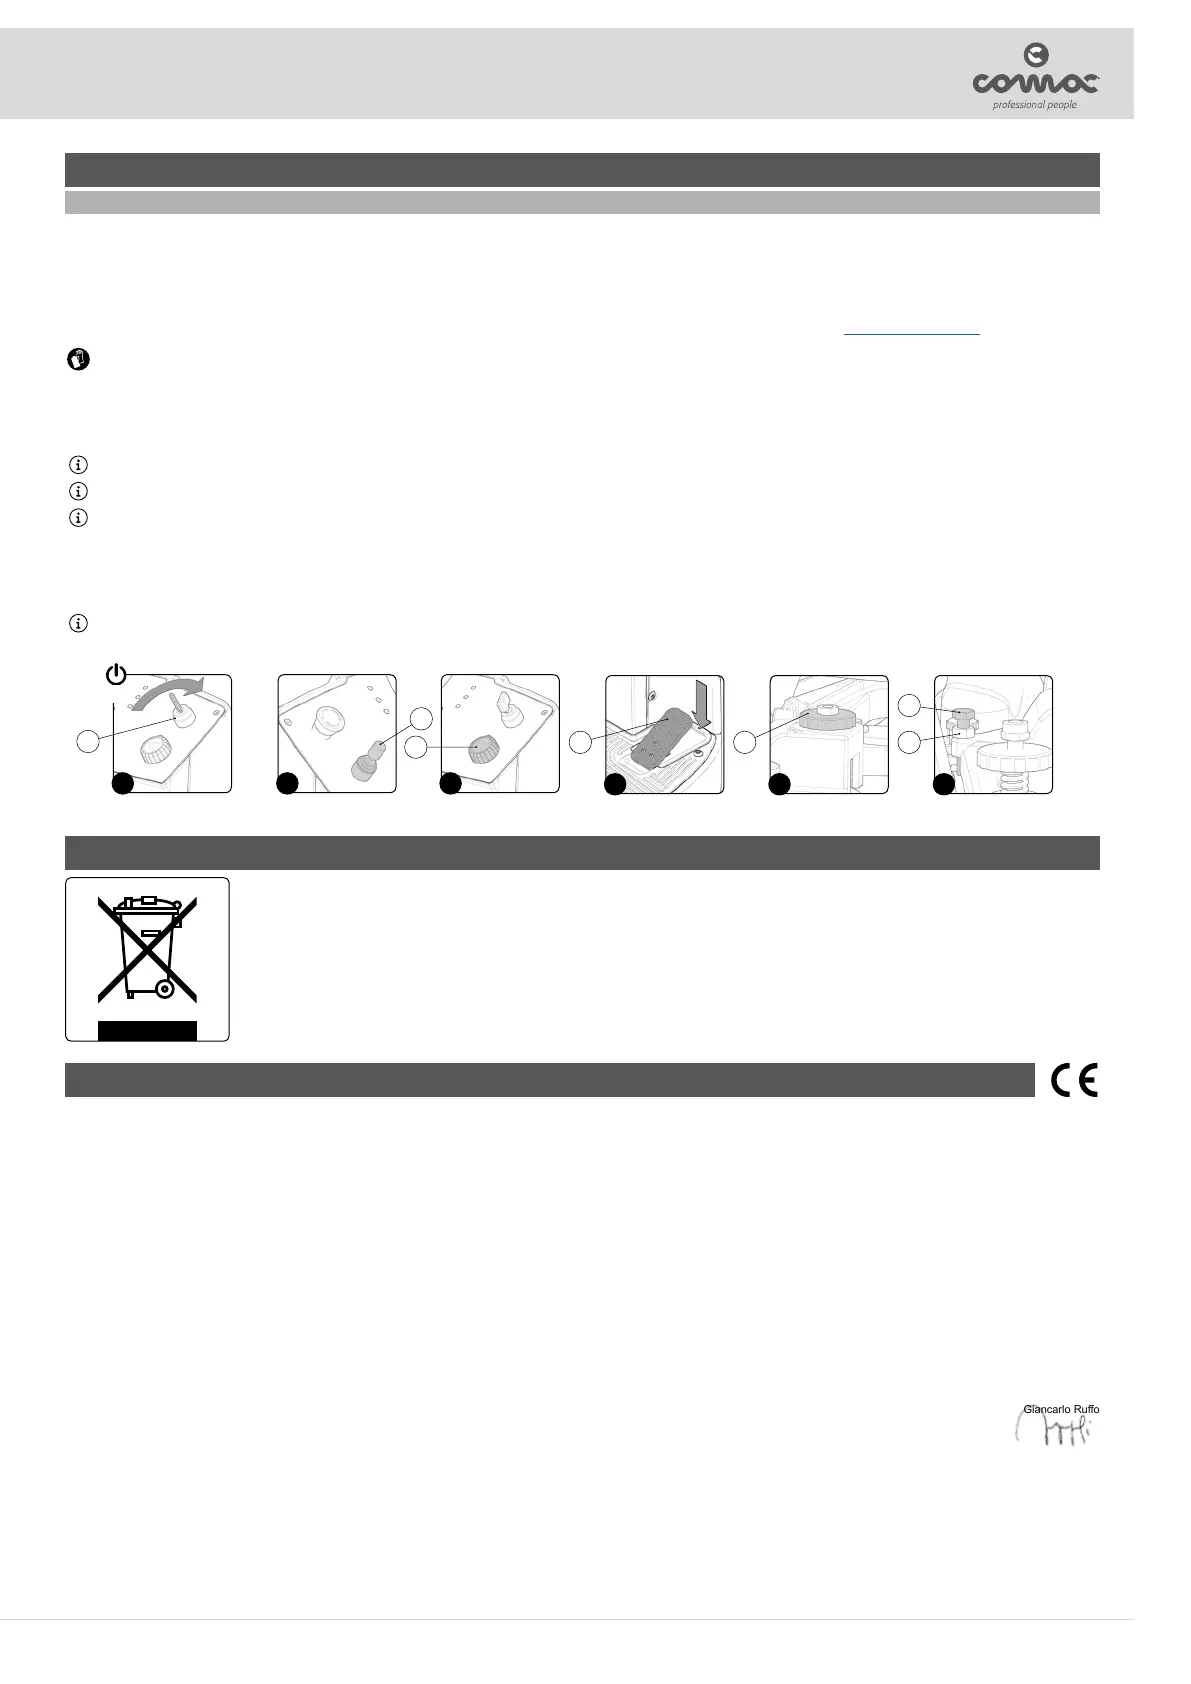
2. Insert the key (1) into the main switch on the control panel. Set the main switch to “I” (Fig. 1).
3. Select the “SCRUBBING WITH DRYING” function using the knob (2) (Fig. 2).
5. Select the “FORWARD” movement direction using the selector switch (3) (Fig. 3).
6. Press the forward movement pedal (4) (Fig. 4) to begin moving the machine.
7. As soon as the brush head and the squeegee have reached their working positions, perform the procedure for securing the machine (see the section titled “SECURING THE MACHINE”).
ATTENTION: these operations must be carried out using protective gloves to avoid any possible contact with the edges or tips of metal objects.
8. Stand at the back of the machine.
Adjusting the height of the squeegee body:
9. Adjust the height of the rubber blade in relation to the oor by loosening or tightening the knobs (5) (Fig. 5).
N.B.: The + and - symbols are printed on the squeegee support to indicate the rotation direction to increase or decrease the distance between the squeegee support and the oor.
N.B.: By decreasing the distance between the squeegee support and the oor, the rubber blades present in the squeegee's body move closer to the oor.
N.B.: the right-hand and left-hand knobs must be rotated the same number of times, so that the squeegee is parallel to the oor when it is working.
Adjusting the tilt of the squeegee body:
10. Loosen the stopper nut (6) of the squeegee's tilt adjustment screw (7) (Fig. 6).
11. To adjust the tilt of the squeegee body rubber blades in relation to the oor, tighten or loosen the screw (7) until the blades are bent outwards by about 30° in relation to the oor, in an even manner along
their entire length.
N.B.: Turning the screw (7) clockwise will increase the tilt of the squeegee body towards the rear of the machine, turn in the opposite direction to rotate the squeegee towards the front of the machine.
12. Once adjustment is made, tighten the stopper nut (6) of the squeegee's tilt adjustment screw (7) (Fig. 6).
1
4 5 6
1
4 5 6
7
ON
2 3
2
3
DISPOSAL
To dispose of the machine, take it to a demolition centre or an authorised collection centre.
Before scrapping the machine, it is necessary to remove and separate out the following materials, then send them to the appropriate collection
centres in accordance with the environmental hygiene regulations currently in force:
• Brushes
• Felt
• Electric and electronic parts*
• Batteries
• Plastic parts (tanks and handlebars)
• Metal parts (levers and frame)
(*) In particular, contact your distributor when scrapping electric and electronic parts.
EC DECLARATION OF CONFORMITY
The undersigned manufacturer:
COMAC S.p.A.
Via Maestri del Lavoro, 13
37059 Santa Maria di Zevio (VR)
declares under its sole responsibility that the products
FLOOR SCRUBBING MACHINES mod. OPTIMA 85B – OPTIMA 100B
comply with the requirements of the following Directives:
• 2006/42/EC: Machinery Directive.
• 2014/35/EC: Low Voltage Directive.
• 2014/30/EC: Electromagnetic compatibility directive.
The person authorized to compile the technical le:
Mr. Giancarlo Ruo
Via Maestri del Lavoro, 13
37059 Santa Maria di Zevio (VR) - ITALY
Santa Maria di Zevio (VR), 11/07/2016
Comac S.p.A.
Legal representative
Giancarlo Ruo
27