Removal and Replacement Procedures 5-33
5.17 USB Board
1. Prepare the computer for disassembly (Section 5.5).
2. Remove the keyboard (Section 5.12).
3. Remove the switch cover (Section 5.14).
4. Remove the display assembly (Section 5.15).
5. Remove the top cover (Section 5.16).
6. Position the computer so the rear panel faces forward.
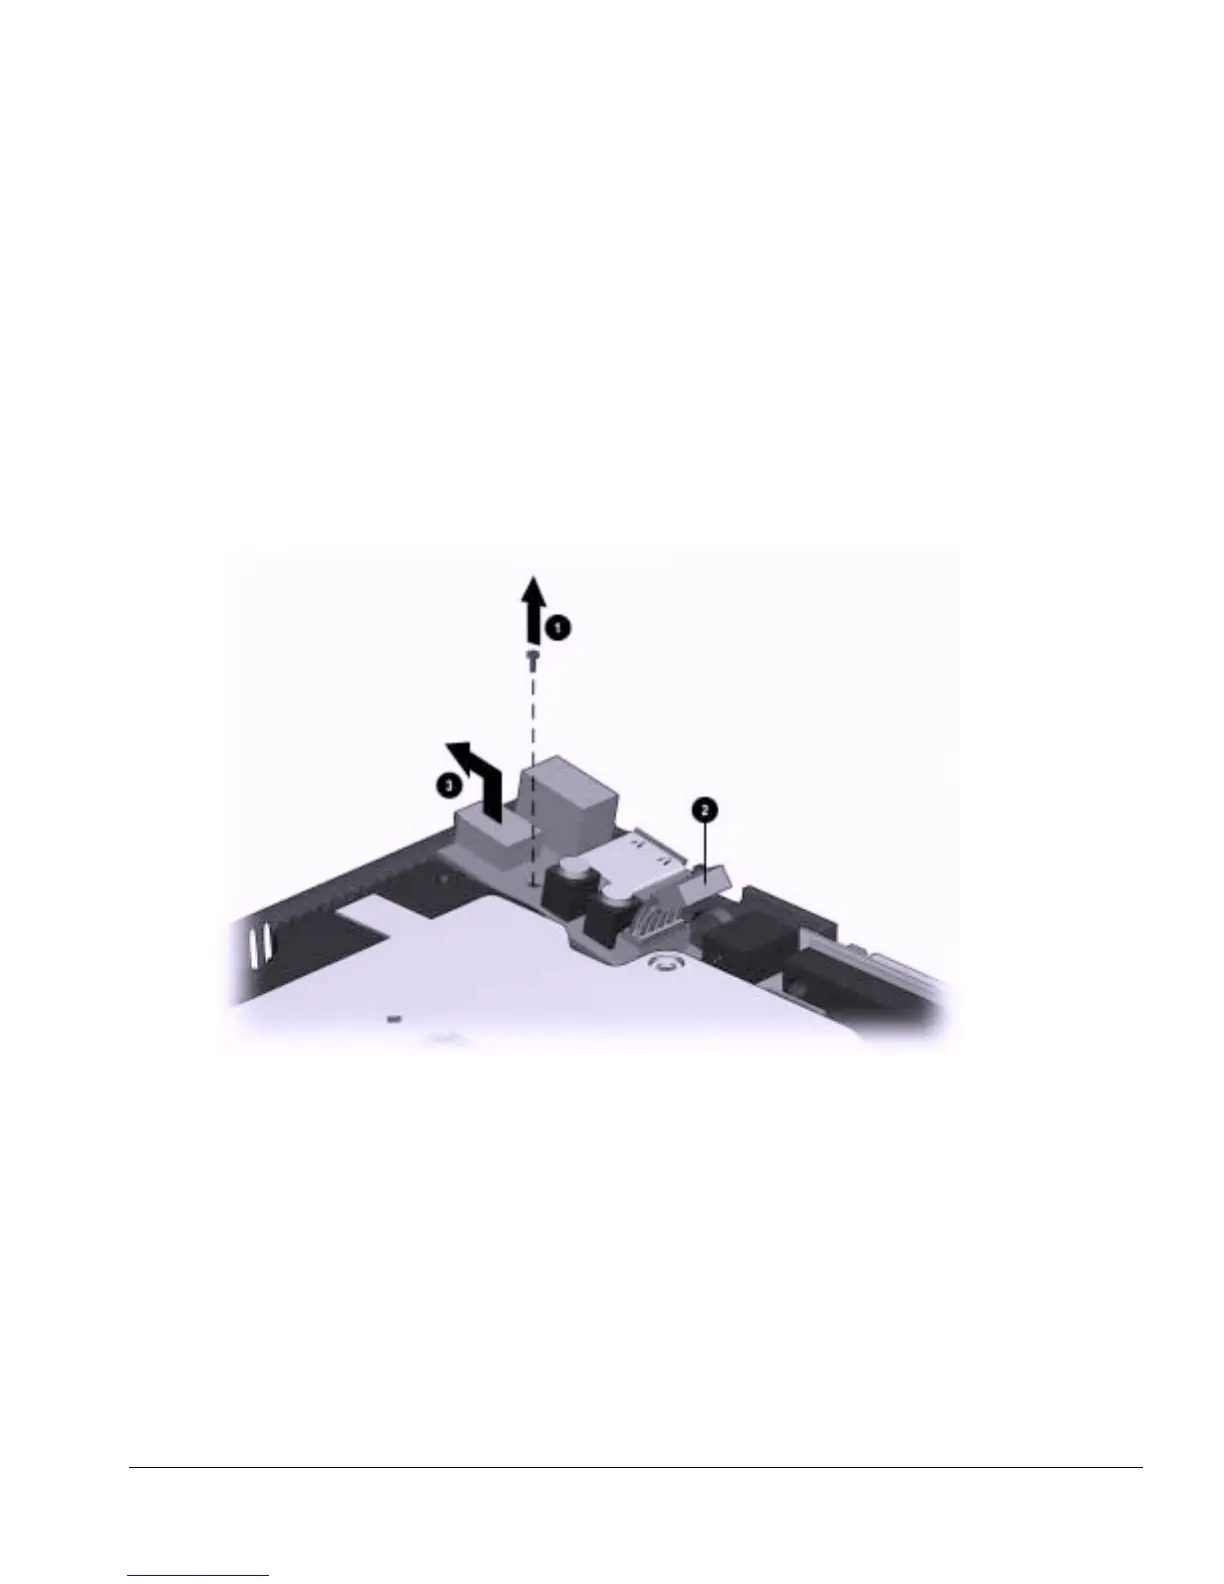
7. Remove the screw that secures the USB board to the base assembly ➊ (Figure 5-31).
8. Disconnect the USB cable ➋.
9. Lift up on the left side of the board. Pull the board out at an angle to remove it from
the base assembly ➌.
Figure 5-31. Removing the USB Board
Reverse the above procedure to connect the USB board.

 Loading...