*
*
5. PREPARATION BEFORE SEWING
5-3. Winding the lower thread
, A CAUTION
A • Do not touch any of the moving parts or place any objects against the machine while winding the~ lower thread, as this may result in personal injury or damage to the machine.
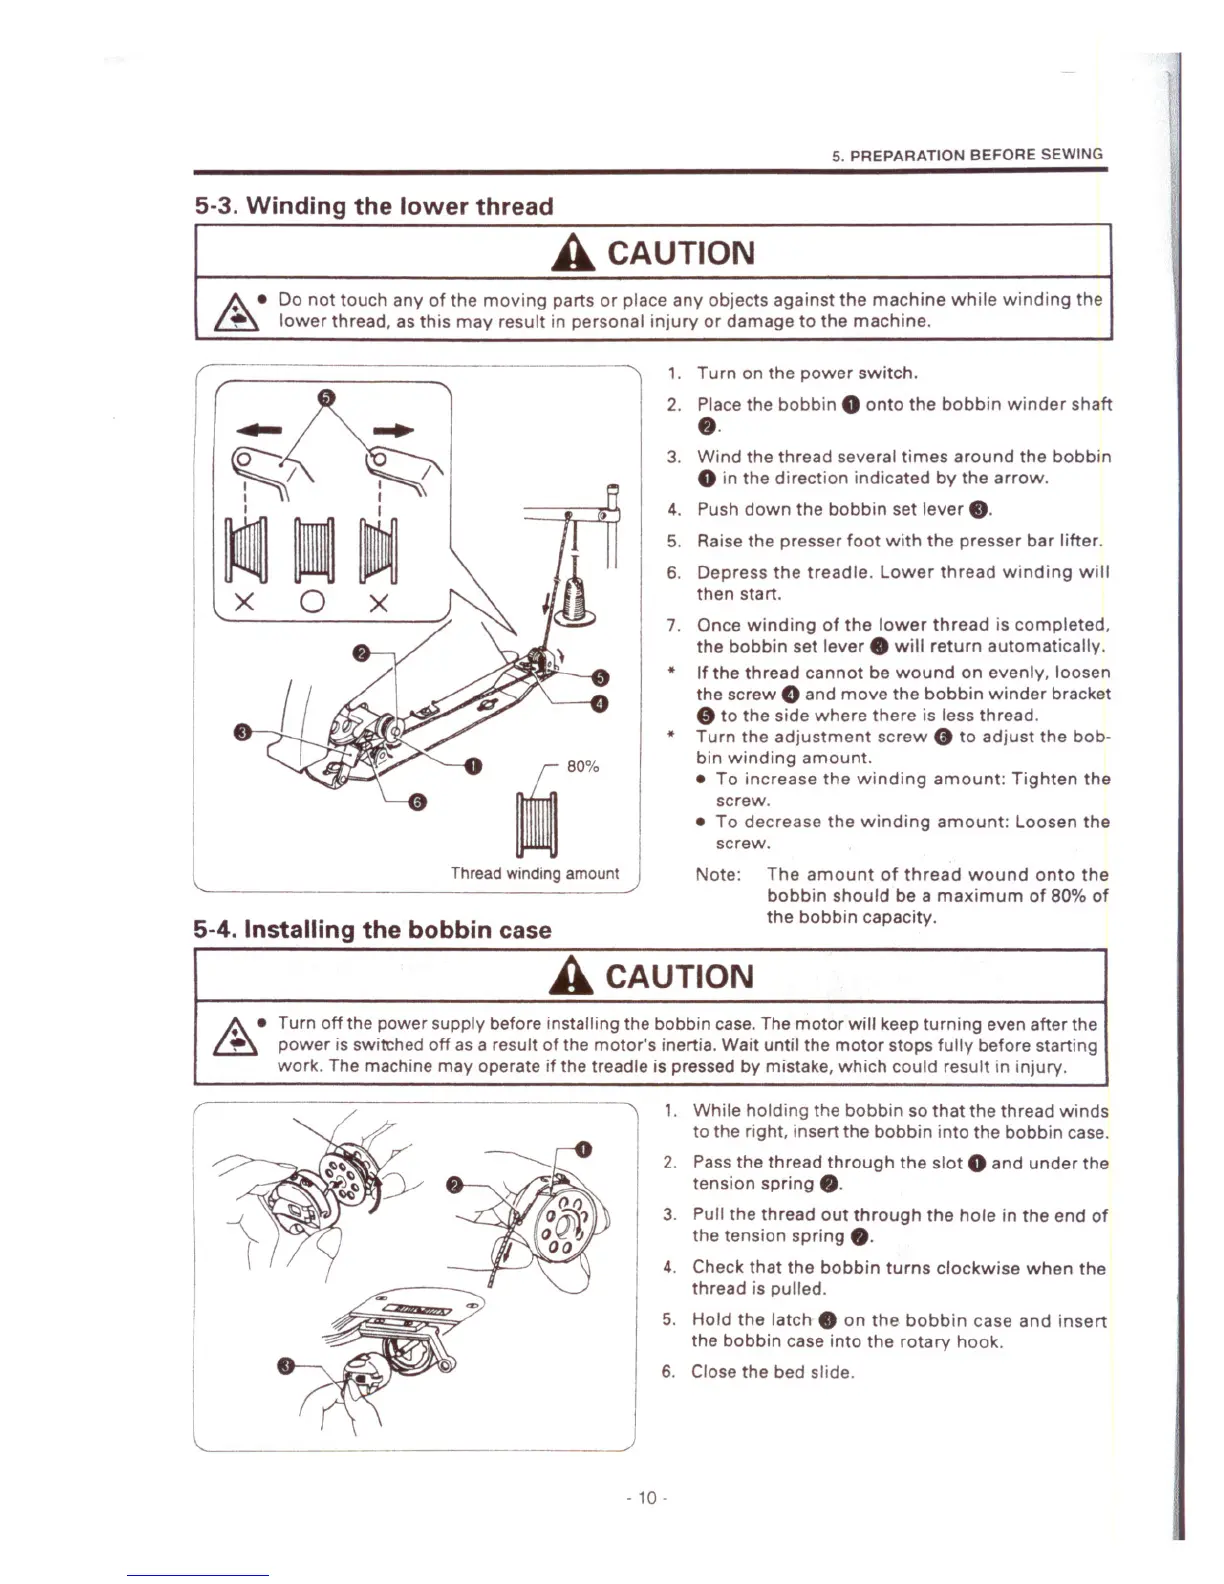
1. Turn on the power switch.
2. Place the bobbin
0onto the bobbin winder shaft
8·
3. Wind the thread several times around the bobbin
oin the direction indicated by the arrow.
4. Push down the bobbin set lever •.
5. Raise the presser foot with the presser bar lifter.
6. Depress the treadle. Lower thread winding will
then start.
7. Once winding of the lower thread is completed,
the bobbin set lever. will return automatically.
If the thread cannot be wound on evenly, loosen
the screw
0and move the bobbin winder bracket
oto the side where there is less thread.
Turn the adjustment screw
0to adjust the bob-
bin winding amount .
• To increase the winding amount: Tighten the
screw .
• To decrease the winding amount: Loosen the
screw.
Threadwindingamount
I Note:
5-4. Installing the bobbin case
. A CAUTION
The amount of thread wound onto the
bobbin should be a maximum of 80% of
the bobbin capacity.
Turn off the power supply before installing the bobbin case.The motor will keepturning even after the
power is swi~hed off as a result of the motor's inertia. Wait until the motor stops fully before starting
work. The machine may operate if the treadle is pressed by mistake, which could result in injury.
1. While holding the bobbin so that the thread winds
to the right, insert the bobbin into the bobbin case.
2. Pass the thread through the slot
0and under the
tension spring •.
3. Pull the thread out through the hole in the end of
the tension spring
e.
4. Check that the bobbin turns clockwise when the
thread is pulled.
5. Hold the latch" on the bobbin case and insert
the bobbin case into the rotary hook.
6. Close the bed slide.
- 10 -