3. WORK TABLE AND MOTOR
3. WORK TABLE AND MOTOR
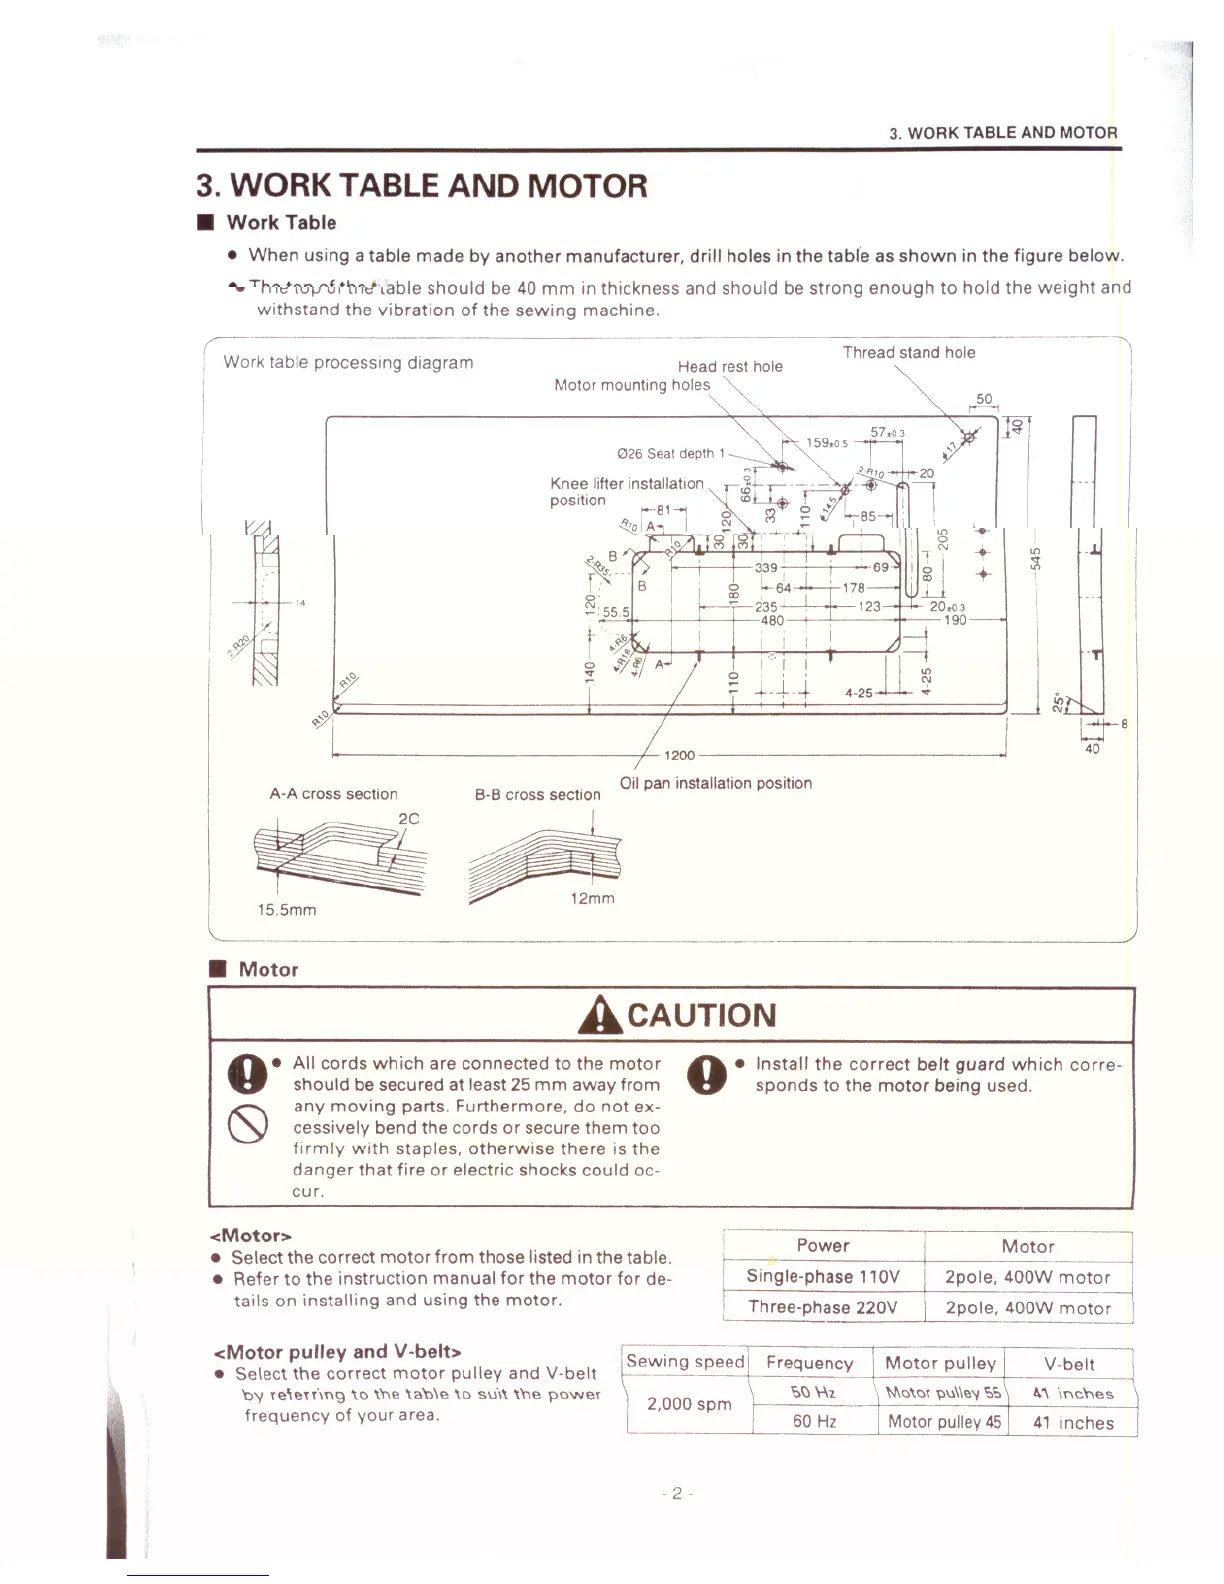
• Work Table
• When using a table made by another manufacturer, drill holes in the tabfe as shown in the figure below .
• The top of the table should be 40 mm in thickness and should be strong enough to hold the weight and
withstand the vibration of the sewing machine.
Head rest hole
Motor mounting holes
w8
40
Thread stand hole
20
l
:g +
IN +
t1 +
20>C.3
-190
=4
4'2s11 ~
..•
I I
..--.---.
! ! !
-t-+--t
o
Knee lifter installation
position
81
'1101";..,l
,.
Work table processing diagram
A-A cross section
B-B cross section
Oil pan installation position
• Motor
ACAUTION
All cords which are connected to the motor
should be secured at least 25 mm away from
any moving parts. Furthermore, do not ex-
cessively bend the cords or secure them
too
firmly with staples, otherwise there is the
danger that fire or electric shocks could oc-
cur.
A •Install the correct belt guard which corre-•• sponds to the motor being used.
<Motor>
• Select the correct motor from those listed in the table.
• Refer to the instruction manual for the motor for de-
tails on installing and using the motor.
Power
Motor
Single-phase 110V
2pole, 400W motor
Three-phase 220V
2pole, 400W motor
<Motor pulley and V-belt>
• Select the correct motor pulley and V-belt
'o'{ Te'eTf\f\9 \0 \ne \a'o\e \0 su\\ \'he poweT
frequency of your area.
Sewing speed
2,000 spm
Frequency
~\J \-\,
60 Hz
Motor pulley
~Q\Q~ ?u\\~'1SS
Motor pulley 45
V-belt
41 inches
- 2-