WINDING
BOBBINS
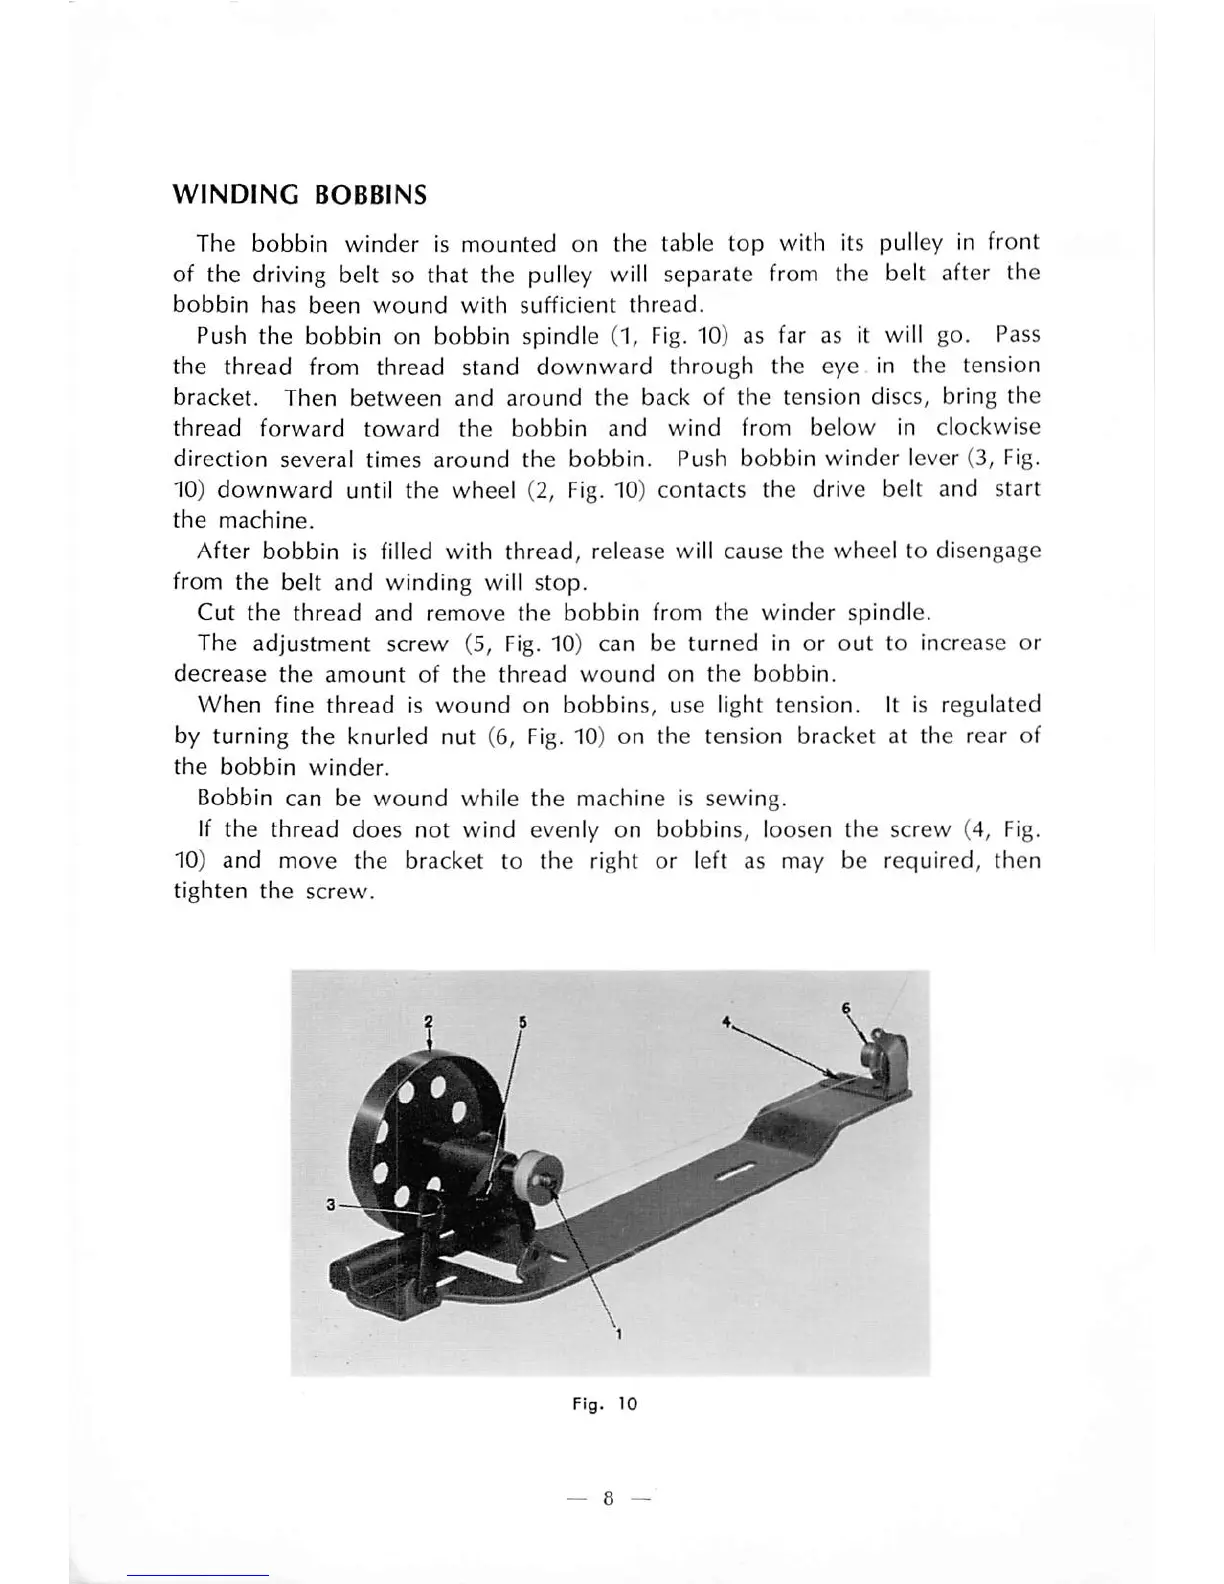
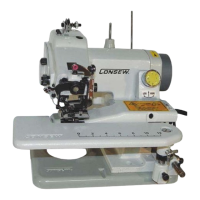
The bobbin winder is mounted on the table
top
with its pulley in front
of the driving belt so that the pulley will separate from the belt after the
bobbin
has
been
wound
with
sufficient
thread.
Push the bobbin on bobbin spindle (1,
Fig.
10) as far as it will go. Pass
the
thread
from
thread
stand
downward
through
the
eye
in the tension
bracket.
Then
between
and
around
the
back
of
the
tension
discs, bring
the
thread
forward
toward
the
bobbin
and
wind
from
below
in
clockwise
direction
several
times
around
the
bobbin.
Push
bobbin
winder
lever (3, Fig.
10) downward until the wheel (2,
Fig.
10) contacts the drive belt and start
the
machine.
After
bobbin
is filled with
thread,
release will
cause
the
wheel
to disengage
from the belt and winding will stop.
Cut
the
thread
and
remove the
bobbin
from
the
winder
spindle.
The
adjustment
screw
(5, Fig. 10) can be
turned
in or
out
to increase or
decrease
the
amount
of
the
thread
wound
on
the
bobbin.
When fine thread is
wound
on bobbins, use light tension. It is regulated
by turning
the
knurled nut (6, Fig. 10) on the tension bracket at the rear of
the
bobbin
winder.
Bobbin can be
wound
while
the
machine is sewing.
If the thread does not wind evenly on bobbins, loosen the screw (4, Fig.
10) and move the bracket to the right or left as may be required, then
tighten
the
screw.
Fig. 10
— 8 —