Settings 39
Basic settings and preferences
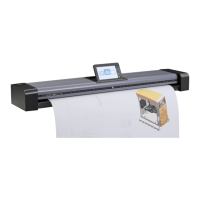
The SD One MF offers a wide range of setting options to match the scanner to your specific needs. Press the Settings icon to reach the available
options. The available settings are grouped under System settings, Scanner settings, Printer settings, and About.
LAN settings - to add the scanning system to the local network. Select DHCP for automatic connection (recommended). Or,
contact your network administrator for information. See also Installation - Enter your network settings. You can also view
your scanner IP address here.
Set your local date, time, metric system (inch or mm.), and paper series (ANSI, ISO, ISO B, ARCH).
You can set up a password to control access to the scanner. Leave empty if you don’t need password protection.
Save Current settings as the scanner’s new default settings, or Reset to Defaults which are the factory defaults.
Setup the outgoing email server for sending scans to email destinations. Some of the settings, or the need for these will
depend on your system's server configuration. Please contact your network administrator for information. See also
Installation - Enter your email server settings.
Select preferred languages for Screen and Keyboard. They do not need to be the same.
Timeout is the time the scanner will stand idle before the scanner resets itself to its default settings so that it is ready for the
next user. Sleep is the time the scanner can stand idle before going into sleep mode.
To update your system software with the latest version. The system will search for a newer version and install through the
internet if available.
Start the Scanner Calibration Wizard. See section Maintenance – Scanner Calibration for instructions and more details
Eject Back , Eject Front – eject the document to the back or front after scanning
Distribute the log data from the scanner for service and support. Send info by email to support@contex.com or Save info to
USB.
Enter the printer’s IP address – the scanner will detect the printer on the LAN and connect. Contact your IT support for
information.
Run the Media Profile wizard to create a media profile for optimal color copying with the loaded media. See installation -
Set up your printer’s media profiles for more details.
Compensate for printer
margins
Make the scanner account for outer paper edges that cannot be reached /printed on by the printer. Ensures you get the
exact margins you set when making copies.
Information about your current scanner firmware, software versions and network addresses