Do you have a question about the Craftsman 113.213213 and is the answer not in the manual?
Understand the manual, labels, applications, limitations, and hazards.
Use the 3-conductor cord and grounding plug for electrical safety.
Avoid loose clothing, jewelry; secure long hair; roll up sleeves.
Always wear safety goggles meeting ANSI Z87.1 standards.
Ensure the switch is in the 'OFF' position before plugging in.
Explanation of kickback and methods to reduce injury risk.
Emphasizes protection for eyes, hands, face, ears, and body.
Support work properly to prevent it from shifting or binding.
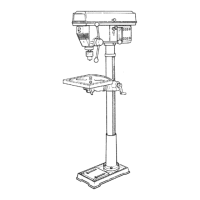
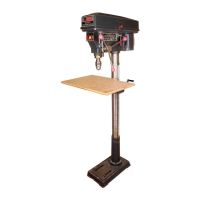
Ensuring the drill press is stable and secured to prevent tilting.
Details the motor's required RPM, voltage, and frequency.
Instructions for proper grounding and connecting to a power outlet.
Steps for unpacking and verifying all parts against the list.
Instructions on removing protective oil from parts.
Applying paste wax to table and column to prevent rust.
Controls for adjusting and locking belt tension.
Mechanisms to lock the head and table in position.
Controls for adjusting feed, drilling depth, and scale.
Switches for operating the drill press and its light.
Controls for tilting the table and locking its support.
Lists the essential tools required for assembly.
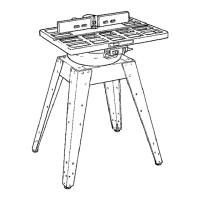
Step-by-step guide to assemble the base and column.
Instructions for assembling the table elevation mechanism.
Detailed steps for installing the table support assembly.
Instructions for fitting the column collar and installing the support lock.
Checking and minimizing backlash in the table crank mechanism.
Guide for lifting and securing the drill press head onto the column.
Steps for securely mounting the motor onto the drill press.
Instructions for attaching the motor pulley to the motor shaft.
Guide for installing and adjusting the drive belts for proper tension.
Locating idler pulley and positioning belts according to speed chart.
Instructions for attaching the belt guard knob.
Wiring instructions for connecting the motor to the power supply.
Steps for attaching the feed handles to the quill.
Guide for cleaning and installing the drill chuck onto the arbor.
Procedure for ensuring the chuck is securely fastened.
Instructions for installing the work light bulb.
How to use the bevel scale for tilting the table accurately.
Covers pulleys and belts; includes chart for selecting speeds.
Controls for adjusting belt tension and locking the head.
Components for measuring and locking drilling depth.
Mechanisms for tilting and securing the table.
Controls for moving the chuck and operating power.
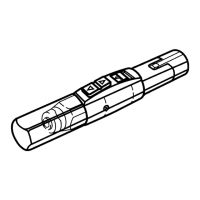
The chuck for holding bits and the self-ejecting key.
Lists the 12 available spindle speeds for the drill press.
Covers pulleys and belt during operation.
Locks motor bracket support and belt tension handle.
Locks the head to the column during operation.
Moves the chuck up or down.
Locks the depth scale to the selected depth.
Details the locking feature and operation of the main switch.
Steps to drill a blind hole to a predetermined depth.
Alternative method for setting and using the depth scale.
Procedure to lock the chuck at a specific depth.
Instructions for safely removing the chuck and arbor assembly.
Steps for correctly re-installing the chuck and arbor assembly.
Reinforces adherence to safety precautions before operation.
Emphasizes wearing appropriate personal protective equipment.
Properly support work to prevent shifting or binding.
Use only recommended accessories to prevent injury.
Guide for inserting and tightening drill bits into the chuck.
How to position the table and workpiece for safe drilling.
Instructions for tilting the table and returning it to 90°.
How to mark the precise location for drilling a hole.
Guidance on applying appropriate pressure for cutting.
Procedure for adjusting the tension of the quill return spring.
How to adjust the quill bearing for smooth movement.
Information on lubrication requirements for moving parts.
Electrical diagram showing motor and switch connections.
List of accessories recommended by Sears for the drill press.
Addresses noisy operation, bit burning, and hole quality.
Covers workpiece tearing, binding, and bit runout/wobble.
Resolves issues with quill return speed and chuck attachment.
Contact number for obtaining parts and repair services.
Contact numbers for scheduling in-home service and finding service centers.
Contact number for information on Sears Maintenance Agreements.
| Brand | Craftsman |
|---|---|
| Model | 113.213213 |
| Category | Power Tool |
| Language | English |