RE-INSTALUNG THE CHUCK AND ARBOR
NOTE: The chuck received with this drill press will not
permitthe use ofsmaller diameter drillbits. For an alter-
nate accessory chuck and key with 1/32" - 5/8" capacity
the following partnumber shouldbe ordered. - Part No.
#8! 7340 (chuck& key).
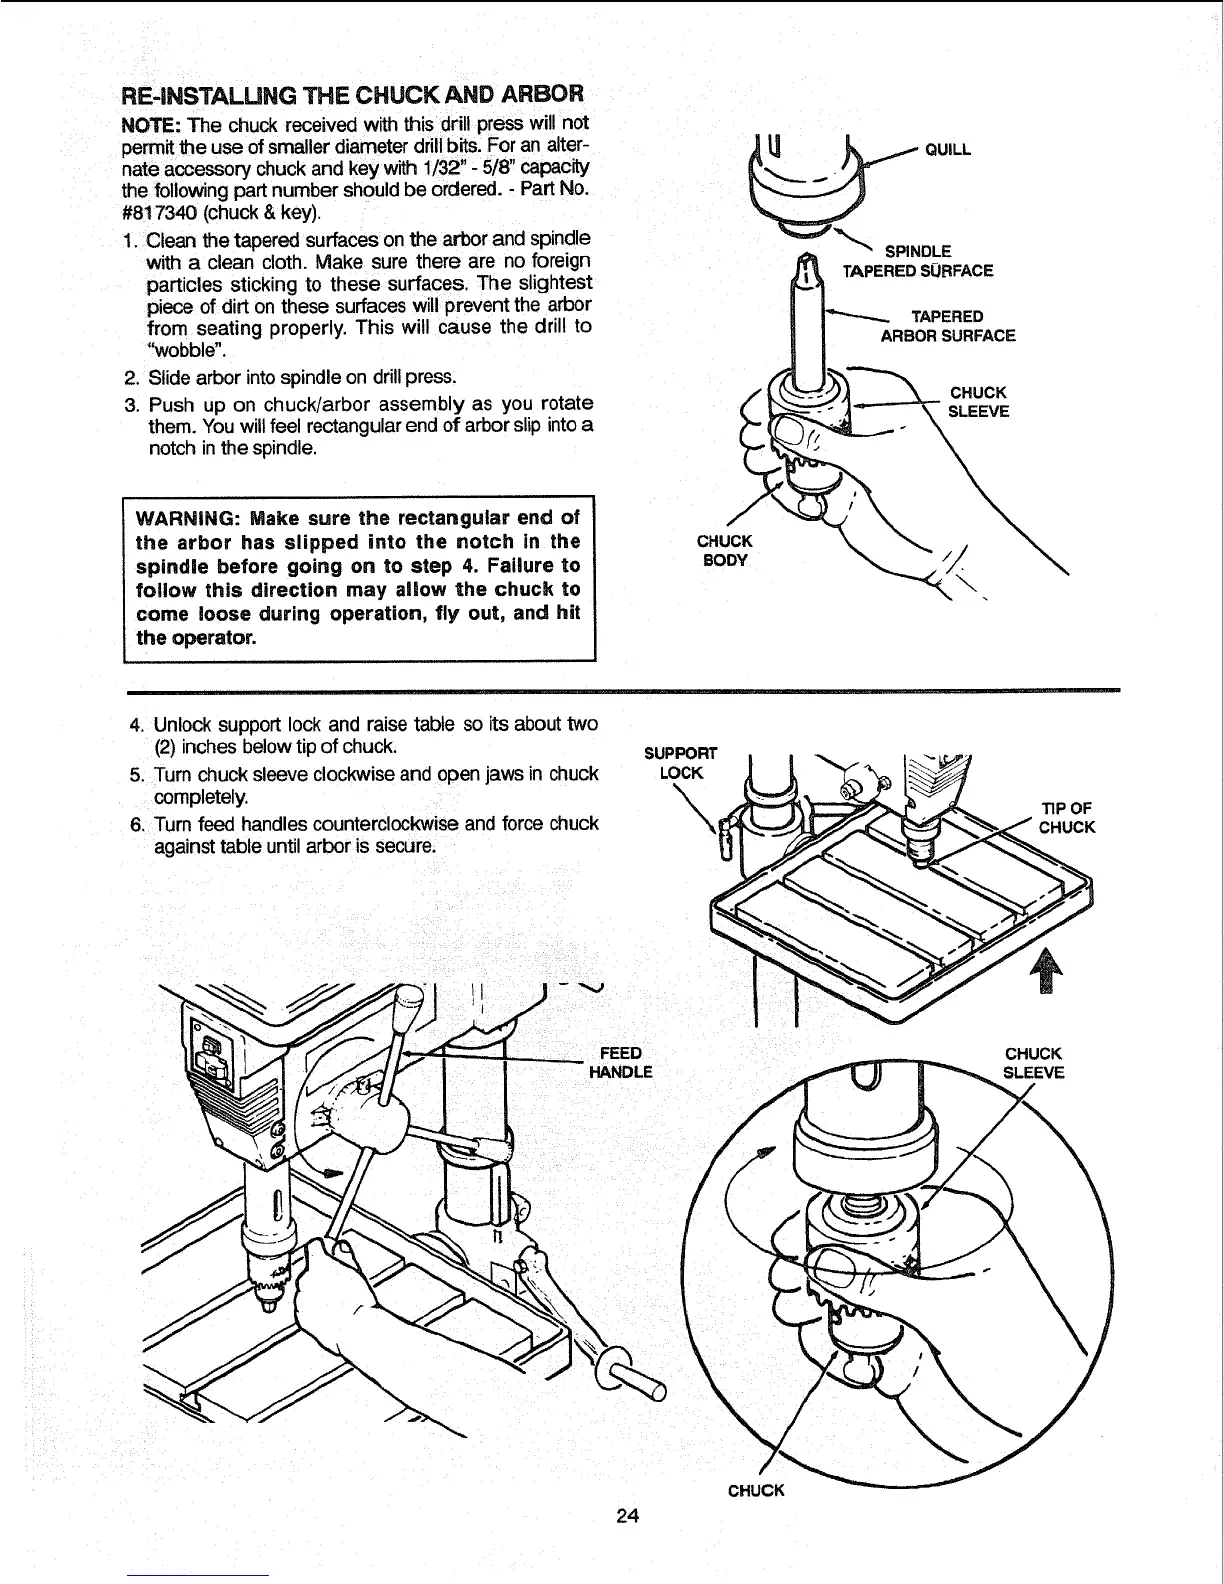
1. Clean the tapered surfaces on the arbor and spindle
with a clean cloth. Make sure there are no foreign
particles sticking to these surfaces. The slightest
piece of dirton these surfaceswill prevent the arbor
from seating properly. This will cause the drill to
"wobble".
2. Slide arbor into spindle on drill press.
3. Push up on chuck/arbor assembly as you rotate
them. You willfeel rectangular end of arborslip intoa
notchinthe spindle.
TAPERED SLIRFACE
TAPERED
ARBOR SURFACE
CHUCK
SLEEVE
WARNING: Make sure the rectangular end of
the arbor has slipped into the notch in the
spindle before going on to step 4. Failure to
follow this direction may allow the chuck to
come loose during operation, fly' out, and hit
the operator.
CHUCK
BODY
4. Unlock support lock and raise table so its about two
(2) inches below tip of chuck.
5, Turn chuck sleeve clockwise and openjaws in chuck
completely.
6, "rum feed handles counterclockwise and force chuck
against table until arbor is secure.
SUPPORT
LOCK
_POF
CHUCK
FEED
HANDLE
CHUCK
SLEEVE
CHUCK
24



 To Next Page