getting to know your beat and disc sander
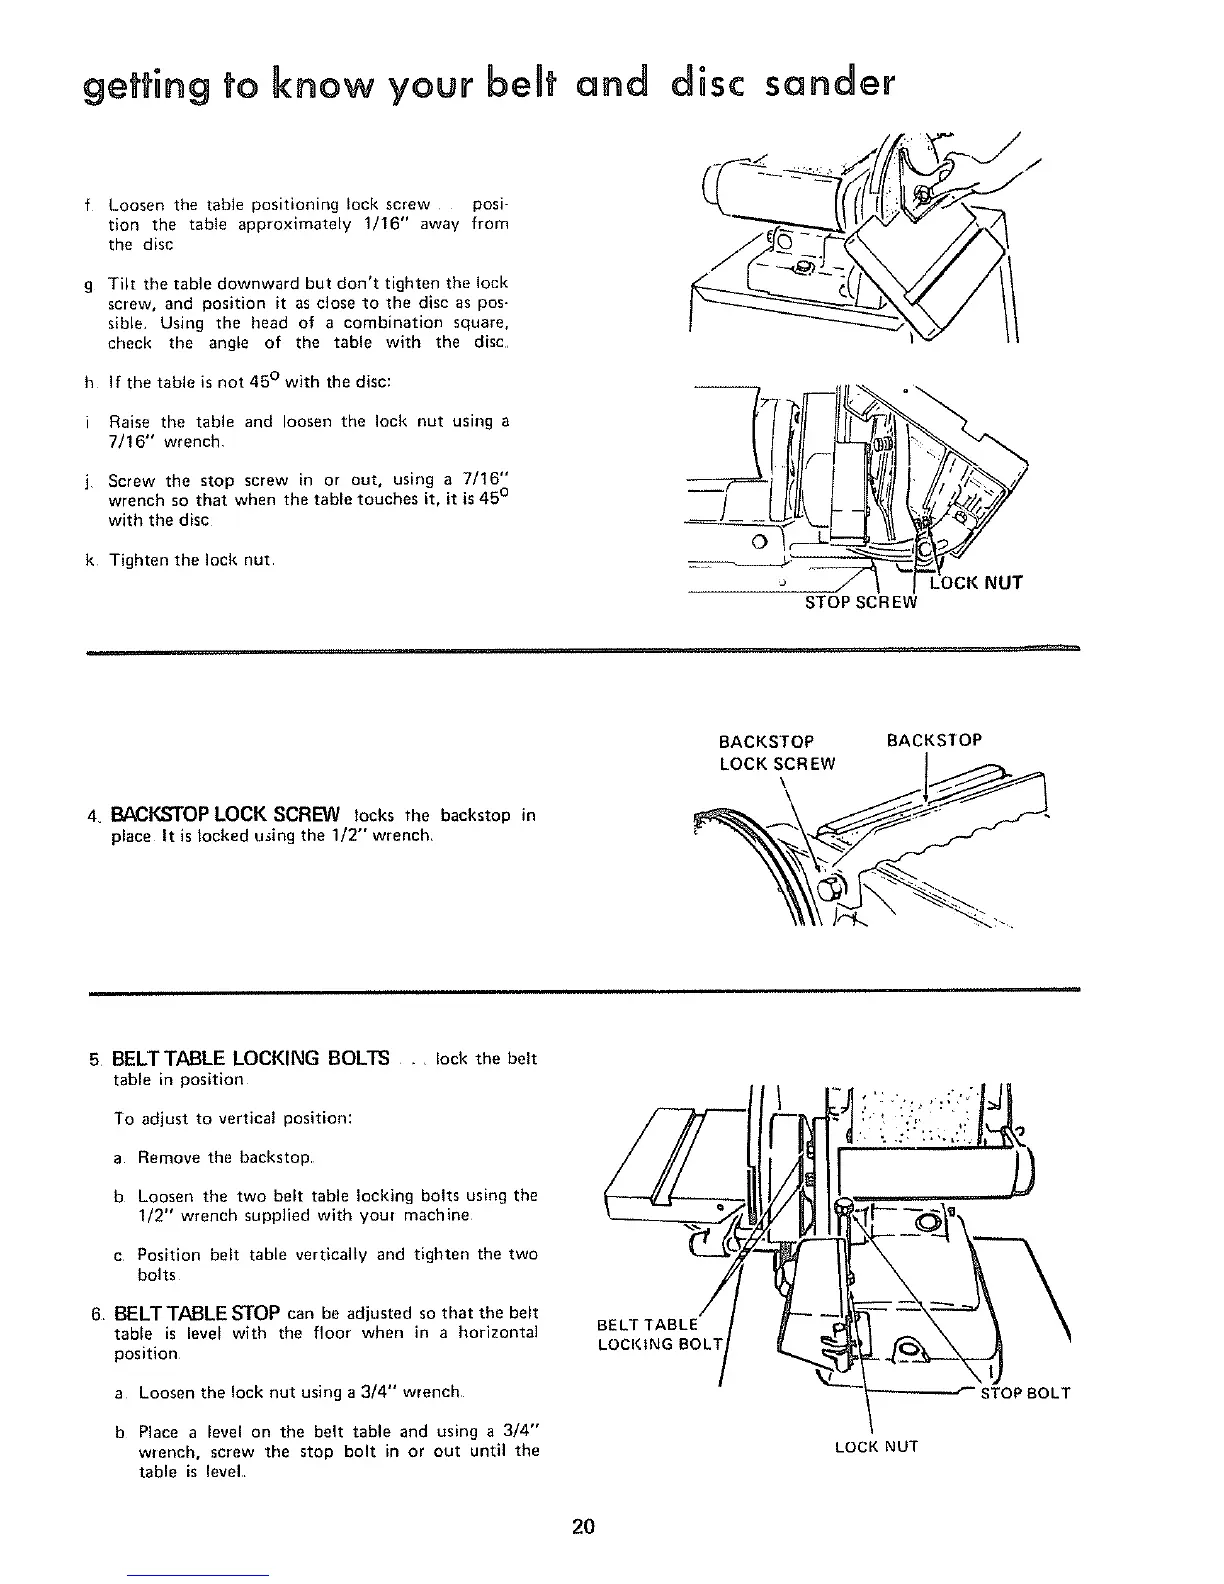
f Loosen the table positioning lock screw posi-
tion the table approximately 1/16" away from
the disc
g Tilt the table downward but don't tighten the loci{
screw, and position it as close to the disc as pos-
sible. Using the head of a combination square,
check the angle of the table with the disc
h If the table is not 45 ° with the disc:
Raise the table and loosen the lock nut using a
7/16" wrench
Screw the stop screw in or out, using a 7/16"
wrench so that when the table touches it, it is 45°
with the disc
k Tighten the lock nut
o
4. BACKSTOP LOCK SCREW locks the backstop in
place It is locked using the 1/2" wrench
BACKSTOP
LOCK SCREW
\
BACKSTOP
6 BELTTABLE LOCKING BOLTS ..... lock the belt
table in position
To adjust to vertical position:
a Remove the backstop
b Loosen the two belt table locking bolts using the
1/2" wrench supplied with your machine
c Position belt table vertically and tighten the two
bolts
6, BELTTABLE STOP can be adjusted so that the belt
table is level with the floor when in a horizontal
position
a Loosen the lock nut using a 3/4" wrench
b Place a level on the belt table and using a 3/4"
wrench, screw the stop bolt in or out until the
table is level.
BELT TABLE
LOCKING BOLT
LOCK NUT
STOPBOLT
2O