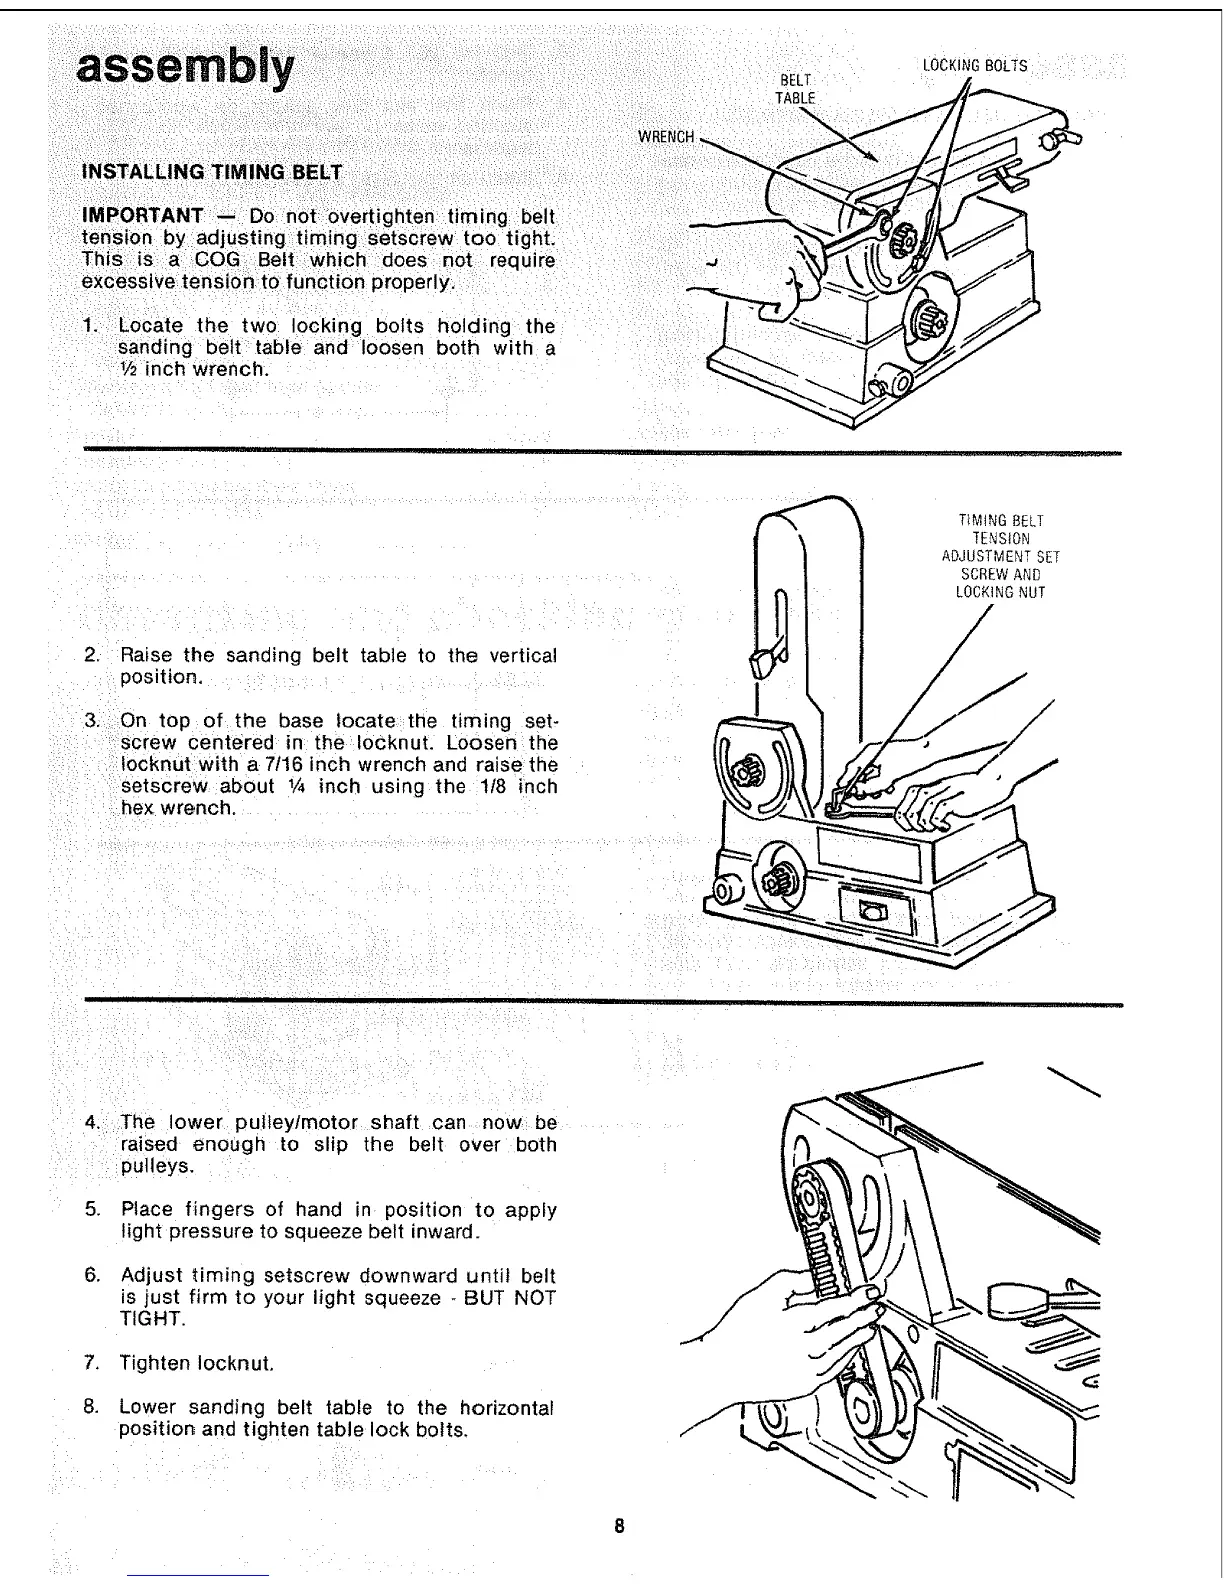
INSTALLING:!TIMING BELT :::
::: : : , :_ '!::::::::: :.::_:
IMPORTANT Do:i:not::::::Ov:ertighten::tim ing belt
tension by:adjusting,timing setscrew too tight_
This ::iS:a i COG_:: Bel{ ::which:i:does not require
excessiVe:tensionl to function properly:
1. :Locate the two locking bolts holding the
sanding belt: table and loosen both with a
1/2inch wrench.
i .........
LOCKING BOLTS
2, Raise the sanding belt table to the vertical
position,
;
On top of the base locate :the timing set-
screw centered in the locknut, loosen the
Iocknut with a 7/16 inch wrench and raisethe
setscrew about t/4 inch using the 1t8 inch
hex wrench.
TIMING BELT
TENSION
ADJUSTMENTSET
SCREWAND
LOCKINGNUT
"' ji
,
.
.
The lower pulley/motor shaft can now: be
raised enough to slip the belt over both
pulleys,
Place fingers of hand in position to apply
light pressure to squeeze belt inward.
Adjust timing setscrew downward until belt
is just firm to your light squeeze - BUT NOT
TIGHT.
7. Tighten Iocknut.
.
,:H
Lower sanding belt table to the horizontal
position and tighten table lock bolts,