PRODUCT SETUP PROCEDURE
7-1
PRODUCT SETUP
The Applicator should be setup and have successfully passed the static test before continuing with this
section. If you have skipped the Applicator Setup Section and have trouble with the application here, it
will leave you with more areas to troubleshoot while fixing the problem.
Regardless of which type of Applicator Nose you are using, it is important to control the product prior to
labeling. If you do not present the product to the Applicator in the same position at uniform speed, label
positioning may not be consistent on the product. If necessary, install Guide Rails to insure products
follow the same path along the conveyor.
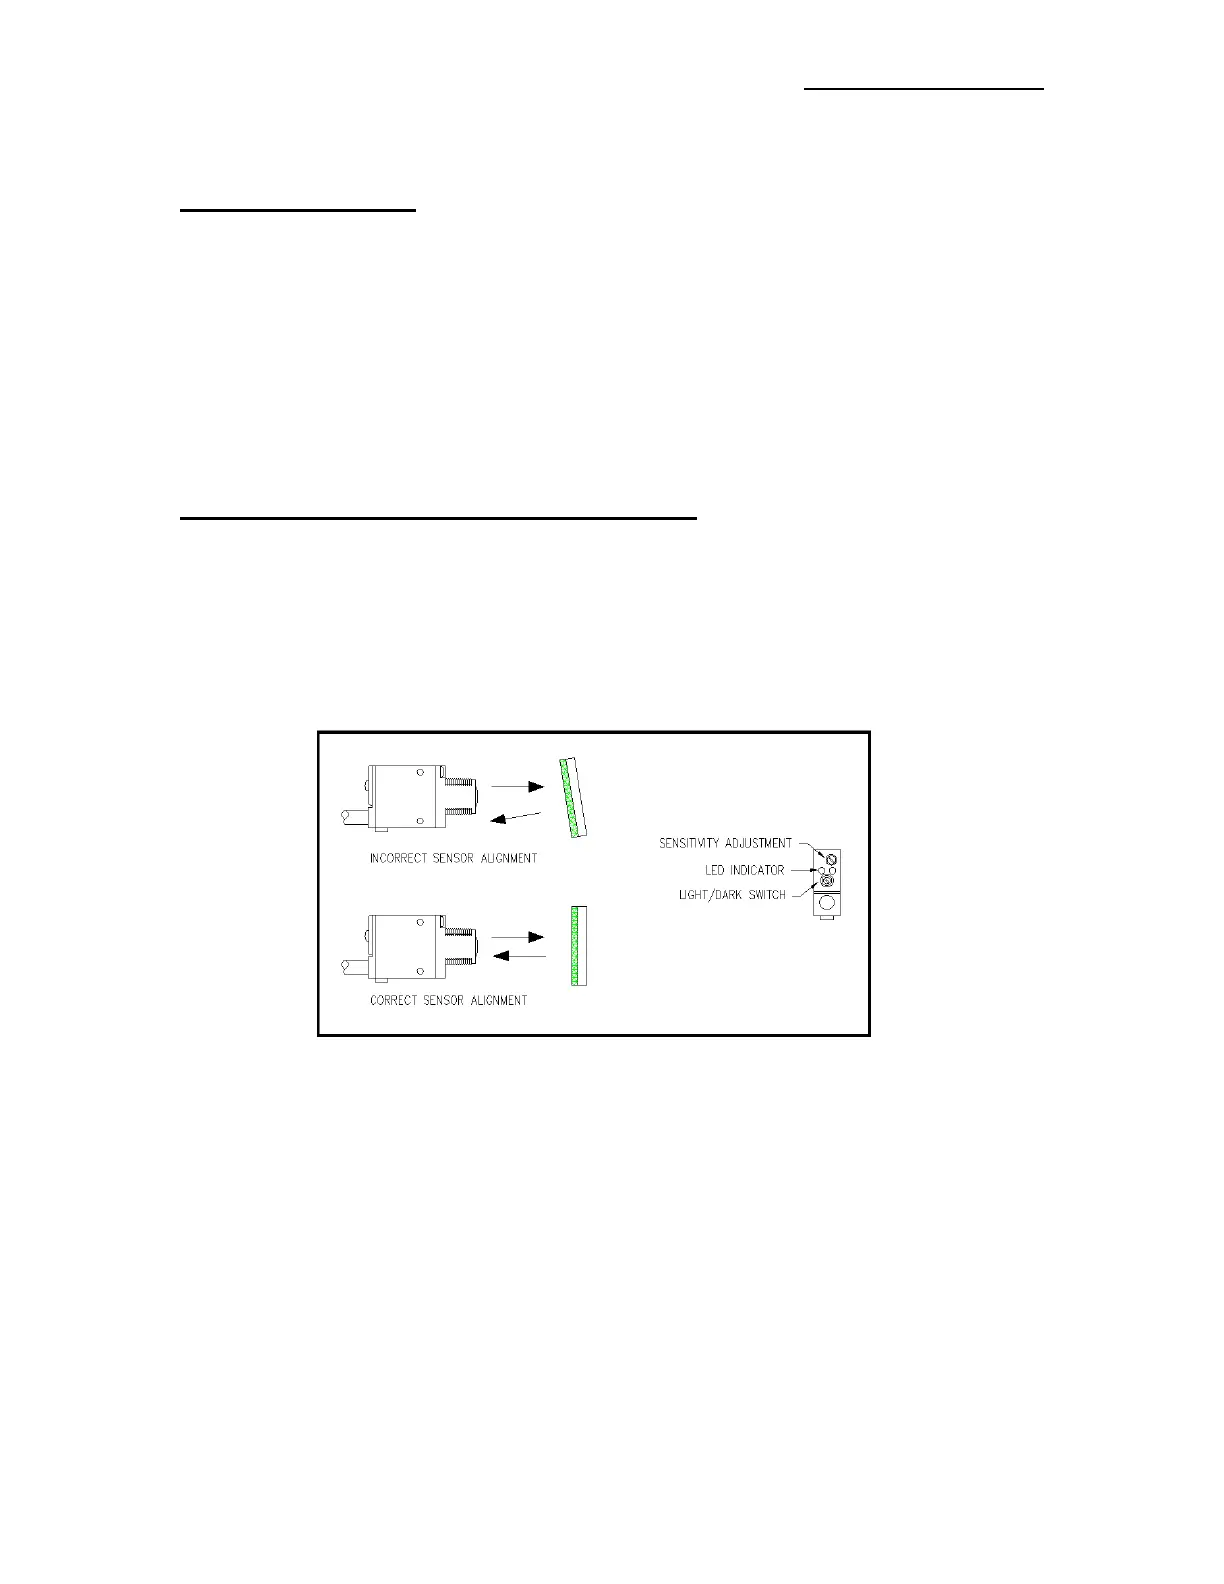
STANDARD PRODUCT SENSOR SETUP (Banner SM312LV)
1- Plug the Sensor into the back of the Applicator.
2- Turn the power on and disable the Tamp (if applicable).
3- Remove the back cover of the Sensor and set the light/dark switch to DO by turning the switch
counter-clockwise.
4- Make sure the Sensor is pointing at the Reflector or Reflective Tape. When the LED indicator is
flashing at the fastest rate, the two are at the best alignment.
5- Place a product between the Sensor and the Reflector or Reflective Tape. The LED indicator should
go out.
a) On translucent products, the sensitivity may have to be reduced to avoid burn-through.
6- Replace back cover of Sensor.
7- When mounting the Sensor, position it slightly upstream of the Applicator Nose. It should be
positioned to allow for fine adjustments of the Label Placement Value. An excessive upstream
position requires large placement values leading to slow label rates.


 To Next Page