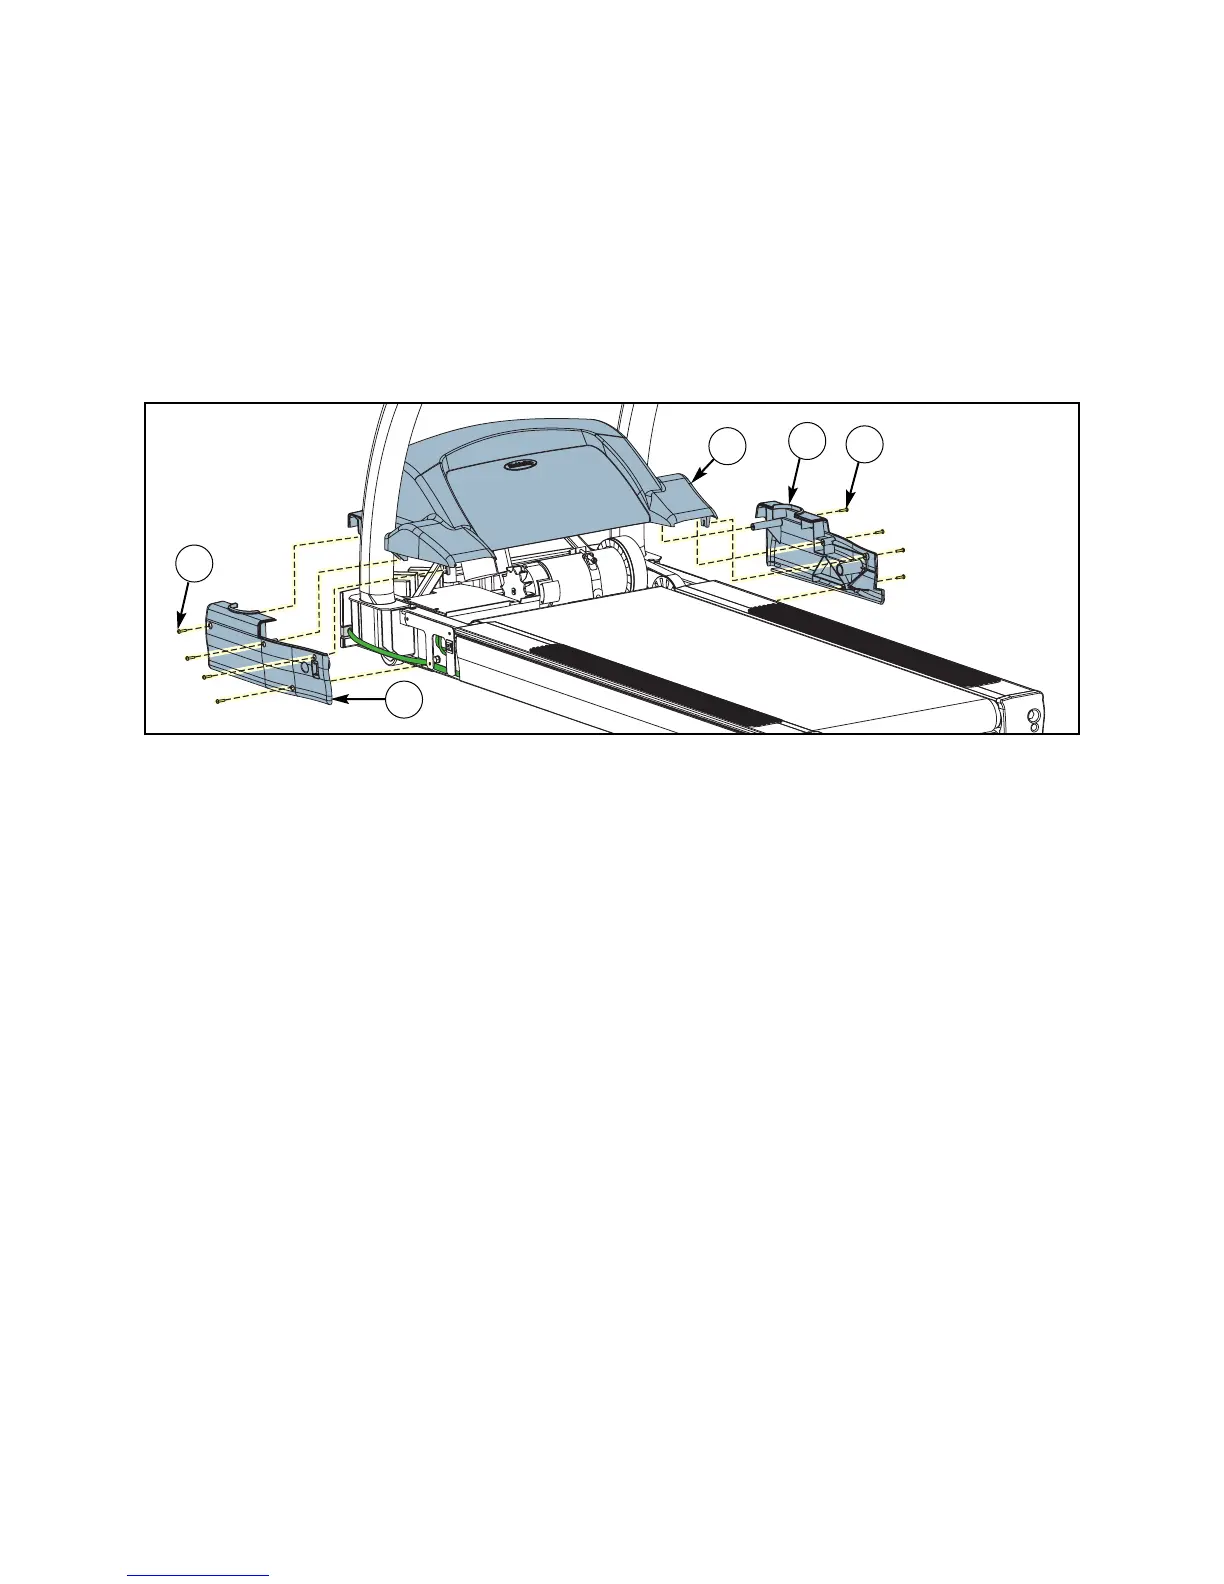
11. Attach the motor cover (three pieces).
A. Using a Phillips head screwdriver, partially tighten each motor cover side (left and right)
with four 10-32 x .75 Phillips head screws. See Figure 12.
B. Place the motor cover center into position. See Figure 12.
C. Using a Phillips head screwdriver, finish tightening all eight screws. Be sure the screws
are catching the motor cover’s holes.
12. Level your treadmill.
A. Confirm that your treadmill is on a level surface.
13. Attach emergency stop key.
A. Confirm that the emergency stop key is in place over the e-stop button. See Figure 13.
NOTE: The treadmill will not run without the key (or other metal) in place.
14. Visually inspect the treadmill.
A. Carefully examine the treadmill to ensure that the assembly is correct and complete.
B. Test for proper operation as noted in the Testing The Treadmill Operation section of
this manual.
Cybex Pro+ Treadmill Owner’s & Service Manual
Setup
&
Assembly
Page 5-9
Figure 12
5
7
4
6
4