Cybex Pro+ Treadmill Owner’s & Service Manual
Service
Page 7-29
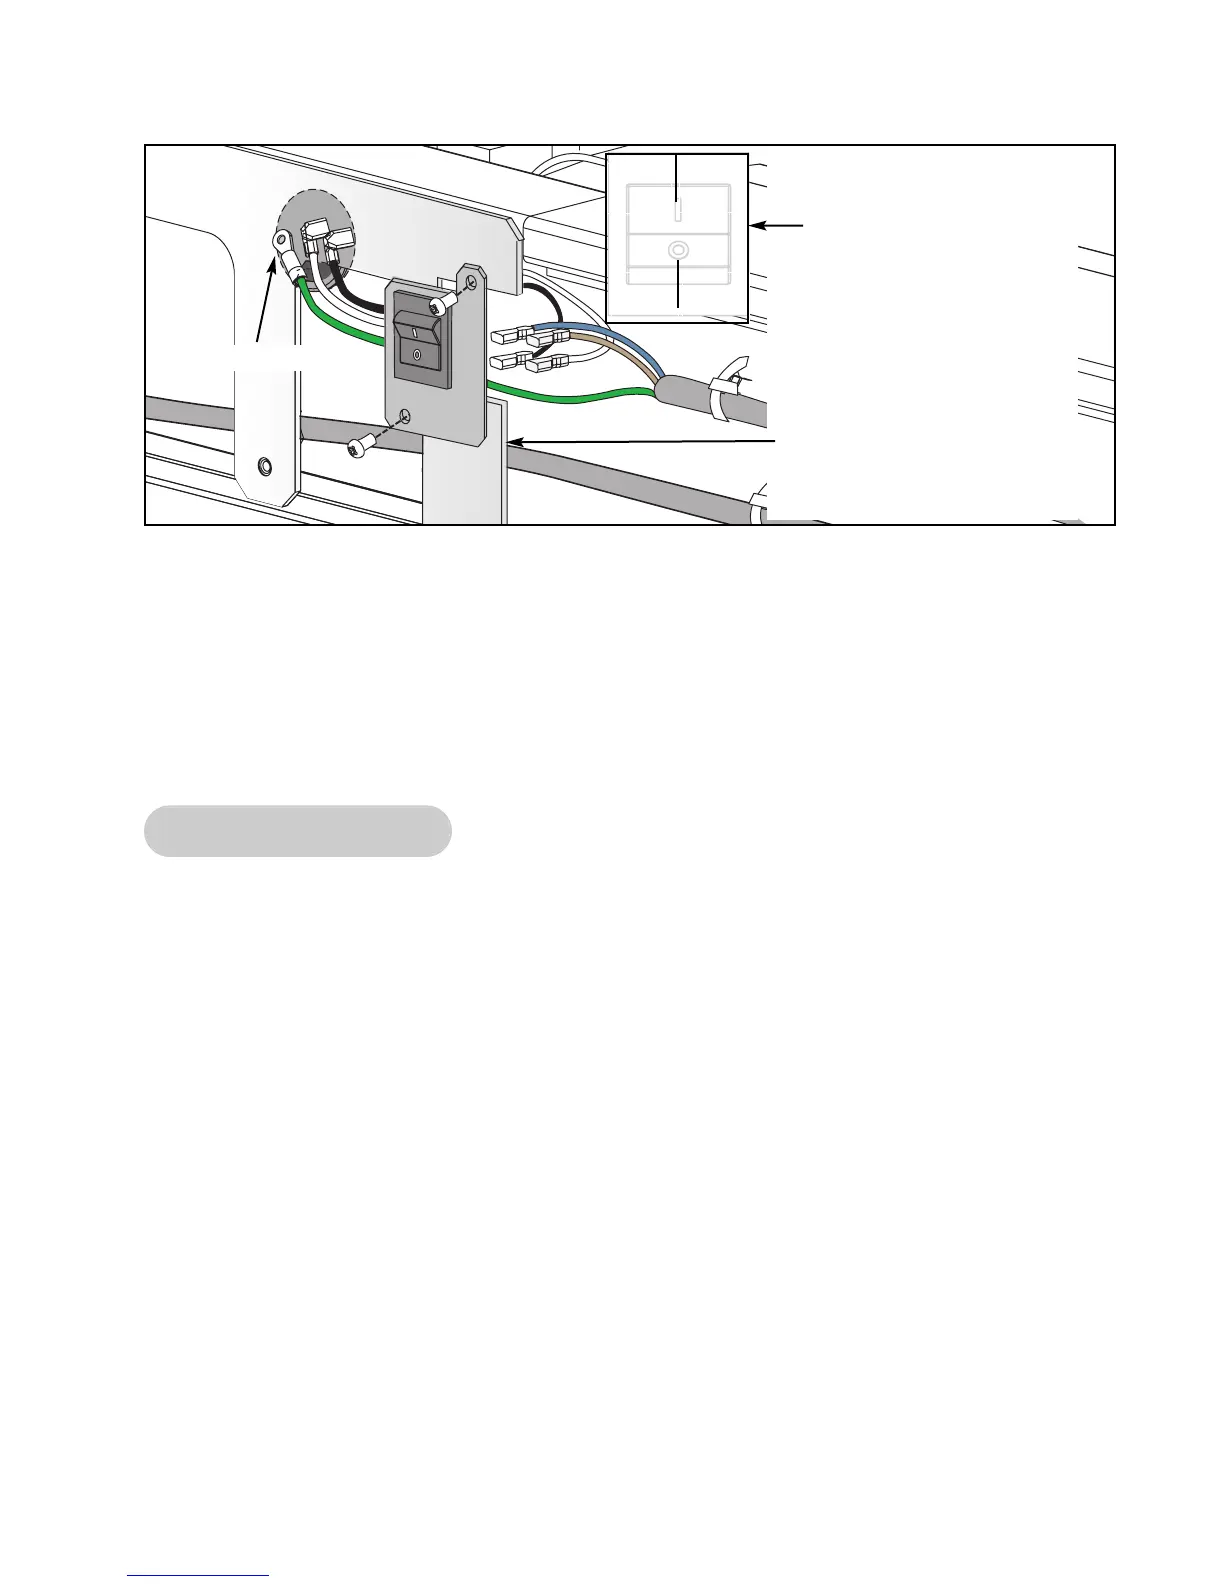
D. With the ground wire through the access hole to the lower control bracket, put the ground
wire terminal on the stud on the lower board bracket.
E. Using a 3/8” nutdriver, secure the one nut over the ground wire terminal.
F. Using a Phillips head screwdriver, secure the switch plate to the treadmill with the I (on)
toward the top.
Upper Display Board
Tools Required
• Phillips head screwdriver
• ESD (Electro Static Discharge) grounding strap
1. Disconnect the external power source.
A. Turn the main power switch on the left side to the off (O) position.
B. Unplug the treadmill from the power outlet.
NOTE: The display board is susceptible to damage from a discharge of static electricity. While
handling parts underneath the console cover use an ESD grounding strap. This eliminates
the potential voltage (static) difference between you and the equipment you are working
on. Wear an ESD strap for the rest of this procedure.
2. Remove the console back from the handrail.
NOTE: If you have a cable plugged into the RJ-45 port disconnect it.
Figure 23
Shown From
Front of Switch
with “I” Toward
the Top
Access Hole
Power Cord
Behind Base
Brackets
Black
White
Brown
Blue