Running Belt & Deck
NOTE: During this procedure you will have the option to remove the running deck, running
belt, rubber mounts, rear roller, front roller and drive belt. Follow this procedure from
step 1 even though the heading for some of these procedures will appear before the
step where you remove that part.
Tools Required
• Phillips head screwdriver
• 7/16” Open end wrench
• 3/4” Open end or socket wrench
• 9/16” Socket wrench with a 3” extension
! WARNING: Disconnect the power cord before beginning this procedure.
1. Disconnect the external power source.
A. Turn the main power switch on the left side to the off (O) position.
B. Unplug the treadmill from the power outlet.
2. Remove the motor cover.
A. Using a Phillips head screwdriver, loosen the three screws on each motor cover side
(left and right). See Figure 2.
B. Lift the motor cover center up and off the treadmill. NOTE: The screws will stay in
place. See Figure 2.
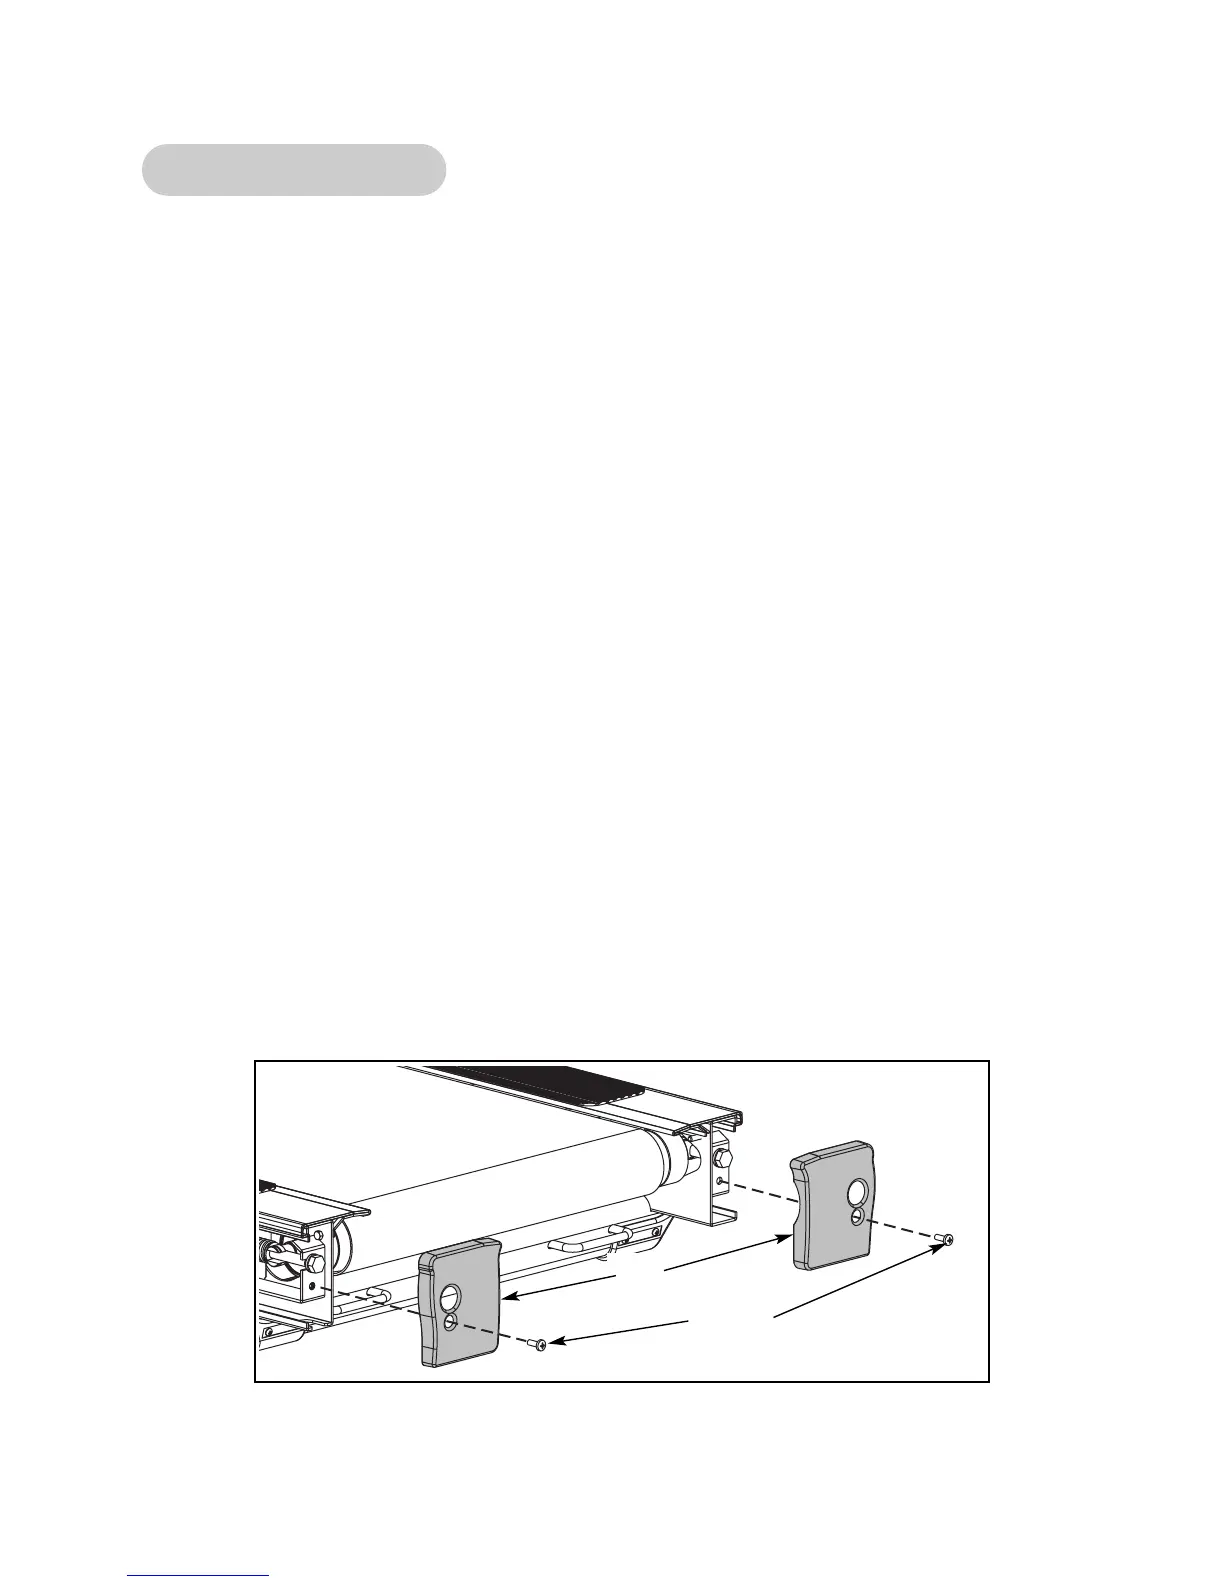
3. Remove the end caps.
A. Using a Phillips head screwdriver, remove the screw that holds each end cap in place.
See Figure 4.
Cybex Pro+ Treadmill Owner’s & Service Manual
Service
Page 7-10
Figure 4
Screws
End
Caps