Cybex Pro+ Treadmill Owner’s & Service Manual
Service
Page 7-16
4. Remove the old drive motor.
A. Using 7/16” open end wrench, remove the nut on each motor strap and remove the
motor straps from the motor saddle. See Figure 12.
B. Slip the drive belt around the flywheel pulley and off the motor. See Figure 13.
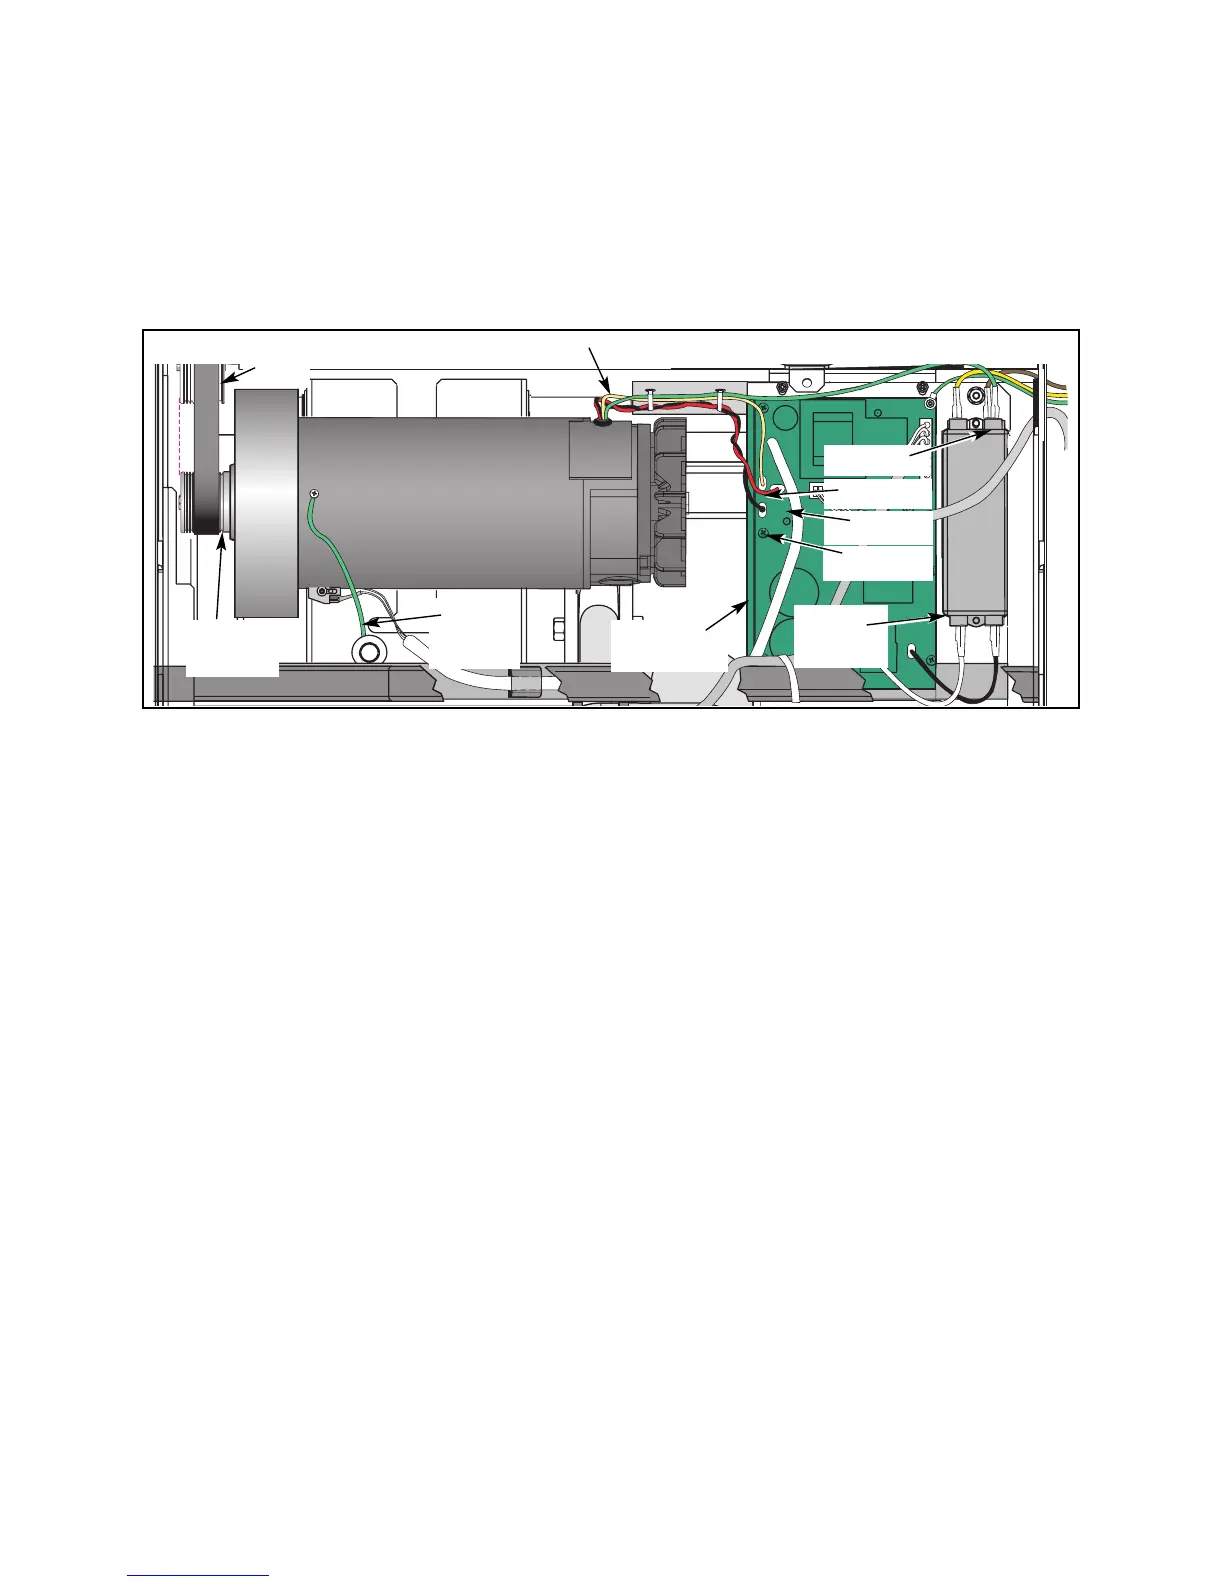
5. Disconnect the motor cables.
! WARNING: Do not touch components on the lower board. A charge can remain after
unplugging the power cord and turning off the treadmill.
A. Using a 1/2” socket wrench, remove the screw, split washer, flat washer and motor
ground wire from the motor saddle. See Figure 13.
B. Pull up on the lower board shield. It will snap out.
C. Disconnect the motor cable from the lower board and line filter. NOTE: You will
disconnect four wires (red, black, yellow and green). See Figure 13.
D. Carefully remove the drive motor.
NOTE: If you are replacing the drive belt with a new one follow step 6B - 8A. If not, skip to
step 8.
6. Remove the drive belt (optional).
A. Using a 3/4” socket wrench, loosen each rear roller bolt 10-12 revolutions to release
tension on the running belt.
B. Using a 9/16” socket wrench with a 3” extension, remove the two front roller screws.
See Figure 8.
C. Tilt the left side of the front roller up and then the right side.
Figure 13
Lower
Board
Drive Motor Cable
Line
Filter
Red
Black
Yellow
Green
Motor
Ground
Wire
Flywheel
Pulley
Drive
Belt