Removal of Front Panel Mechanism Assembly Si04-756
14 Removal Procedure
4. Removal of Front Panel Mechanism Assembly
Procedure Warning Be sure to wait for 10 minutes or more after turning off all power
supplies before disassembling work.
Step Procedure Points
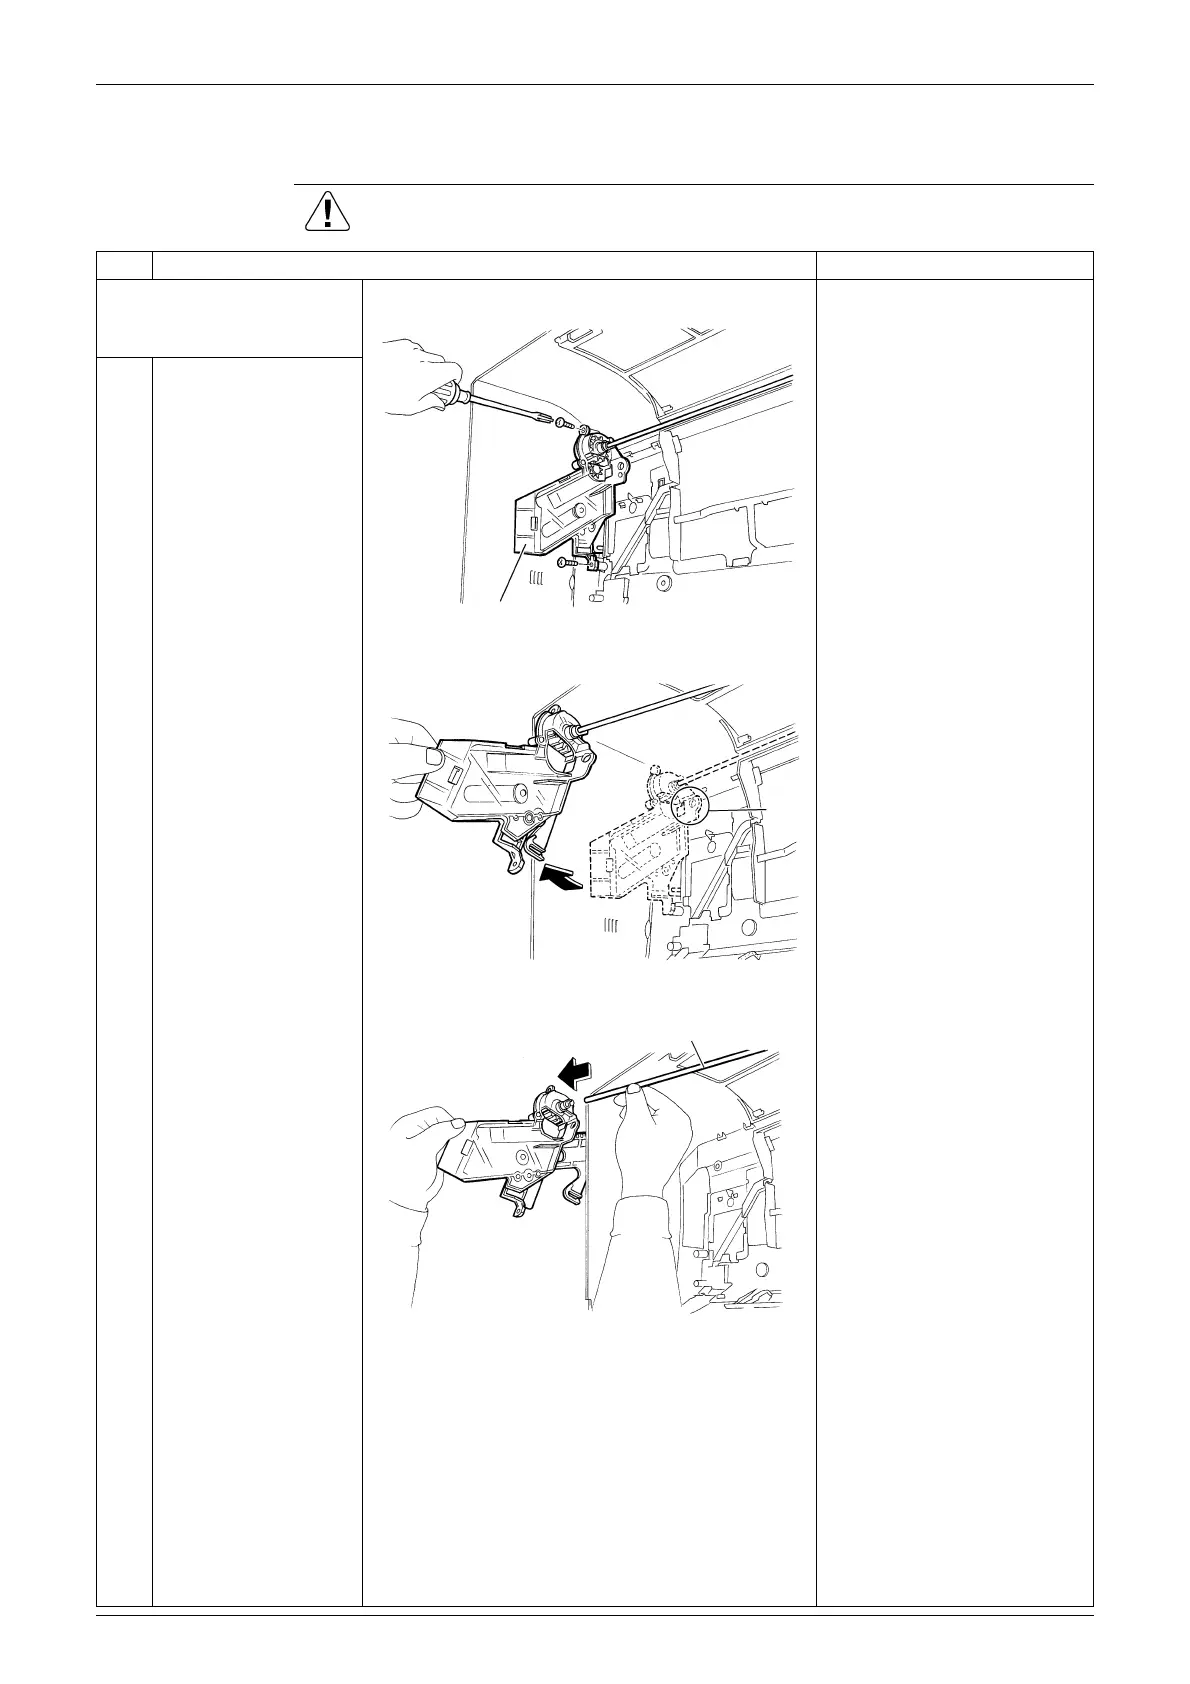
1. Remove the front panel
mechanism assembly
(right).
Preparation
Remove the front grille
according to "Removal of
Front Grille".
1
Remove the 2 screws.
2
Unfasten the hook
while straightening the
front panel mechanism
assembly (right) and
remove it.
When reassembling, catch
the hook first.
3
Pull out the front panel
mechanism assembly
(right) from the shaft.
Replace the front panel
mechanism as an assembly
kit.
(R13955)
Front panel mechanism assembly (right)
Hook
(R5665)
(R13956)
Shaft
 Loading...