ESIE16-03B | Part 5. Appendix 5.3. Wiring diagram
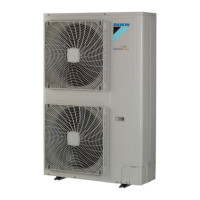
SA R32 Sky-Air RZAG-L
Page 114 22/08/16 | Version 1.1
5.3. Wiring diagram
5.3.1. Indoor unit
Figure 5-1: Wiring diagram - indoor unit
Notes
1. In case using central remote controller, connect it to the unit in accordance with the attached installation manual.
2. In case of main/sub changeover. See the installation manual attached to remote controller.
3. Shows only in case of protected pipes. Use H07RN in case of no protection.
4. When connecting the input wires from outside, forced off or on/off control operation can be selected by the remote controller. See installation manual for more details.
5. Connect power of adapter for wiring to terminal block (X2M) of indoor unit directly.
6. X35A, X39A, X70A are connected when the optional accessories are being used. In case an auto cleaning panel is used, see the wiring diagram.
Legend
V1R (A1P) Diode module
A1P Main PCB X1A (A7P) Connector (power supply for option PCB)
A2P Adapter PCB X2A (A7P) PCB connector (sensor kit)
A3P, A4P * Sensor kit PCB X24A (A1P) PCB connector (wireless remote controller)
A5P, A6P Receiver/display PCB X33A (A1P) PCB connector (adapter for wiring)
A7P * Adapter for wiring X35A (A1P) PCB connector (auto clean panel)
BS01 (A6P) Push button (ON/Off) X39A (A1P) PCB connector (auto clean panel)
C105 (A1P) Capacitor X70A (A1P) PCB connector (auto clean panel)
DS1 (A1P) DIP switch X*A PCB connector
F1U (A7P) Fuse B, 5 A 250 V X*M Terminal strip
F2U (A7P) Fuse B, 5 A 250 V X*Y Connector
HAP (A1P) Running LED (service monitor-green) Z*C Noise filter (ferrite core)
H1P (A6P) LED (On-red) Z*F Noise filter
H2P (A6P) LED (timer-green) * Optional
H3P (A6P) LED (filtersign-red) # Field supply
H4P (A6P) LED (defrost-orange)
H5P (A6P) LED (element cleaning-red)
Symbols
H6P (A6P) LED (ventilation cleaning-green) X1M Main terminal
KCR (A7P) Magnetic relay Earth wiring
KFR (A7P) Magnetic relay Wire number 15
KHuR (A7P) Magnetic relay (Hu) Field wire
K2R Magnetic relay Field cable
M1F Fan motor (indoor) Connection ** continues on page 12 column 2
M1P Motor (drain pump) Several wiring possibilities
M*S Motor (swing flap) Option
PS (A1P) Power supply Not mounted in switch box
R1T Thermistor (air) Wiring depending on model
R2T Thermistor (liquid piping) PCB
R3T Thermistor (coil)
RC (A1P) Signal receiver circuit
Colours
SS1 (A5P) Selector switch (emergency) BLK: Black
SS2 (A5P) Selector switch (wireless address set) WHT: White
S1L Float switch RED: Red
TC (A1P) Signal transmission circuit

 Loading...