142 H-Class
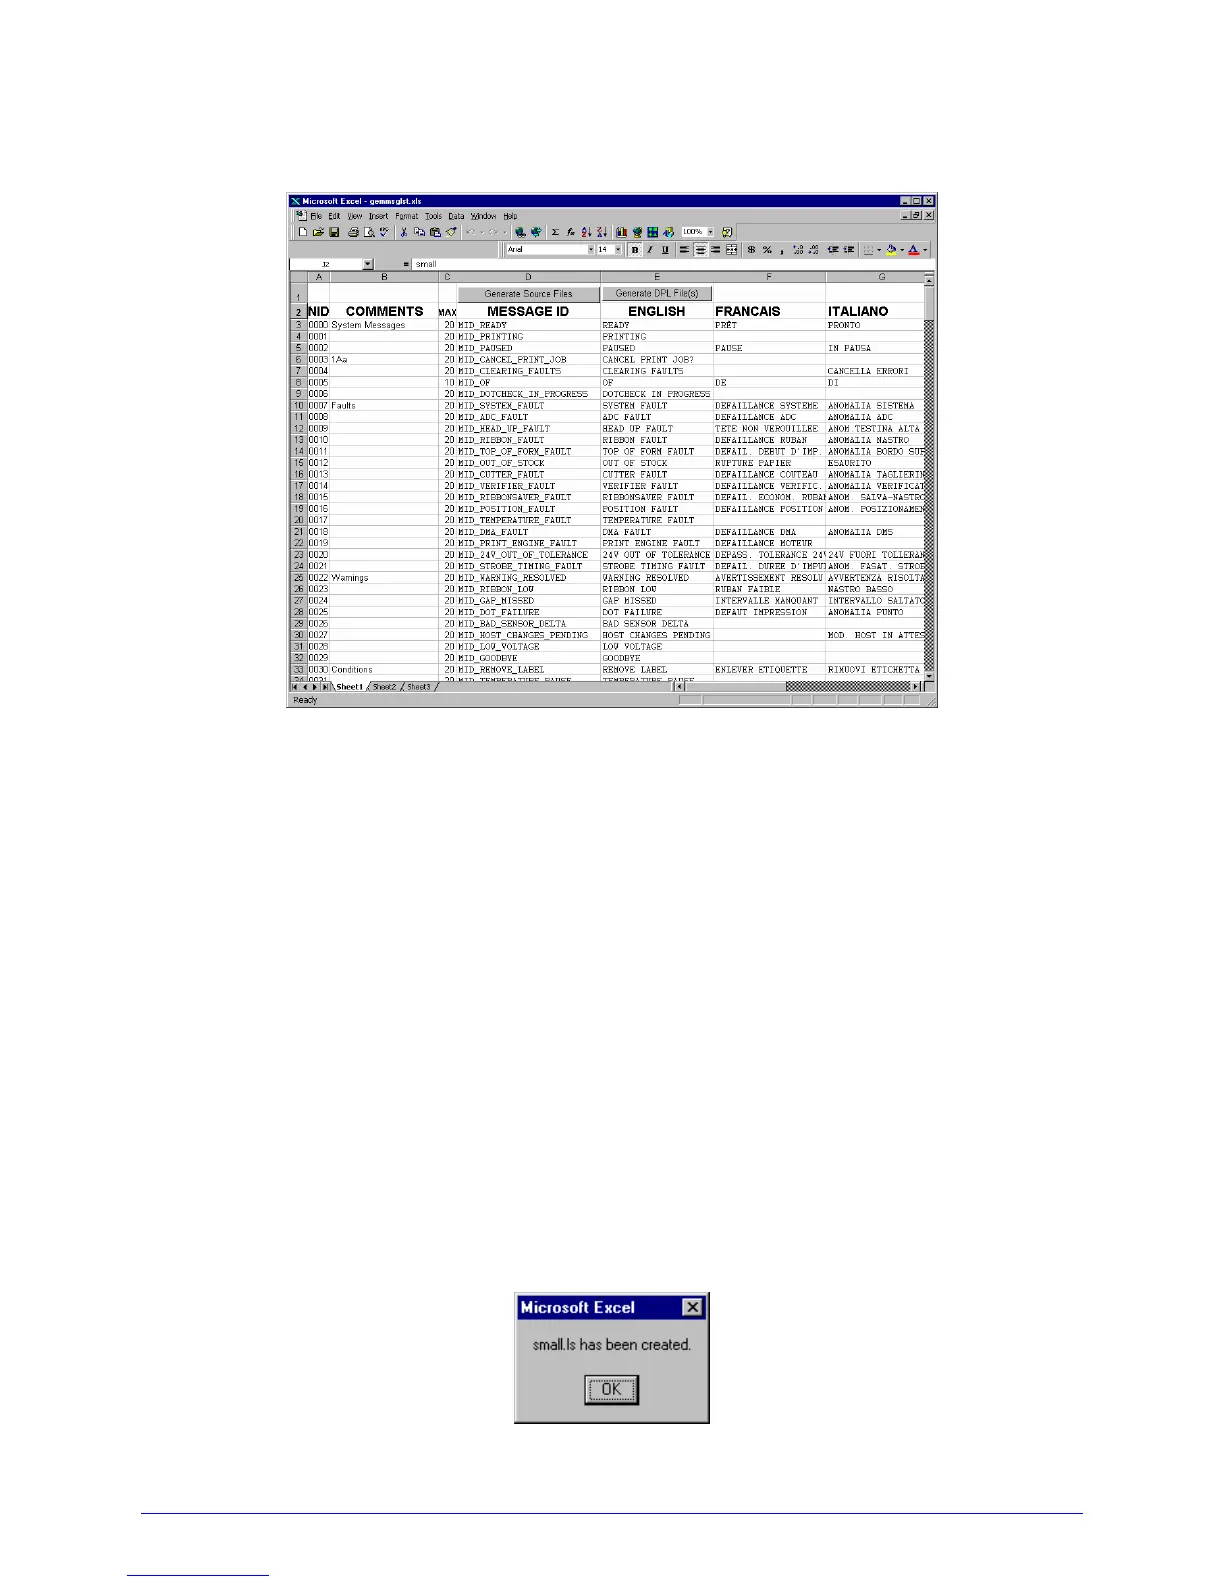
B. Click the “Enable Macro” box. The following screen appears:
C. Click On Column J and enter your new language, or modify an existing one. Some tips
on this process:
• Message Size – When entering new messages, reference the ‘MAX’ column: this is
the maximum number of characters allowed for this field. (Warnings are displayed
when the number of characters is exceeded, or when trying to modify the MAX
value; however, “cutting and pasting” fields could defeat this warning system.)
• Two Line Messages – Some of the message are displayed as two lines. These are
indicated in the comment fields.
• Comments – This field can be modified with no effect.
D. After editing is completed, highlight all of the columns to be created by pressing the
letter above the column (more than one language may be selected).
E. Press the Generate DPL File(s) radio button. A file will be generated for each of the
selected columns and Excel will provide confirmation (for example, as shown below,
small.ls).
 Loading...