H-Class 83
Advanced Entry Calibration (continued)
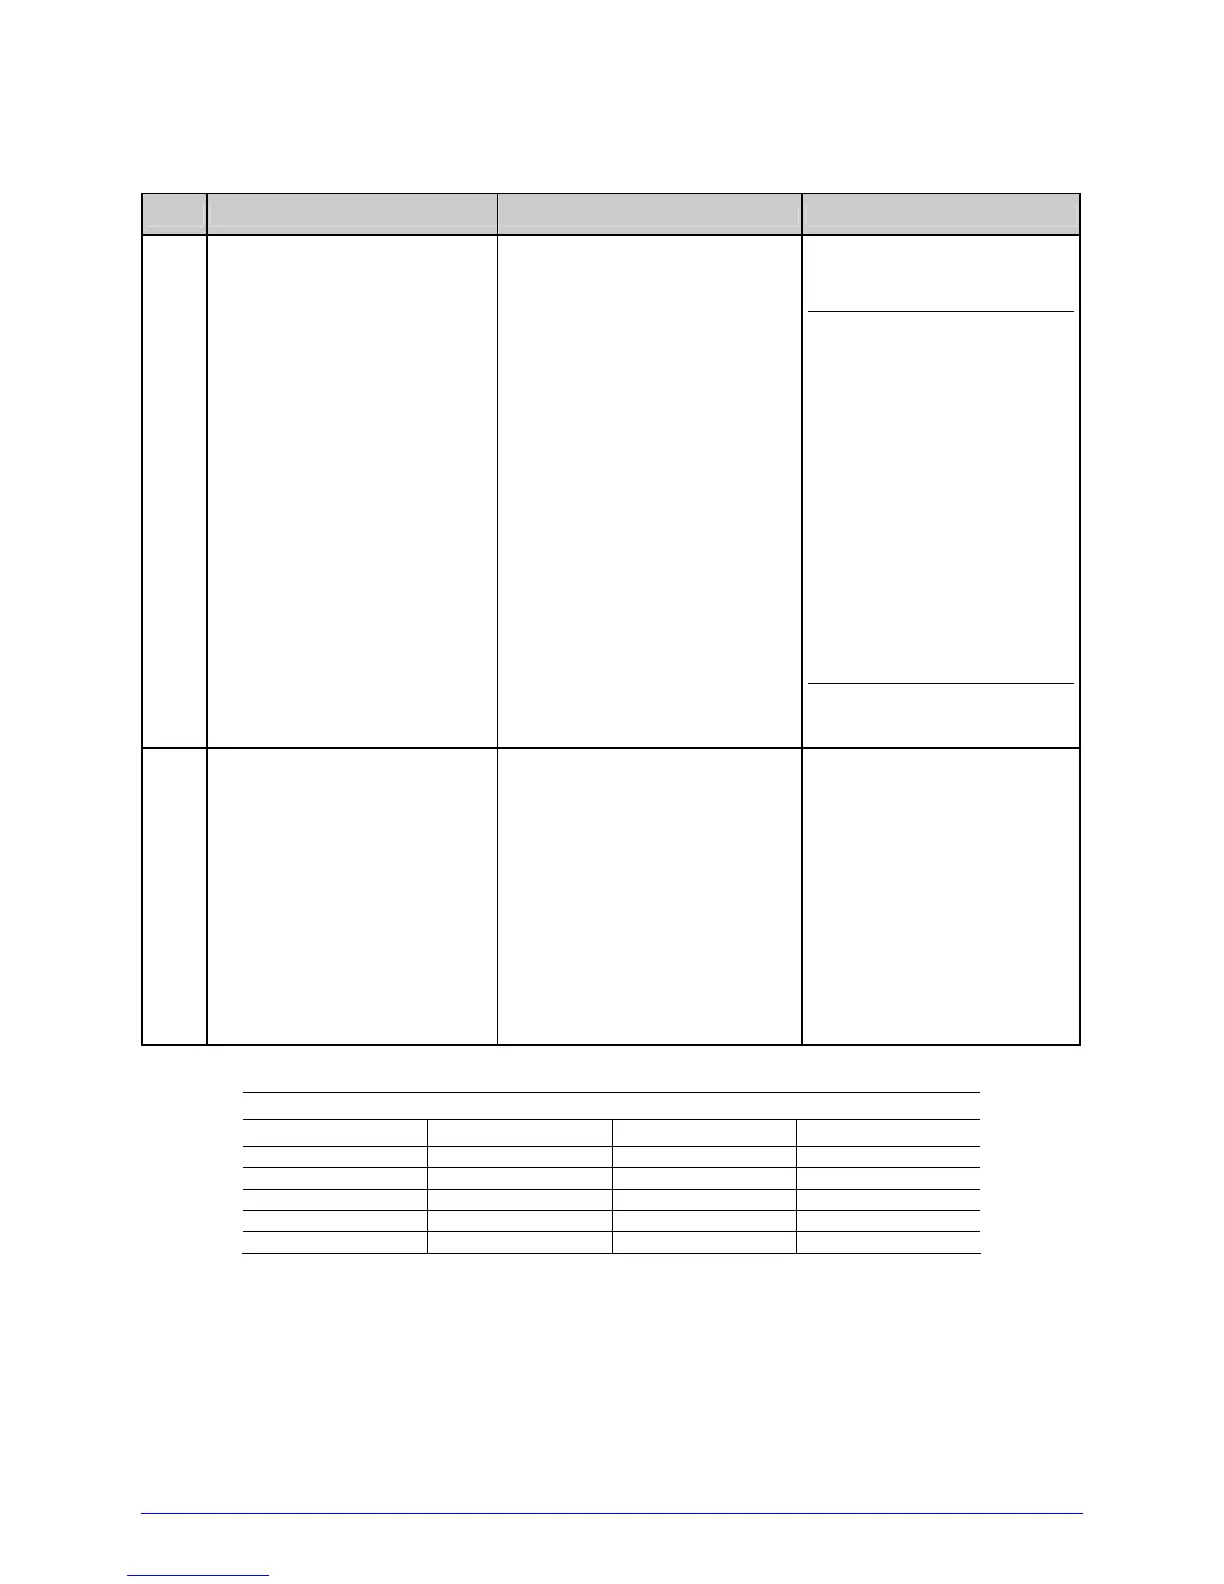
Step
Action Displayed Message Comment
H
Raise the printhead
assembly then proceed
according to the media
type:
• Die-cut – Remove a label
or two from the liner
then position that area
over the Media Sensor.
Adjust the Media Sensor
under the liner area.
• Notched – Position the
Media Sensor under the
notch.
• Reflective – Position the
Media Sensor under the
black mark.
TRAN SENSOR GAIN
yyy (0 - 31)
31
;
(1) Do not position the
Media Sensor under a
perforation; and if
using preprinted
media, ensure the
label area placed over
the sensor is free of
text, graphics, lines,
etc.
(2) Do not move the
Media Sensor after
this step.
I
Lower and latch the
Printhead Assembly.
Using the buttons set the
Gain Number to 00 and
then press ENTER.
Record the reading as a
TOF Value for Gain
Number 00 in the table.
TRAN SENSOR GAIN
yyy (0 - 31)
00
This is the TOF Value for
a gain setting of 00,
where ‘yyy’ represents
the current sensor
reading.
Sample Calibration Table
Gain Number Label Value TOF Value Difference Value
00 252 248
01 250
02 248
… …
31 09
 Loading...