Chapter 2 - Printer Setup 9
2
2
2
.
.
.
4
4
4
L
L
L
o
o
o
a
a
a
d
d
d
i
i
i
n
n
n
g
g
g
R
R
R
i
i
i
b
b
b
b
b
b
o
o
o
n
n
n
Ribbon is required with thermal transfer media. It is recommended that the width of the ribbon be
slightly wider than the media being used. The printer can use either ribbons with the ‘coating side
in’ or
ribbons with the ‘coating side out’. To load:
• Using a ribbon that is slightly wider than your media (and liner, if any) will help protect against
printhead wear.
• The ‘Media Type’ setting within the printer’s setup must be set to ‘Thermal Transfer’ to print
using ribbon. This can be accomplished via the DMXConfig Utility (see section 3.4); or, if
display-equipped, via the menu system (see section 4.5).
1. Open the media cover.
Press in on the Printhead
Latch and raise the
printhead assembly.
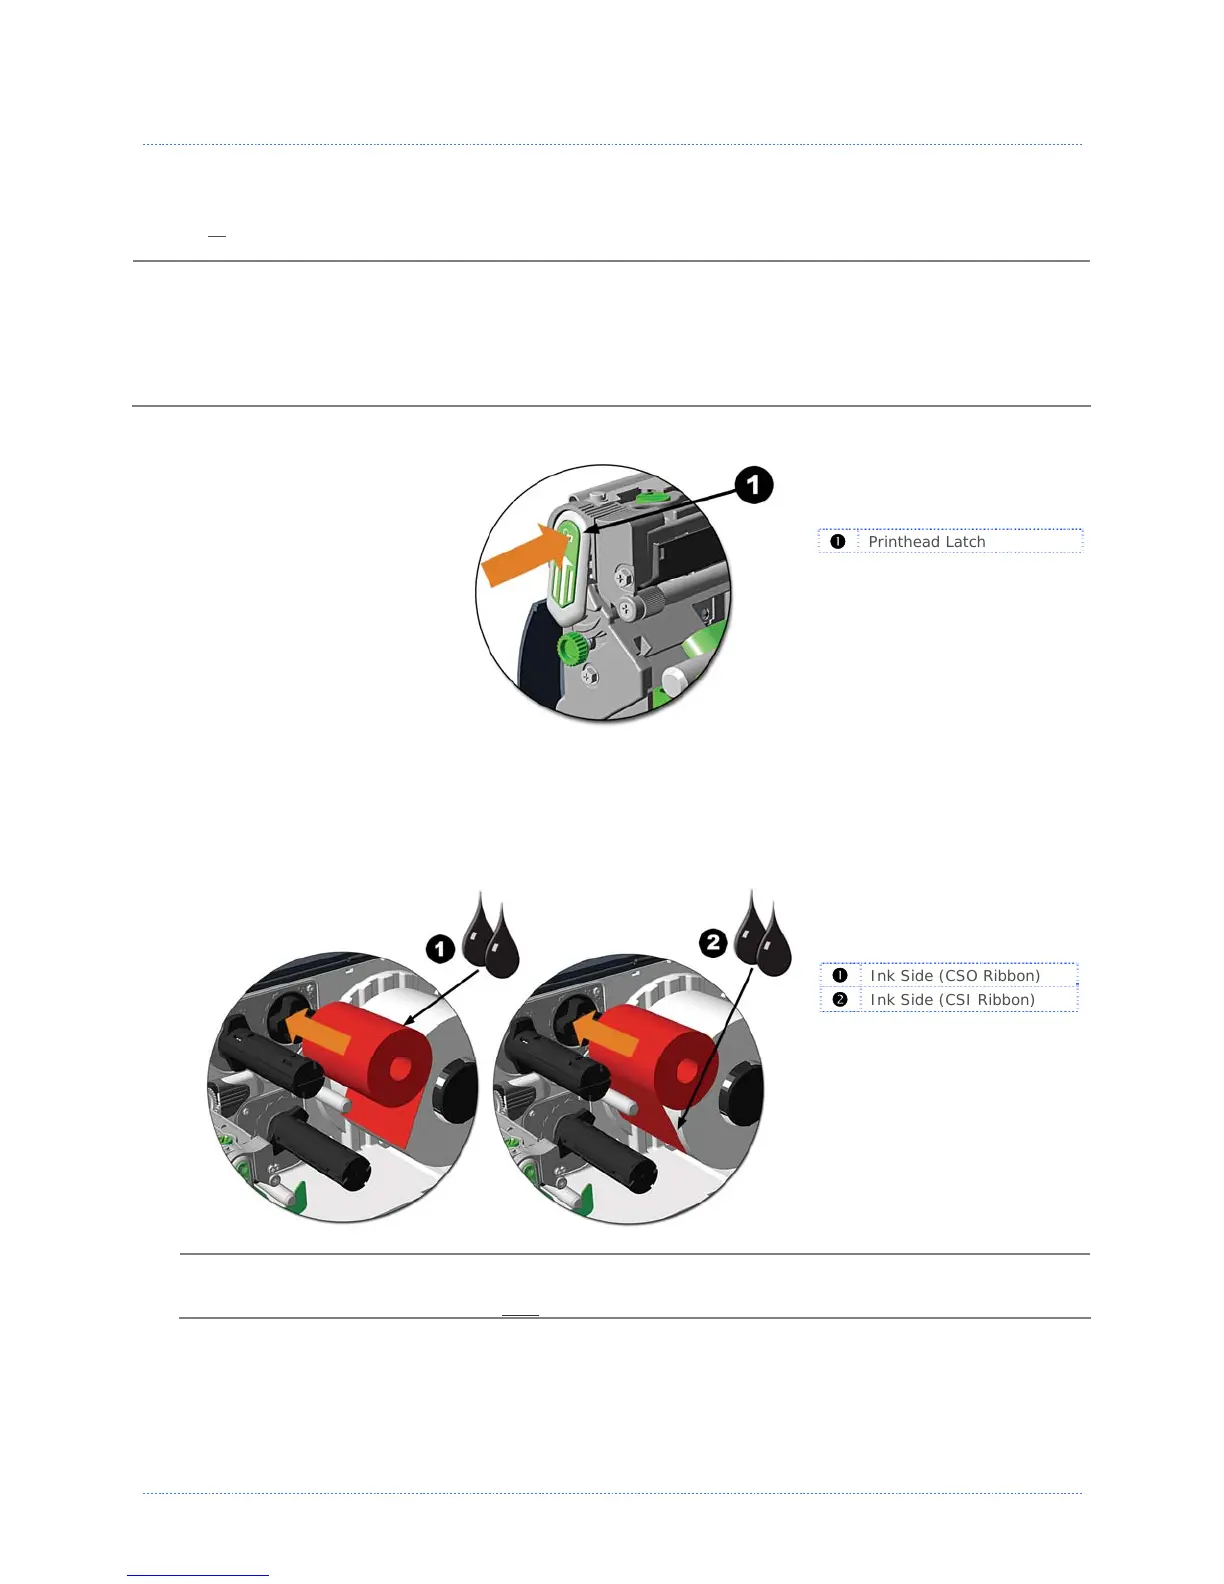
Printhead Latch
2. Slide the Ribbon Roll onto the Ribbon Supply Hub until it rests against the flange. Ensure the
ribbon unwinds in the correct direction (see Ribbon Routing). The illustrations below depict a
‘Coated Side In’ ribbon.
Ink Side (CSO Ribbon)
Ink Side (CSI Ribbon)
Directional Arrows near the Ribbon Supply Hub indicate the correct ribbon route. Ribbon types
are available with the ink (coating) layer wound ‘in’ or ‘out’. Ensure the inked side of the
ribbon faces the media and NOT
the printhead.