108
2. FOCUS: This section allows you to apply the Auto FOCUS setting or to adjust
the FOCUS manually.
AUTO: Press this button to apply the Auto FOCUS.
MANUAL: Once the “MANUAL” button is pressed, you can adjust the
“FOCUS” manually by pressing the “+ & -“ buttons.
3. IRIS: This section allows you to apply the Auto IRIS setting or to adjust the
IRIS manually.
AUTO: Press this button to apply the Auto IRIS.
MANUAL: Once the “MANUAL” button is pressed, you can adjust the “IRIS”
manually by pressing the “+ & -“ buttons.
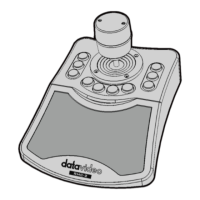
4. CAMERA CONTROL: The “ZOOM IN” and “Zoom OUT” buttons allow you to
control the “Zoom In” and “Zoom OUT” function. The slider allows you to
control the zoom in, zoom out, panning and tilting speeds. Press the
“UNLOCK” button to lock or unlock the “CAMERA CONTROL” section. If this
section is locked, the joystick and the slider can not be used. If the “UNLOCK”
button is unlocked, you can control this section.
5. CAMERA: This section allows you to select “CAM A”, “CAM B”, “CAM C” or
“CAM D”.
6. POSITION: The 1 to 4 and the “STORE” buttons allow you to set up to 4
preset positions for each camera.
How to Store a Preset Position
1. At first, please make sure that the desired parameters and angle of the
camera are set in advance for CAM A, CAM B, CAM C or CAM D
2. Please press the “CAM A”, “CAM B”, “CAM C” or “CAM D” button that you
want to store the preset position.
3. Please press the “STORE” button and the position button “1”, “2”, “3” or “4”.
 Loading...