Rooster™ Sensor100 USER MANUAL
Rooster
TM
Sensor100 USER MANUAL 62320MN000-A04 6
an alarm.
Home>Settings>System>Alarms/Sound>Alarm Controls>Latch Alarm
EH&S or Certifier users can configure the amount of snooze time before an alarm rings again
after being muted in the “Alarm Controls” menu.
Home>Settings>System>Alarms/Sound>Alarm Controls>Ringback
Users can toggle the brightness setting, as well as the brightness of the screen when set to
“dim”. A “time before dim” option is available that sets the screen to dim after a predetermined
amount of time has expired.
Home>Settings>System>Brightness
EH&S or Certifier users can select the resolution of air velocity units displayed in m/s, fpm, or
cfm.
Note: Cfm can only be displayed once duct diameter information has been entered; see the
Volumetric Flow Settings section of this manual for more information.
Home>Settings>System>Advanced>Airflow Resolution
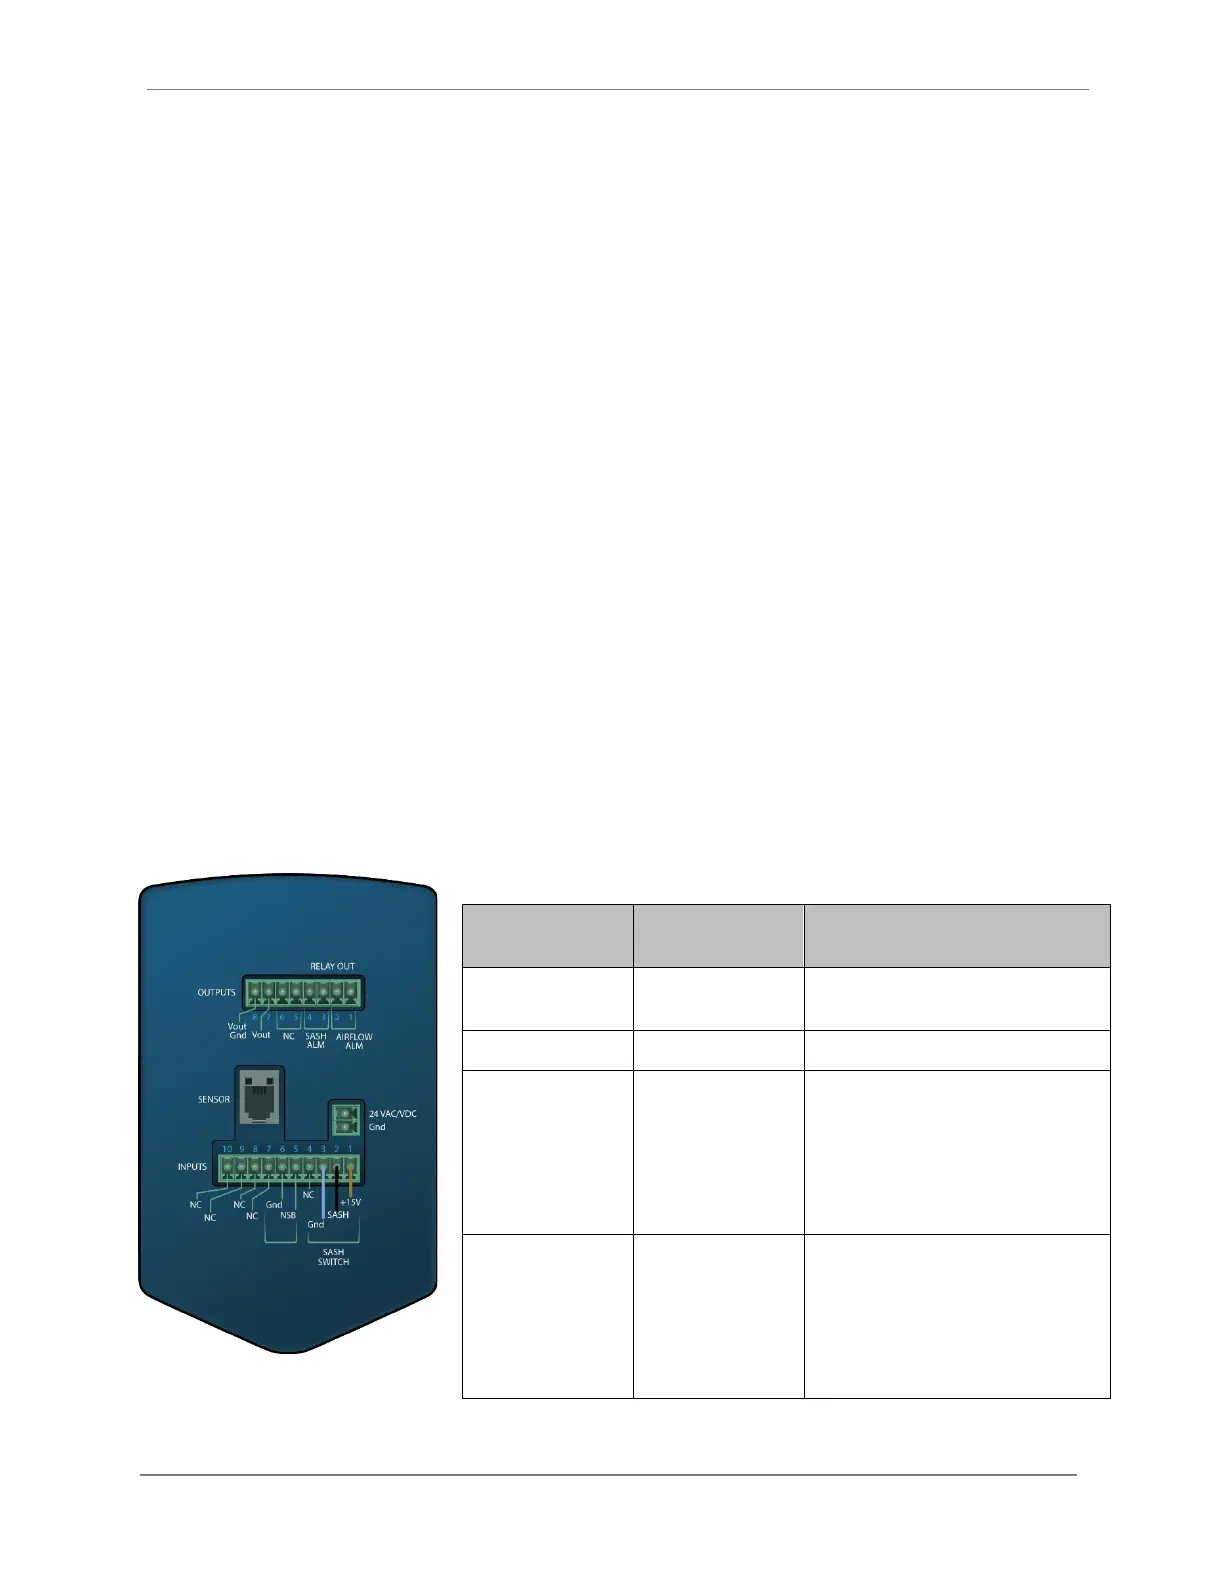
Rear Panel Layout for Advanced Connections
Rear Panel View of Rooster
TM
Sensor100
2-Pin, polarized,
Phoenix Contact
Included and attached to AC/DC power
supply.
Included as part of sensor assembly.
8-pin, polarized,
Phoenix Contact
*2-position
connectors will fit
Not included.
8-position orderable Part Number:
Phoenix Contact 1803633
2-position orderable Part Number:
Phoenix Contact 1803578
10-pin, polarized,
Phoenix Contact
*2-position
connectors will fit
Not included.
10-position orderable Part Number:
Phoenix Contact 1803659
2-position orderable Part Number:
Phoenix Contact 1803578
Degree Controls recommends 18-24 AWG wires to be used with screw terminal connections.